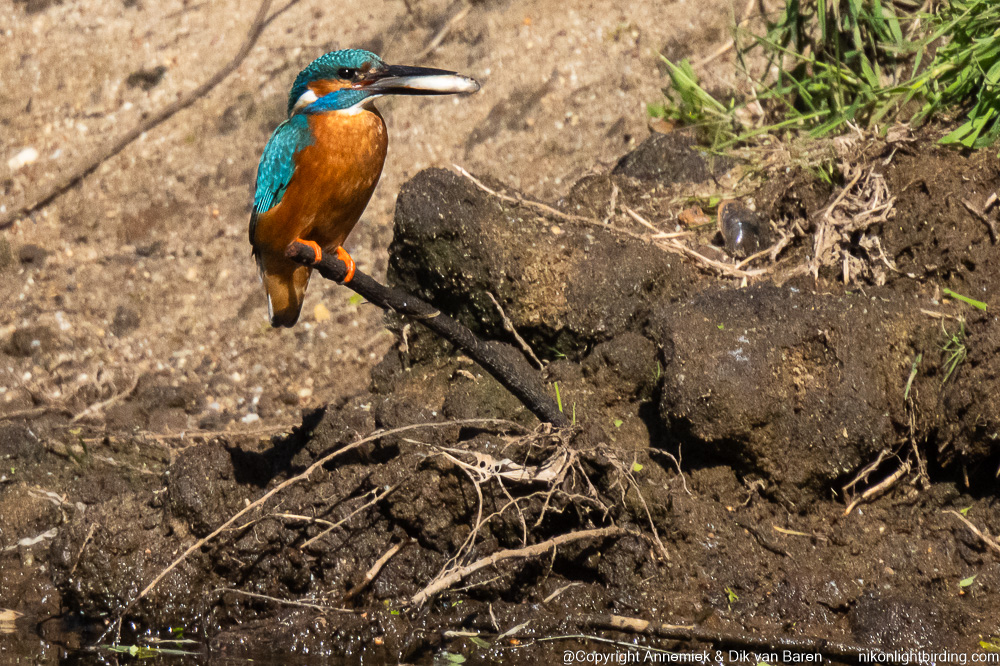
Foto at top: Holland Kingfisher (IJsvogel) size 22cm distance 28m sun equivalent 1050mm Z50 Nikkor 500mm f/5.6E PF VR substantial camouflage. Crop 1700 x 1100. Sand mountain background result man & wife 24h digging nest corridor. @dik recr qm
Difficulties bird photography
In bird photography we are photographing essentially different situations with quite various requirements regarding (settings of) equipment. When in the field we …
- … always hope for abundant available light so that our camera’s can focus at & track bird action more reliably.
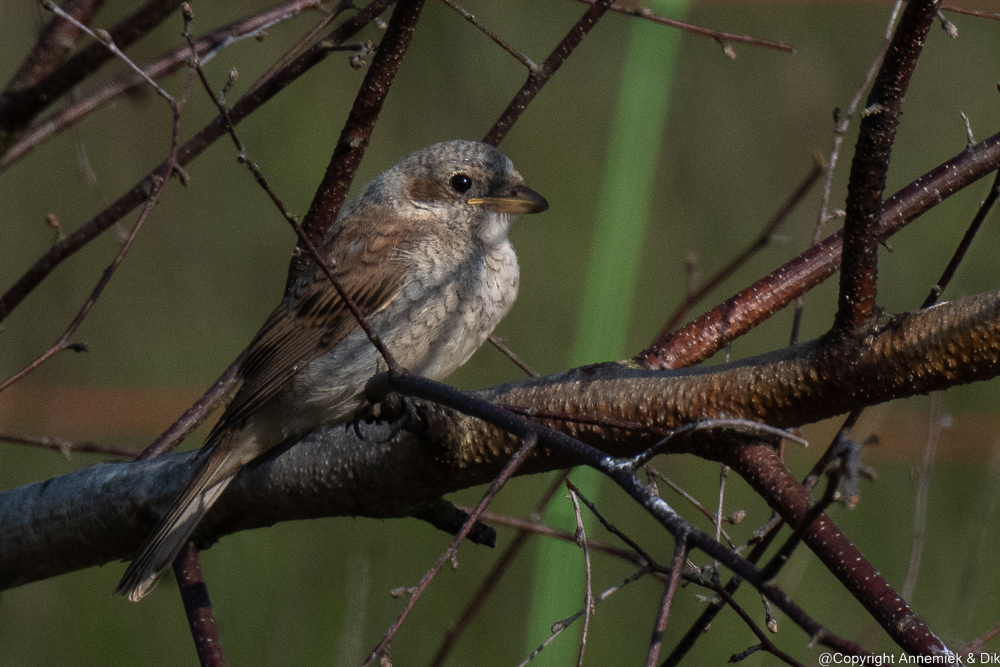
- … often need long reach, if we want detailed pictures of interesting but relatively small or rare or shy birds at er large distance like Kingfisher, Shrike, Bee-Eater, Wheatear, Bearded Tit, Blue Rock Thrush, Rufus Bushchat, Bluethroat, Wren, etcetera.
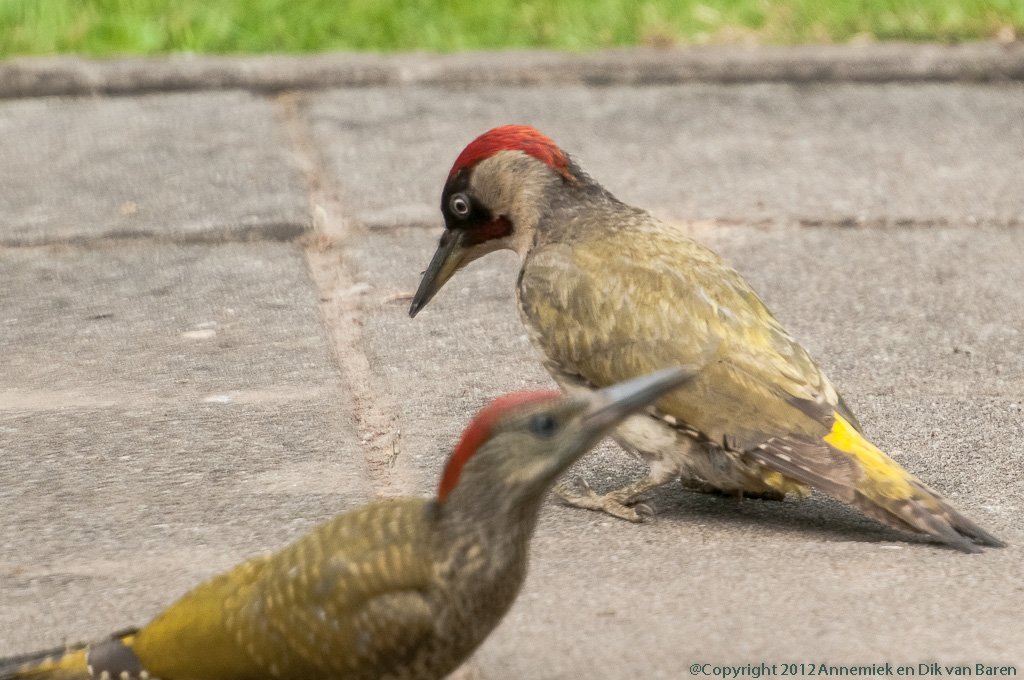
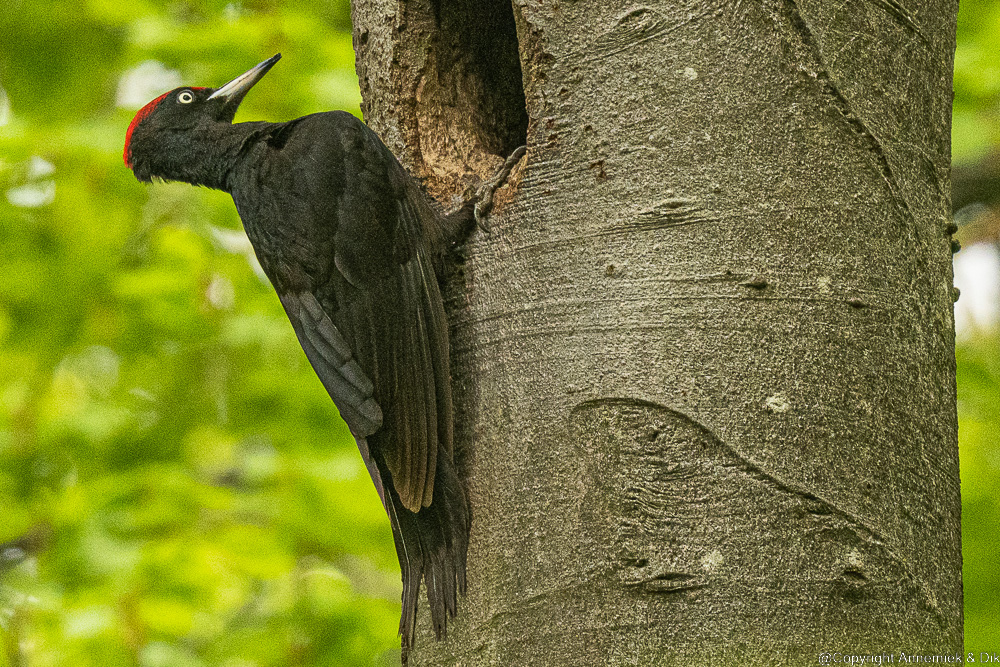
- … occasionally need be sure that we do not have too much reach” and large birds close by will fit within the picture frame like Black woodpecker, Heron, Egret. Avocet, etcetera.
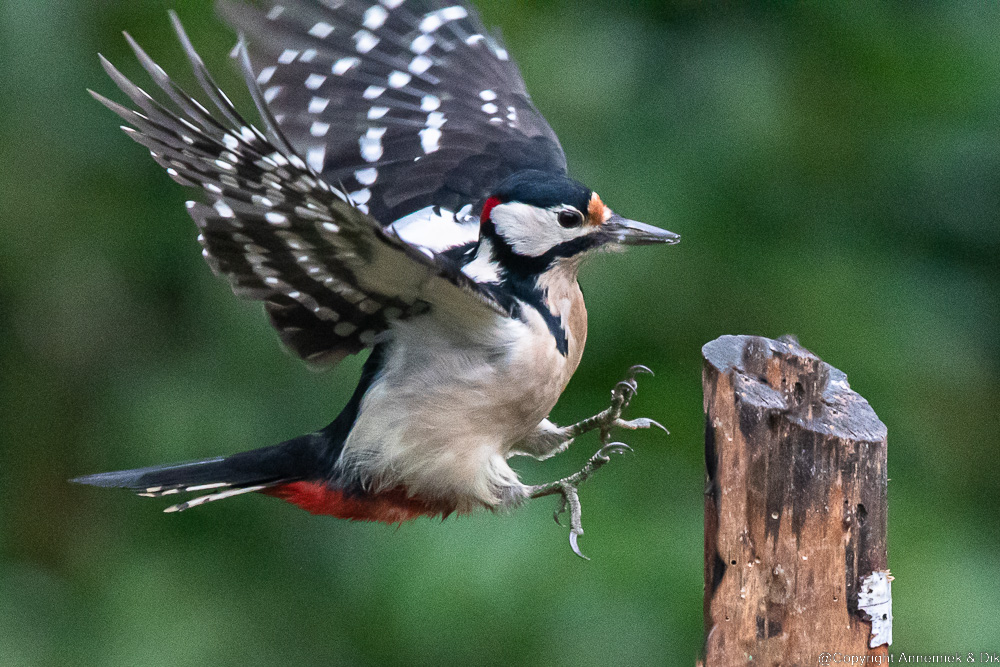
- … at almost any moment must be prepared for photographing (fast) bird action of Great Spotted Woodpecker, Buzzard, Kite, Osprey, Kestrel, Peregrine, Hobby and the like.
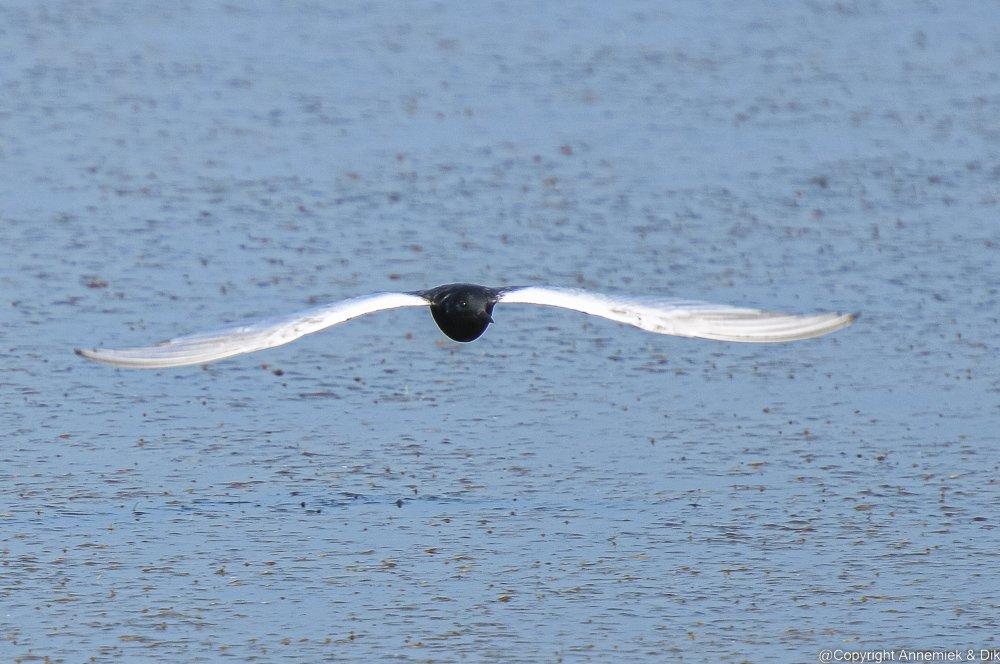
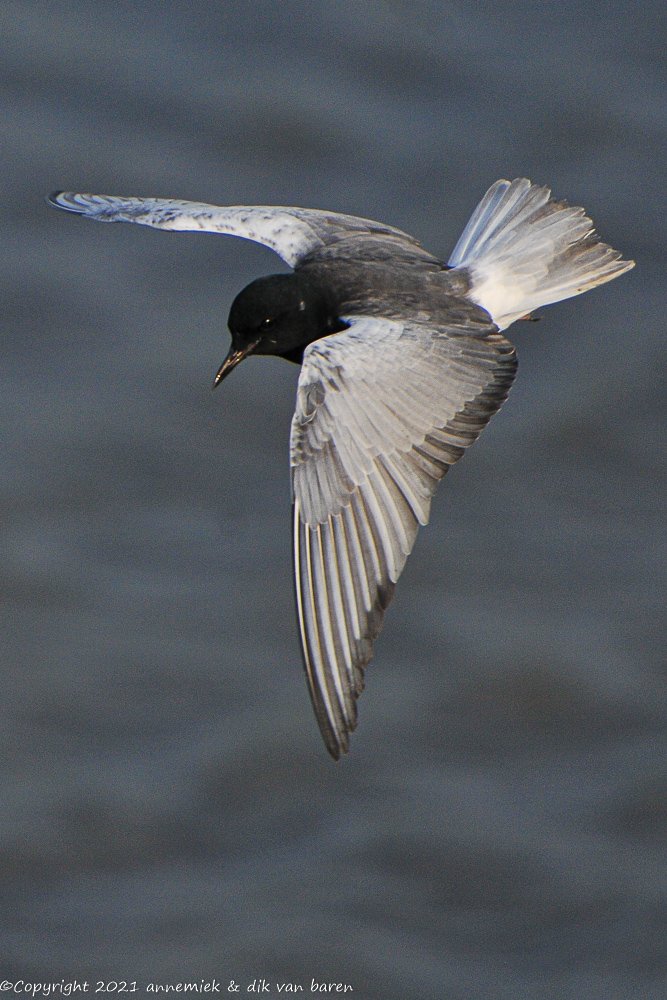
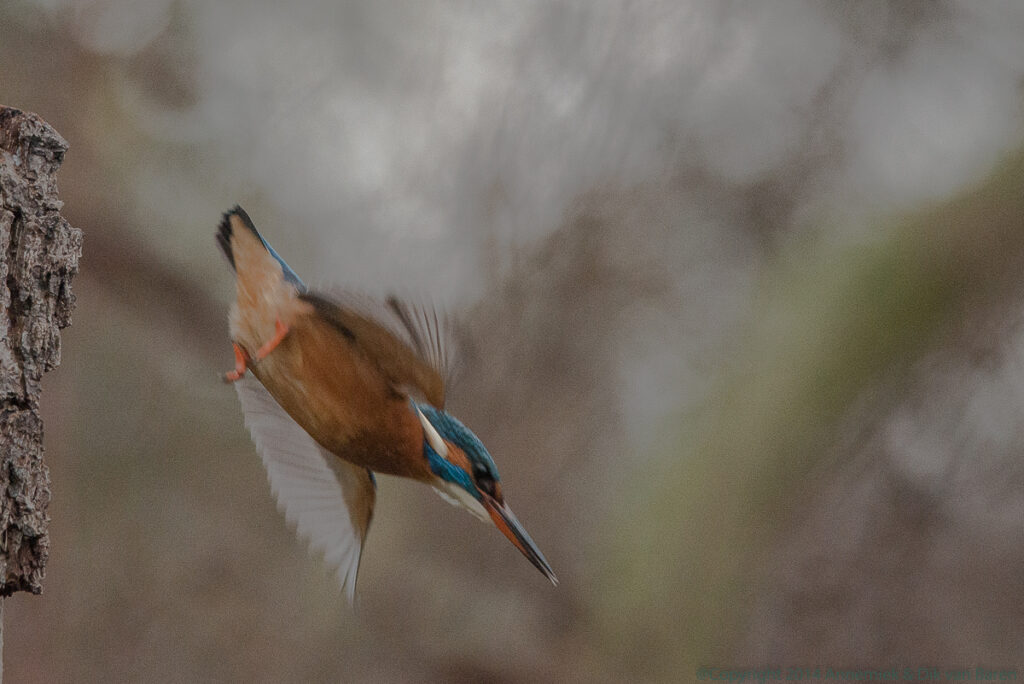
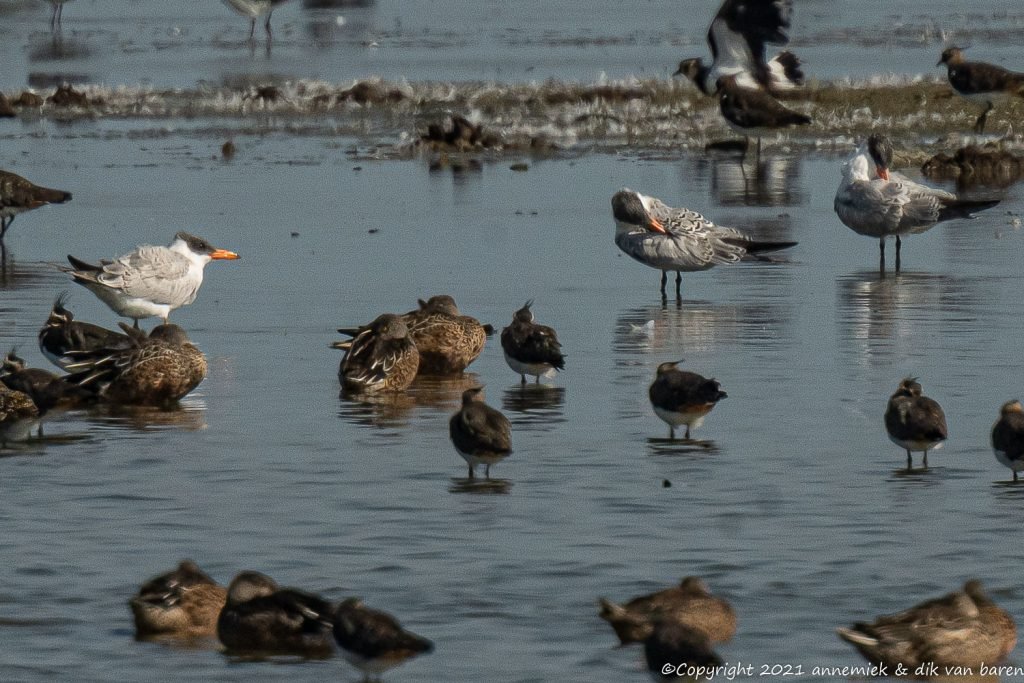
- … in some situations need an easily movable, lightweight camera-lens combination for handheld tracking of fast or unpredictably flying/diving/turning birds like Terns, Sparrowhawks, Lapwings, Pratincoles, Kestrels and Peregrines.
However – and this is essential! – these requirements are different with regard to suitable equipment however do not conflict with regard to camera settings.
Some examples of difficult situations regarding reach, light or action
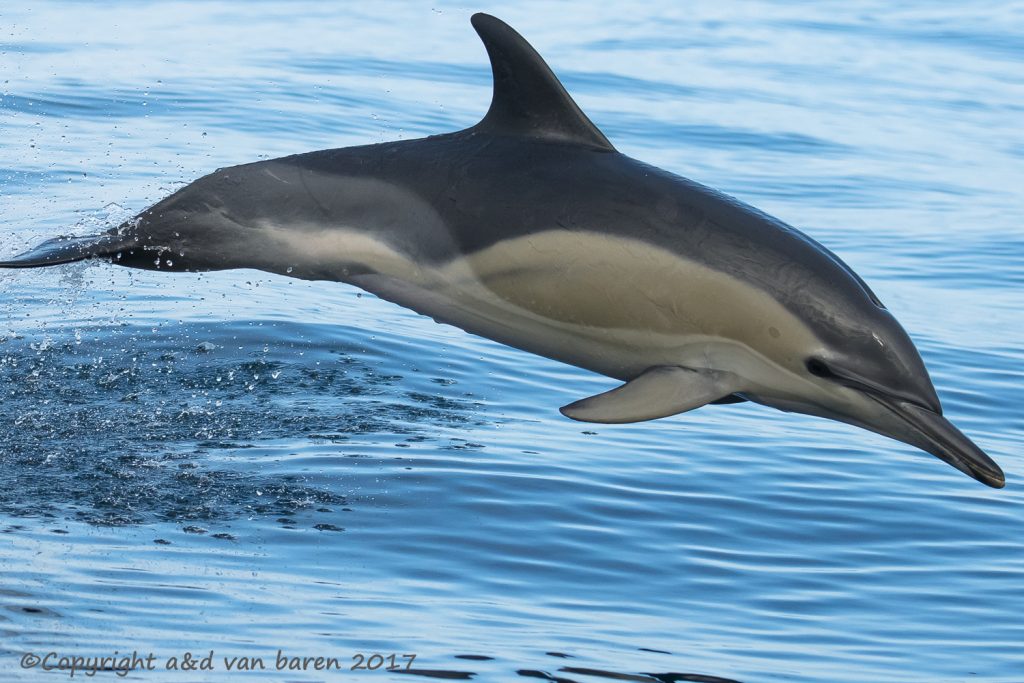
Look at some examples below of quite different situations regarding available light, size, speed, distance and (unpredictable) action of the subject bird:


About equipment for lightweight bird photograhy
Nikon DSLR’s do not support advanced AF functionality beyond f/5.6 or TC-20E III beyond f/4. This “Not supported “Advanced AF functionality” consists of:
- AF-C 3D at f/8, f/11, etcetera.
- AF-C auto at f/8, f/11, etcetera.
- Use of TC-20E III at Nikon DSLR and Nikkors with APERTURE value f/5.6, f/8, etcetera.
This set of functions is often referred to as “f/8 support” (“all functionality beyond f/5.6 at Nikon DSLR’s”). For example the combination D500 Nikkor 300mm f/4E PF VR TC-14E equivalent 630mm as such is supported, however Nikkor 500mm f/5.6E PF VR TC-20E III equivalent 1500mm is not supported, whereas Z50 Nikkor 500mm f/5.6E PF VR equivalent 1500mm is supported because Nikon mirrorless System 1 Series and Z camera’s do not “suffer”” from this “f/8-restriction”.
In case of small birds far away you need large 35mm equivalent, a high resolution image sensor and probably a tripod and improvised sight at your lens in order to quickly and precisely aim your lens at distant bird(s). The bird should occupy a significant part of the picture frame containgn sufficient detail. So you need for example Nikon Mirrorless Z50 Nikkor 500mm f/5.6E PF VR TC-20E III, equivalent 1500mm. Occasions are often affordable because some of these lenses are more of less oldtimers. We own several Nikkor lenses for many years and know for example that both “golden ring” pro-level lightweight Phase Fresnel lenses consistently produce surprisingly detailed pictures with or without converters. We thes PF lenses frequently. Also some Nikkor Z lenses are wonderful pro level Phase Fresnel by the way.
For photographing (fast), (unpredictable) action you occasionally need one special relatively light preferably handholdable camera-lens converter combination with APERTURE value like f/2.8 of f/4.0 transmitting a sufficient amount of light onto the camera’s (integrated) AF sensor. The camera should have fast focussing potential, high frame rate, large buffer and an improvised sight to track fast moving birds. You may also need something like a rice bag to support your camera when working from shelter, car or from behind a wall, tree or the like.
In case of (a) large (pair or group of) birds close by you need extraordinary small equivalent so the picture itself will fit whithin the picture frame. You need for example Nikkor 70-200mm f/2.8 VR II (1450 gram) or Nikkor 70-200mm f/4 VR S (850 gram) ans possibly with TC-14E or TC-20E III to get a larger equivalent or a Nikkor Z camera with Z Nikkor 100-400mm f/4.5 – 6.3 (featherlight 1435 gram superb top quality S-class lens!) or Z Nikkor 180-600mm f/5,6-6.3 VR.
When you prefer using but one combination you almost unevitably need a zoom lens. An excellent solution in that case is the Nikkor Z 100-400mm f/4.5-6.3 S external zoom, high S optical quality lens, 1435 gram, maximal length 22 centimeter price anno 2023 2400 euro. This lens also performs quite well even with Z TC-1.4x and maybe (not tested yet) Z TC-2.0x converter of about 500-600 Euro. By the way also Z Nikkor 50-250mm f/4.5-6.3 is a high quality zoom lens and often offered by Nikon as part of an attractive package deal. We used it when we need an absolutely light camera-lens combination at long walks! Look at thes two interesting pictures:

Our choices of equipment
After many years and considering the difficulties and complications mentioned at this page, our choice of equipment for the time being is as follows below. For the tome being We use D500 Nikkor 500mm f/5.6E PF VR lens and TC-20E III converter for maximal reach and the featherlight handholdable easily movable D500 Nikkor 300mm TC-14E II for action photography of these unpredictable Terns, Lapwings, etcetera. Both F-mount combinations are optimally set up for action photography of small or large (groups or pairs of) birds at any distance.
- 1 Nikon D500 Nikkor 70-200mm f/2.8 (!) VR II [TC-20E III] mainly as fast focussing action-camera for large birds close by, like seabirds, Spoonbills, Herons, Egrets, Buzzards, Kites, Cormorants and the like.
- 2 Nikon DSLR D500 as our preferred “action-camera” (or reach-camera) using Nikkor 300mm f/4E PF VR [TC-14E II] or Nikkor 500mm f/5.6E PF VR [TC-14E III].
- 3 Nikon Z50 as our preferred “reach-camera” using Nikkor 500mm f/5.6E PF VR [TC-20E III]. Nevertheless we systematically use it as a more or less universal reach & action-camera in bird photograph.
- 4 Telescope Nikon ED82 (older type but sturdy and optically quite good and easy handling) or Swarovski STM80HD (top quality) with optically perfect digicompacts Panasonic G3 Lumix 20mm f/1.7 or Nikon Series 1 V1 1 18.5mm f/1.8, both perfect lenses behind scope photograping birds at extraordinary large distance.
- 6. Nikon Z50 Nikkor DX 50-250mm f/4.5-6.3 exceptionally lightweight high quality combination.
- 7 Possibly in near future also: Z Nikkor 180-600mm f/4.5 – 6.3 VR.
- 8 Possibly in near future: Z Nikkor 100-400mm f/4.5 – 6.3
- 9 Possibly in near future: Z Nikkor 400mm f/4.5 S VR.
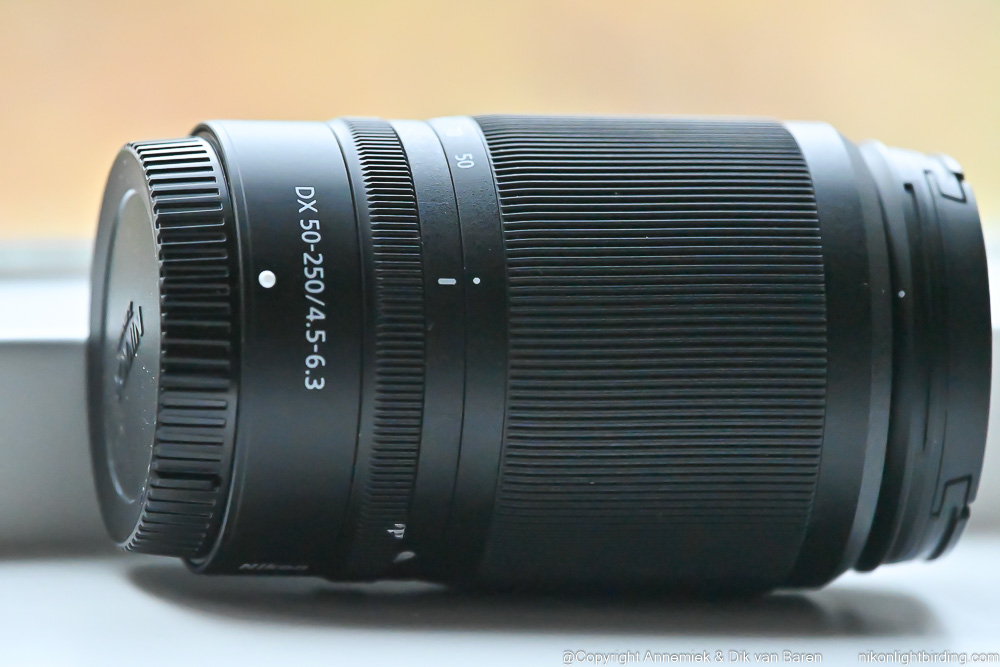
Z50 Z Nikkor DX 50-250mm f/4.5-6.3 is an exceptionally compact lightweight zooming combination with stoll acceptabel maximal equivalent 375mm (without Z converter) which comes in handy if one absolutely wants to “travel light”. Nikon is often offering this well-known high quality lens in attractive package deals with Z camera’s.
Nikkor 70-200mm f/2.8 VR II is a sturdy pro quality lightning fast focussing lens and ideal for photographing (action of) large birds (at sea) close by – with TC-20E III also further away – like Seabirds, Spoonbills, Herons and Egrets. Alas we don’t have Penguins (Pinguins) in Holland (yet).
The Z50 with Nikkor 500mm f/5.6E PF VR TC-20E III offers a luxurous 1500mm equivalent.
We may add one of those interesting three Z tele-lenses (items 5, 6 and 7) to our collection after we have tested them. Sometimes we use Z7 or Z7 II (courtesy Nikon) replacing D500. They give us less reliable autofocus and tracking (yet), however a lighter combination, more image quality and a larger viewer field of view, which can be key in action photography because fast flying large birds do stay somewhat longer “within” view and eventually within the picture frame. These full frame Z7 and Z II have somewhat lower tracking speed. We consider this as being a relatively small dilemma with a relatively large price tag for the time being.
These sets of equipment are independently usable and always ready to go wherever we are. We use D500 Nikkor 300mm f/4E always handheld. The combination is quite light and well balanced. You can move it easily and track extraordinary fast action like fishing/diving Terns (Sterns), Gannets (Jan van Genten) and the like. Look at the picture of the fishing Sandwich Tern (Grote Stern) below. Nikkor 500mm f/5.6E PF VR is a fabulous (“lifetime”) superlight unicersal top quality tele. We use it almost daily and are very it. which still performw quite well in combination with TC-200E III, another favourite of us. Our “financial controller” granted us this lens. W
We already never stopped down modern Nikkor lenses in lightweight bird photography any more. We prefer to use all available light for autofocus in low light situations in bird photography. Only if maximum detail is an absolute priority we stop down classical lenses like Nikkor 300mm f/4D, Sigma Sport 600mm TC 1401 or Tamron G2 600mm TC X14.
Why this special “APERTURE mode Birds”?
In order to acquire maximal reach bird photographers use tele-lenses or super tele-lenses with relatively large APERTURE values like f/2.8, f/4, f/5.6. Many also use converters and eventually are using APERTURE values like f/8 (e.g. D500 Nikkor f/5.6 500mm TC-14E III or, even worse, f/11 (e.g. Z50 Nikkor f/5.6E 500mm TC-20E III). This f/11-combination transmits a thin 12.5% part of the of totalavailable light onto camera’s image sensor compared to 100% light of for example a Nikkor 70-200mm f/2.8 without converter!
When using APERTURE mode, you are in fact working “ISO driven” continuously checking & resetting ISO value and less frequently maybe using EXPOSURE Time Compensation +/-. All the time you try shooting in-focus, detailed pictures of birds of changing size and distance in various conditions of wheather and direction or intensity of light like sun, clouds, deep shadow, twilight, backlight or direct light. Fortunately modern digital camera’s like Nikon D500 and Z50 “equipped” with latest image sensors and firmware can do their job pretty successful in cases of lowavailble light. The good news is also that in bird photography we are almost all the time using a constant APERTURE value because we need all the light we can get producing in-focus pictures with optimal detail, light and color contrast. We also need maximal depth of field (scherptediepte) to keep head and tail of larger birds in focus, also when birds are flying to or from you.
So, if our APERTURE value is more or less fixed, why not try automatising some other settings as well? After a bit of trial and error we developed our “APERTURE mode Birds” which we have been using successfully for many years now.
| Because of an almost “constant” APERTURE value in bird photography one can program most (semi) pro) Nikon camera’s for shooting pictures in a surprisingly comfortable way like in “APERTURE mode Birds”. When we use this method we never stop down lenses and keep APERTURE value constant. |
Minimum required sound basis APERTURE mode Birds
- APERTURE mode
- No stopping down lenses: constant APERTURE value (front dial not used).
- “Back Button Autofocus”: AF-ON button (thumb) autofocus & Release: (forefinger) shoot picture(s) (other hand free).
- Step value 1/2 EV.
- “EASY EXPOSURE compensation” ON (via subdial & quickly counting in 1/2 steps).
- ISO sensitivity settings: Auto ISO sensitivity control ON, Max. sensitivity 3200, Min. Shutterspeed 1/1250. *)
- White balance: AUTO2 (keep warm colors, not perfect white).
- Standby timer: 30s (camera shuts down automatically always and is always ready to go if you press Release!).
*) ISO 3200 is our personal maximal ISO value; we may use 6400 or even 12.800 if we definitely need in-focus pictures and do accept somewhat lower image quality in cases of unique species and or excetionaly low light, matter of priorities.
Extra Info: For “AF-ON” read: “AF-ON button” at D500 or “AF-L/AE-L button” at Z50
Actual bird photography using APERTURE mode Birds
By using this “APERTURE mode Birds” we eliminate all activities except focussing, always via AF-ON button. We only need forefinger (Release button) and thumb (AF-ON button) and always keep one hand free for moving tripod or whatever. We but rarely adapt EXPOSURE Time Compensation easily and reliably via main dial. This results in an extremely comfortable way of photographing, since thumb and forefinger are permanently at the same two camera buttons! In that way we can pay full attention at observing birds, anticipate their actions and shoot pictures at the very right moments or if required “focus and recompose”. “APERTURE mode Birds” is quite effective once you have found the Nikon equipment that matches your budget and programmed your camera into this mode.
Once you have correctly set all switches and menu parameters camera and start photographing birds:
- Switch ON camera (if it was not in standby mode).
- Point your camera at bird(s).
- Press and hold AF-ON: camera will perform autofocus according to the way you have set it and will continue focussing also when you move camera, either because you want to follow bird(s) activity or you want to recompose picture before shooting (“focus and recompose”). Camera will continuously report remaining free buffer space. At any moment you can stop pressing AF-ON and check actual ISO value reported. As soon as you resume pressing AF-ON camera will restart focussing, etcetera …
- Full press [and hold] Release every time (as long as) you wish to shoot (a series of) picture(s).
Generally keep/resume pressing AF-ON as long as you want the camera to continue focussing and tracking and full press Release any time you want to shoot (a) picture(s) at the actual distance.
You only have to adjust EXPOSURE TIME via subdial (your “EXPOSURE TIME compensation +/- button”) – easily counting in half stops – if amount or direction of light change significantly. Even if you have no time to do this it will be no disaster and you will still produce correctable pictures, never blurred pictures or pictures with unnecessary high ISO values and noise. The camera will also be able to satisfactorily handle borderline situations as long as it sees sufficient available light. The margin for EXPOSURE correction in modern digital camera’s is about +/- 2.5 stops. Try it out, you will but rarely have to use the backwheel subdial, except when:
- (expected) species, activity or speed (flying or moving) of birds change significantly
- bird(s) move(s) from deep shadow into direct sunlight or vice versa
- sunlight (re-)appears after clouds have drifted away or vice versa
- you have to redirect camera from backlight to direct light or vice versa.
So be happy! You did transform your High Tech Nikon camera into an “Smart Point and Shoot” device for lightweight bird photography. This camera will continue focussing & tracking as long as you press AF-ON until you stop shooting or memory card is full or battery is empty or someone switches camera off. We never switch our camera OFF as long as it is in our neighbourhood or as long as we are out there. We leave it in standby mode all day, and if something interesting shows up, we start shooting pictures right away…
WARNING! Do not press Release if camera is not focussed at a bird because it may then loose focus completely or even start hunting! Do’t press Release button unless you are sure camera is focussed! Practice! Once you control this way of operating your Nikon camera it will offer you a wonderfully effective and comfortable technique in your bird photography!
More about Automatic ISO Sensitivity control
Make sure you understand this item correctly: Your “programmed” Nikon camera will try to keep shutterspeed “between” the limits you set for Minimal Shutterspeed and Maximum ISO Sensitivity and, if this happens to be impossible, suggest or use shutterspeeds lower than the value set by you. For example requiring a Minimum Shutterspeed 1/1000 in combination with Maximum ISO 6.400 effectively means: set EXPOSURE Time to 1/1000 second or shorter (like 1/1250 second or even shorter) and try to keep ISO Sensitivity below 6.400. If this is impossible because teh camera sees insufficient available light, it will – in our experience – prioritize high shutterspeed over low ISO value and for example suggest EXPOSURE Time 1/1000 and ISO Sensitivity 9000 or higher. We thinnk that this makes sense in bird photography: more noise and loss in colour contrast is not as bad as too low shutterspeed causing worthless blurred pictures.
Once more: basically ISO 3.200 is our standard maximum acceptable ISO value. In some situations we go up to 6.400 ISO and in unique situations try 12.800 ISO. Nikon camera’s almost always compute a quite acceptable approach even in extremebirding situations as long as we use Automatic ISO. Try this out for a while in various conditions and change the ISO and Shutterspeed limits of your camera to your personal guidelines of image quality or type and speed of birds. Check your results and get experienced in setting the limits. Our experience – several years by now – is that this method works great in lightweight bird photography but it may take some time to get the right feel for it.
Using APERTURE modes Birds you may notice:
At (firmware version December 2023) Z50 the picture in the EVF will be blacked out during shooting bursts of pictures. The camera has to write the digital images into camera’s data buffer. Newer model Z camera’s have improved in several areas. This “blacking out” is, for the time being, a disadvantage of Nikon Z MLC’s next to our overall experience that Z camera’s, except probably speedy Z8 and Z9 Superstar, are still somewhat inferior when compared to Nikon DSLR‘s regarding subject tracking. One may expect that the majority of all this will relatively be resolved by firmware updates,
The frame rate may drop somewhat. In our experience at D500 from 11 FPS to an average of 8 FPS and at Z50 from 10 FPS to average 7 FPS. This is not as bad as it looks: all pictures are in-focus at D500 because of your a1-setting for focus priority you are missing are out-of-focus pictures only.
D500 generally will keep the image in the optical viewer stable, so you can better observe, follow and anticipate bird action and redirect the camera accordingly. We tend to use D500 Nikkor 300mm f/4E PF VR for obviously fast or unpredictable action photography like photographing Woodpeckers and Terns, and use Z50 for other bird photography also because we that way we can use our favourite TC-20E III in combination with Nikkor 500mm f/4E PF VR or NIkkor 500mm f/5.6E PF VR and get this wonderful 1500mm equivalent and still relatively high quality pictures.
One step more? Camera in Manual mode (not our advise but proposed e. g. at Youtube)
This way of photographing can also be accomplished using the camera in Manual mode in stead of APERTURE mode. It is sometimes called “misomatic mode“. This way of photographing birds, wildlife or sports will also save time and enable you to concentrate at bird action, etcetera. However: our experience is that shooting birds in this mode quite frequently produces (almost) unrecoverable underexposed or overexposed pictures. We had to take special precautions to avoid this and use EXPOSURE TIME compensation frequently in stead of occasionally. So we prefer using APERTURE Mode as the base for our “APERTURE mode Birds”.
So why does this work so well?
Why do you consistently get in-focus pictures and sometimes even suprisingly attractive pictures even when your birds are moving fast although it feels like you are using a simple “point and shoot camera”? This is why:
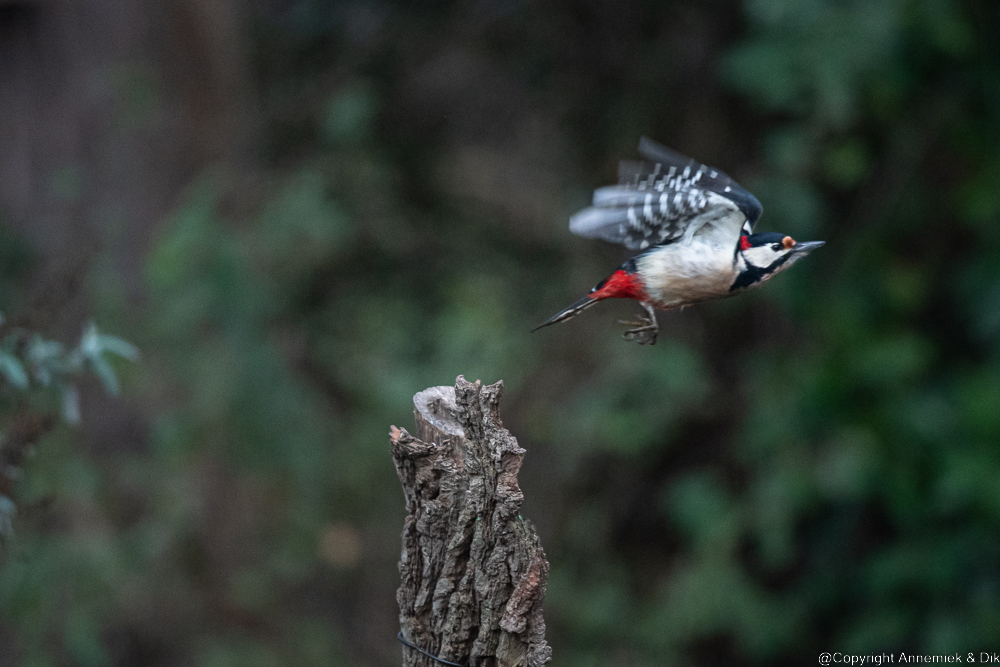
- You have streamlined your photography via back button autofocus using AF-ON button to focus camera and independently press Release anttime you wish to shoot pictures using forefinger & thumb only and comfortably use Easy EXPOSURE TIME Adjustment +/- and always keep one hand free for redirecting camera, head, tripod or lens. You can also continuously focus and track bird(s) and recompose at wish which ia aften required when you try to photograph a fst starting bird (focus at bird, receoompse (stop focussing) and point camera somewhat into the direction you expect the bir will fly. This often works beautifully! See the starting Great Spotted Woodpecker below.
- Your camera is set to focus and track fast flying birds in APERTURE mode with maximal APERTURE value.
- OR D500 has been optimized for accurate focus and track via dynamic anticipating mode using 25 or 72 AF points OR Z camera is optimized for accurate focus and track in AF-C wide AF area (L).
- You are committed to RAW workflow using professional image editing software for example Lightroom.
- The camera uses Automatic ISO sensitivity control via a lightning fast processor and you have put your personal ideas in bird photography about ISO sensitivity and shutterspeed into this processor: an ideal combination!
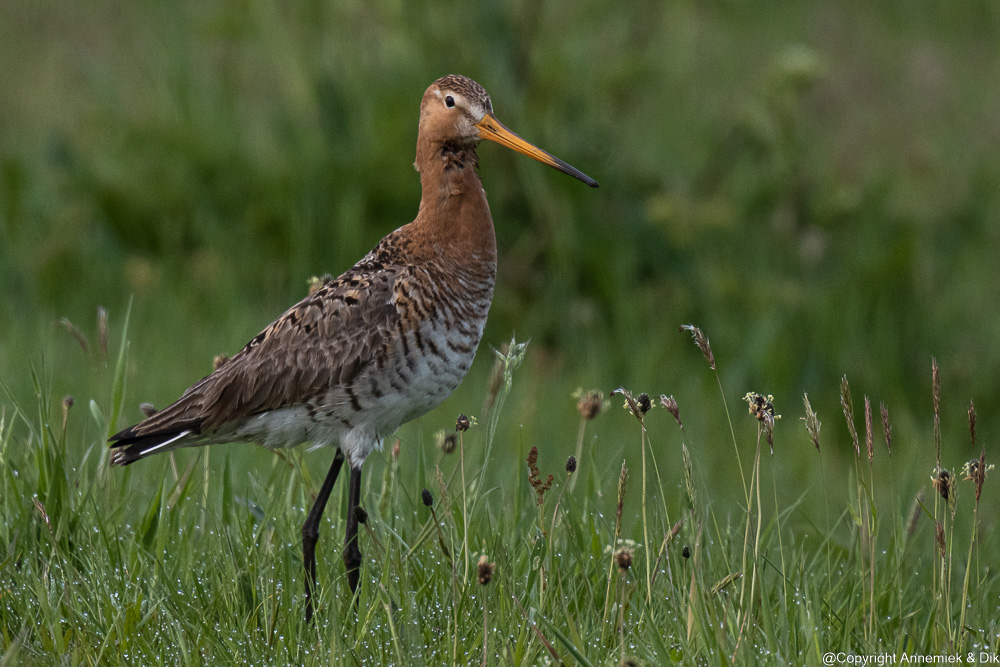
So your camera gathers maximum amount of light during optimal EXPOSURE TIME to produce in-focus, detailed pictures in accordance with your ideas about optimal EXPOSURE TIME and ISO limits in bird photography. It shoots your pictures of birds and other life. During actual photography you relax and dedicate all time to enjoy nature, the birds and other life, anticipate interesting action and press Release precisely at the right moments, in stead of all the time resetting ISO, EXPOSURE Time, etcetera. You now shoot pictures even in low available light like for example this one of the beautiful elegant Black-tailed Godwit (Grutto).
Notice the optimal trade off of EXPOSURE TIME 1/1250 versus ISO 4000 resulting in a sufficient depth of field producing these nice in-focus waterdrops inn foreground …
…and this one of a fast starting Woodpecker relatively close by:
@dik Restant from setting a m b reach
Also, anytime something interesting happens, you can pick up the camera, press AF-ON button and Release button and start shooting without checking your settings until you have time to make up for this. Your pictures may not always be perfect but anyway at least acceptable. You have transformed your camera into a “Very smart Point and Shoot”-device.
Try this out for a while and change the ISO and Shutterspeed limits of the camera to your personal guidelines of image quality and or (expected) type and speed of birds. Check the results to gain experience in setting those limits. Our experience – several years by now – is that this method works fine in lightweight bird photography but it may take a few weeks to get the feel for it.
Basically ISO 3.200 is our standard maximum acceptable ISO value. In some situations we go up to 6.400 ISO and rarely try 12.800 ISO. In our experience Nikon camera’s almost always compute a quite acceptable approach even in extreme and unique birding situations when we use Automatic ISO.
The frame rate will drop somewhat. In our experience at D500 from 11 FPS to on average of 8 FPS and at Z50 from 10 FPS to average 7 FPS. This is not as bad as it looks: all pictures are in-focus because your a1-setting. In other words: you are missing blurred pictures only.
@dik z50 xclv qm
Comfortably using APERTURE Mode Birds REACH” we discovered a variant which we called “APERTURE Mode Birds ACTION” being cery efficient and also still delivering good pictures. It is “APERTURE Mode Birds” but extended with a few settings that optimise your camera for (high speed) action bird photography where speed and autofocus are priority and maximum detail (“reach“, in other words maximum detail) maybe a bit less. It is some kind of smart compromise:
- APERTURE Mode Birds (is the base)
- Quality JPG FINE (in stead of RAW)
- Always AF Mode AF-C (both DSLR and Z camera’s)
- AF area Wide-L (Z camera’s).
In this way you optimise your camera-lens converter combination(s) for shooting (possibly expected) unique action of (etremely fast flying or moving) birds (or other animals) and or sudden action.
Examples using Nikkor 70-200mm f/2.8 VR II