F11: full screen
Foto at top: Holland sept 2023 sun Grey Heron (Blauwe Reiger) catching lobster, size 94cm distance 45m, equivalent 1050mm Nikon Z50 Nikkor 500mm f/5.6E PF VR standard camouflage APERTURE Mode Birds. Obvious “bokeh”: bird clearly separated from background in picture (relatively large APERTURE value 5.6).
About this page
This rather technical page may be somewhat hard, but if you take some time to understand it and subequently practice what has been explained here, you will shoot fine pictures! The page contains everything you really need to know about lenses, camera’s and optimal settings thereof in your bird photography. If, next to studying and understanding this page, you use our APERTURE Mode Birds (APERTURE Mode Birds), you are well prepared for succesful bird photography.
“Light, light and more light”: APERTURE, ISO and EXPOSURE TIME
The actual values of APERTURE (diafragma lens in 1/f-waarden), ISO (lichtgevoeligheid sensor in ISO-waarden) and EXPOSURE TIME (sluitertijd in seconden) together will more or less create your digital picture. They are sometimes called “Big Three“. These three entities of equal importance together determine the amount of light the image sensor is exposed to.
When you use your camera in APERTURE Mode, values of APERTURE and ISO value will usually be set by you. However the value of EXPOSURE time in seconds will always be calculated by the camera itself.
Once the camera has defined thne actual value of EXPOSURE TIME, you can adjust – in fact overrule – this value by using the TIME Compensation +/- button of the camera. Make sure you understand this correctly: You can use this very important button to change, either structurally or as an incidental last minute correction, the camera-calculated EXPOSURE TIME. Because of its importance and frequent use you can assign this EXPOSURE TIME COMPENSATION function to the subdial at the back of the camera. We strongly advise you to do so.
Effects of “Big Three”
In bird photography you should know by heart the effects and various side effects of each one of Big Three are:
| APERTURE | “ISO” | EXPOSURE TIME | |
| Amount of light sensor receives is determined by: | size lens opening (f/stops 1.4, 2.8, 4, 5.6, 8, 11, 18, …) | sensitivity to light of image sensor (ISO values 64, 100 … 256.000) | time (seconds) during which the image sensor is exposed to incoming light. |
| Side effect: | Large/small Depth Of Field | Very high: noise, low colour contrast | Too long: blurred, not in-focus picture |
The following picture may very well be a good “mental model” of your camera’s operation:
WHITE: light
1. RED: APERTURE (determines the amount of light passing through):
2. BLUE: EXPOSURE TIME (shutter determines seconds during which image sensor is exposed to incoming light)
3. GREEN: ISO value (determines sensitivity of sensor for incoming light but also amount of noise and Depth Of Field).
Photography is “writing with light” according to the following proces:
1. The size of the APERTURE (doorsnede lensopening), as set by, you will determine the amount of light that will be passed onto the image sensor.
2. The duration in seconds, EXPOSURE TIME (belichtingstijd in seconden), that the shutter curtain (blue) in front of the image sensor is open, will determine how long the image sensor is being exposed to incoming light.
3. The ISO value, also set by you, will control the ISO light sensitivity (regelbare gevoeligheid voor licht) of the image sensor (green) as represented by the sensitivity curve in the diagram below.
These three entities together will determine the voltage (strength) of the electronic signal that each individual pixel (beeldpunt) of the image sensor eventually will “write” to your photo card. The value of this signal in millivolts is roughly linearly proportional to the amount of incoming light (within a limited range of light intensity: the “straight” part of the sensitivity curve of the image sensor).

The image sensor of the digital camera is – basically by you – set to a specific ISO sensitivity to light usually in the range of 64 – 512.000 ISO Sensitivity. “ISO” is short for International Standard Organisation. They define things like “Kilogram”, “Meter”, “Second”, etcetera. For example Nikon D500 and Z50 both have a range of 100 – 512.000 ISO They both have an image sensor of similar architecture.
Every time you half press Release the camera will perform an automatic light measurement (lichtmeting) and compute the optimal EXPOSURE TIME value, using the actual values of Big Three and thereafter – when you full press Release – “shoot” a picture (up to 11 times a second at D500, including the opening and closing of the mechanical shutter curtain) and write a NEF (“Nikon Electronic File Format”) file containing the digitalised image into the data buffer of the camera. Nikon flagship Z9 can do all this up to 30 times per second. Some camera’s are even faster (and even more expensive).
However: only you can observe and react to or anticipate everything happening out there in the field: the actual direction of the light like backlight or front light, the (expected) speed and size of the subject bird(s), the (expected) type of action, the required depth of field (scherptediepte), etcetera. So you have to prepare your camera in all this by setting or adjusting camera parameters like APERTURE value, ISO value and possibly EXPOSURE TIME Compensation +/- , according to your ideas and experience of required shutterspeed to acquire in-focus pictures and to occasionally stopping down the used lens to get some extra detail and or setting under– or overexposure of the image sensor because ofbacklight/frontlight in any particular situation. The camera needs your input to calculate the optimal required EXPOSURE TIME (shutterspeed in seconds) every time you shoot a (series of) pictures.
Results of correctly setting Big Three
- Correct values of EXPOSURE TIME: not blurred but correctly focussed pictures (assuming stabilisation and focussing of equipment are OK)
- Correct values of ISO: minimal noise (ruis), sufficient detail, contrast and colour contrast in the Blacks (Lage Lichten) of the picture.
- Correct values of APERTURE: Not too dark or too light pictures and no clipping (“uitgebleekte Hooglichten”) but good detail in the Highlights (Hooglichten), no diffraction (onherstelbare optische vervorming) caused by APERTURE values like <= f/16.
On top of these three main results you will acquire optimal depth of field (scherptediepte) “DOF” as follows: High APERTURE values like f/1.4, f/2.8, f/4, … result in large depth of field (scherptediepte) which is almost always welcome, whereas low APERTURE values like f/16, f/22 … result in restricted depth of field (scherptediepte) which may cause problems in case of very large birds or birds moving towards or from the camera.
In lightweight bird photography it is often difficult to acquire larger DOF when you are using super telelenses including converters resulting in low APERTURE values like f/8, f/11, f/13 or worse.
Possible negative side effects of setting APERTURE, ISO and EXPOSURE TIME
You really should should know by heart when and to which extent setting one of Big Three will have significant or even disastrous side effects. We will list these effects below:
1. Too long EXPOSURE TIME may cause blurred pictures (bewegingsonscherpte).
2. Extremely(!) high ISO values may result in incorrectable noise (ruis) and lack of detail and or colour contrast. However late Nikon camera’s like D500 and Z7 II are equipped with image sensors of such high quality that you can get almost perfect noisefree pictures even if you are using rather high ISO values! In other words: the only possible negative factor left now is our number 1: too long EXPOSURE TIME. The great importance of ISO value has more or less disappeared when you are using modern Nikon camera’s.
3. Too high APERTURE values may cause overexposed pictures with insufficient detail and “clipping“of Highlights (“uitgebleekte Hooglichten”).
4. Extremely low APERTURE values can cause diffraction (schadelijke optische vervorming met verlies in detail) progressively occurring at very low lens openings like 1/16, 1/22, etcetera, the amount of diffraction depending on the type of lens.
5. Too high APERTURE values may cause overexposed pictures with insufficient detail and “clipping“of Highlights (“uitgebleekte Hooglichten”).
The next diagram summarises all this:

Some examples of bird action photography
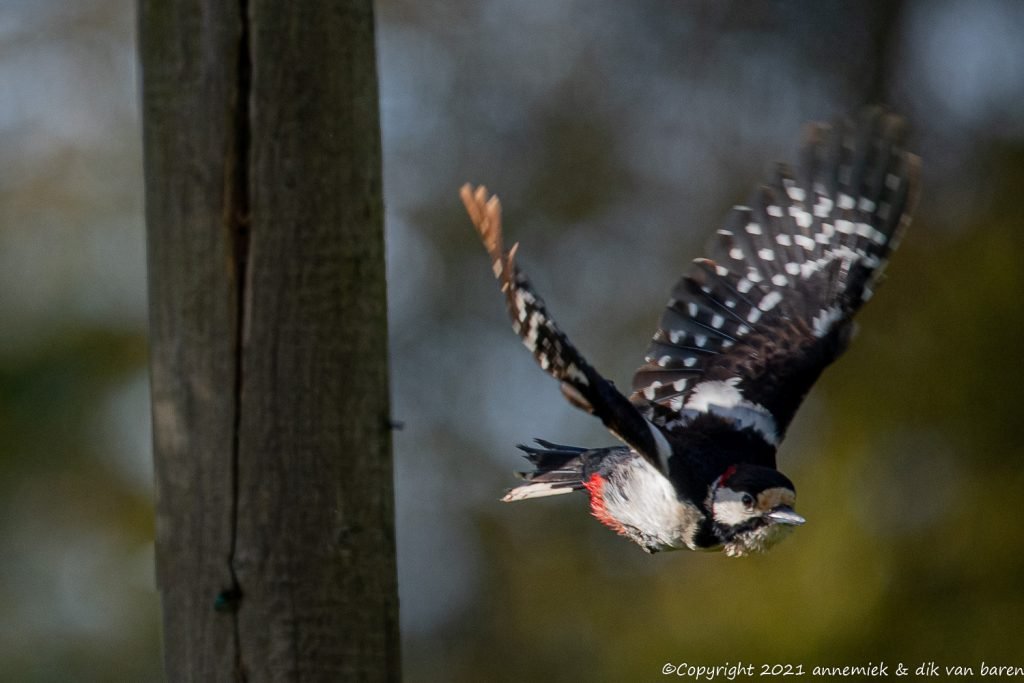
The Woodpecker, an extremely fast starting and flying bird, was flying towards the camera at 3 meter/second and our Z50 managed to track it, albeit in good sunlight. Our time stamped pictures confirm this speed. And by the way the D500 is an even better subject tracker. Until recently (January 2023) Nikon Z mirrorless camera’s tend to be somewhat weaker in tracking than Nikon DSLR‘s, although this situation is improving gradually. MLC‘s don’t have a dedicated autofocus sensor. Image and autofocus technique is integrated at the one and only sensor.
This beautiful Sandwich Tern was out fishing near its breeding colony at isle Texel in Holland. We expected that it would sooner or later scratch the water surface to catch insects or small fishes to feed its young and could track it using our lightweight Nikkor 300mm f/4E PF VR:

Effect “stopping down” (“afstoppen” of “diafragmeren”) of lenses.
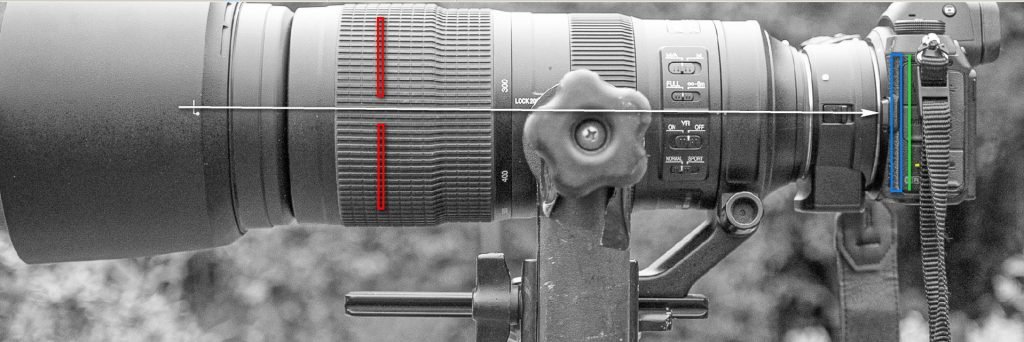
The technique of Stopping down (“afstoppen” of “diafragmeren”), usually 0.5 – 1.5 stops, sometimes even up to -2.5 EV, affects the operation of the lens used. By using only the central part of the optical glass, which is less “curved” than the side parts, the lens suffers less from optical aberration so photographs will be slightly more detailed. The effect of this phenomenon varies per lens type. You better know this optimal amount of stopping down by heart (if you still care for stopping down at all):
- Nikkor 300mm f/4E PF VR: 1.0 – 1.5 stops stopped down clearly causes some effect.
- Nikkor 500mm f/5.6E PF VR: 1.0 or more stops stopped down causes hardly any effect (also some loss of AF speed). By the way Nikon claims no loss of detail using TC-14E III. In our experience this is correct.
- Nikkor 200mm-500mm f/5.6E: 1.0 stop stopped down causes some effect (also some loss of AF speed).
- Sigma Sport 150-600mm f/5.0-6.3 1.0 stop stopped down clearly effect even with 1.4 converter, some loss in AF speed.
- Tamron G2 150-600mm f/5.0-6.3: 1.0 stop stopped down clearly effect even with 1.4 converter, also loss in AF speed.
When you add a 1.4 converter and stop down the lens one stop, for example a lens having APERTURE f/6.3, the lens will change into a lens with APERTURE f/13 and end up transmitting but 12.5% of the original light at f/6.3 and will loose its Nikon DSLR Advanced AF support and may suffer from decreased accuracy and or AF speed.
Anyway and nevertheless don’t ever sell your good old fast telelenses unless you have a significantly better alternative. For many years we are using our featherlight (770 gram) Nikkor 300mm f/4E PF VR handheld with or without converter if we want to be movable and versatile and hold our camera and lens pointed at fast moving bird(s) during longer periods and do have sufficient amount of light in difficult focus tracking situations. Look at the examples above of tracking a fast Great Spotted Woodpecker (Grote Bonte Specht) and tracking this Sandwich Tern (Grote Stern) at 45 meter away from us!
All this may sound quite alarming but nevertheless in reality in our experience autofocus (not the advanced AF functionality 3D, etcetera!) still works fine as long as you have plenty of available sunlight and high quality equipment! For example using a D500 with Tamron 600mm G2 TC X14 or Sigma Sport 600mm TC 1401, both being high optical quality combinations, our semi pro DSLR D500 will most of the time autofocus reliably, except of course in classically difficult situations like low contrast, unstructured objects, etcetera.
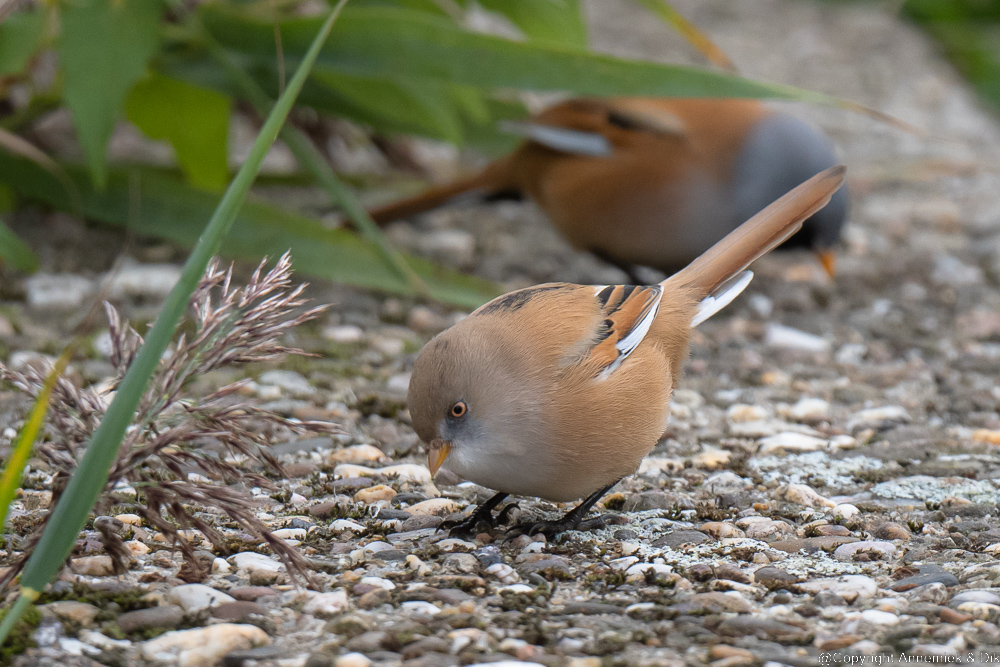
Positive side effect of using a large APERTURE: bokeh (onscherpe achtergrond en of voorgrond)
A large APERTURE (lensopening) will result in high bokeh.

…
Workshop Lightweight bird photography:
- WS1 Reach (bereik)
- WS2 Estimating reach
- WS3 “Big Three”: APERTURE, ISO, EXPOSURE time
- WS4 APERTURE
- WS5 ISO
- WS6 EXPOSURE TIME
…
Pingback: Z50 Settings – LIGHTWEIGHT BIRD PHOTOGRAPHY
Pingback: Recent photos and video clips – nikonlightbirding
Pingback: WS1 Reach (bereik) – nikonlightbirding
Pingback: WS2 Estimating reach – nikonlightbirding
Pingback: WS6 EXPOSURE TIME – nikonlightbirding
Pingback: ACTION – nikonlightbirding
Pingback: WS 4 APERTURE – nikonlightbirding
Pingback: HOME 2 – nikonlightbirding
Pingback: txt home page – nikonlightbirding