Foto at top: qqq
F11: full screen
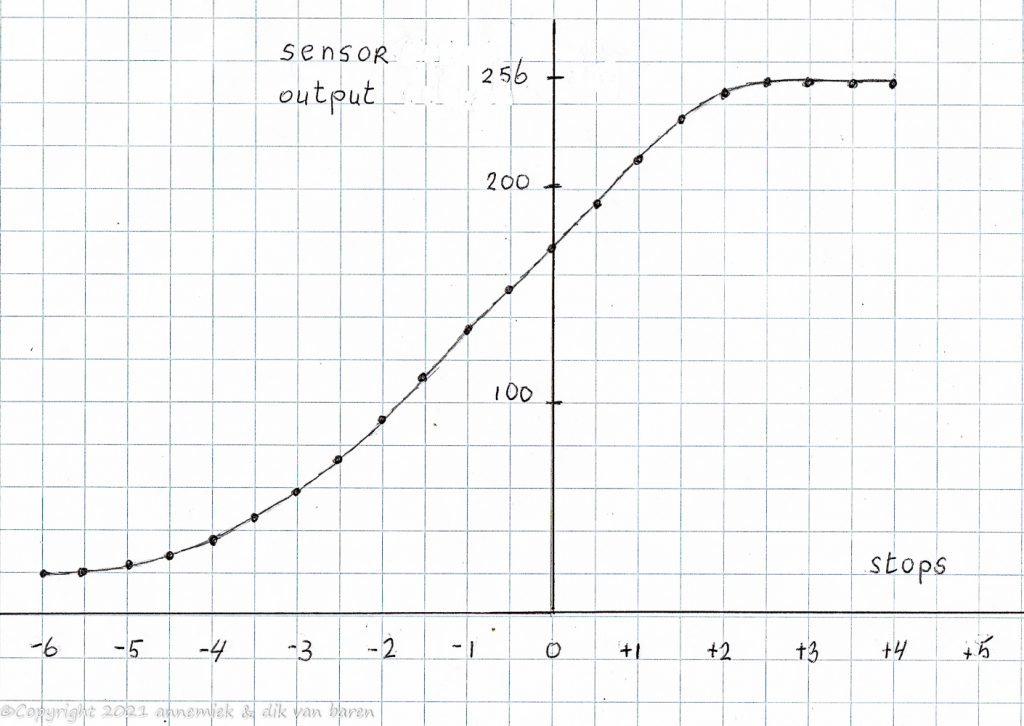
Sensitivity curve image sensor
The sensitivity curve of a digital camera is important every time you have to decide what to do in low light circumstances or when in bright sunlight shooting (partially) white birds:
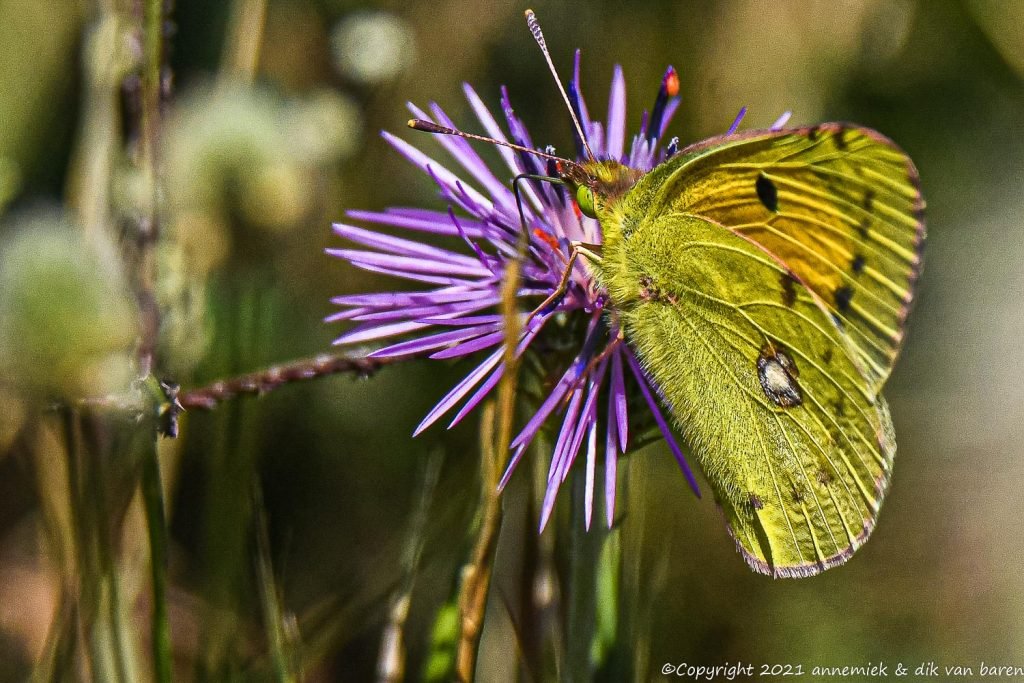
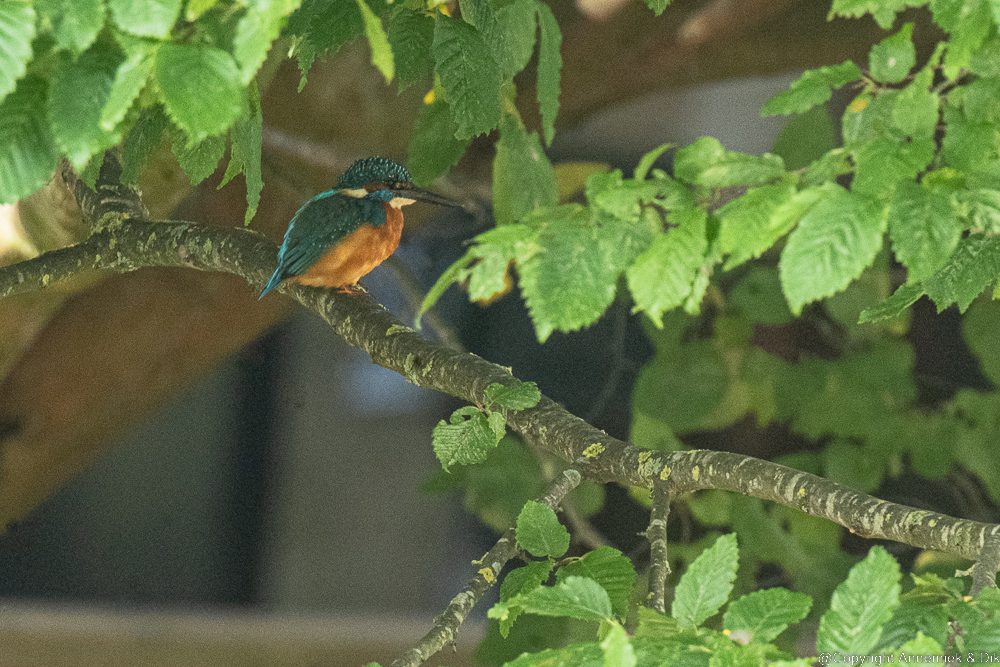
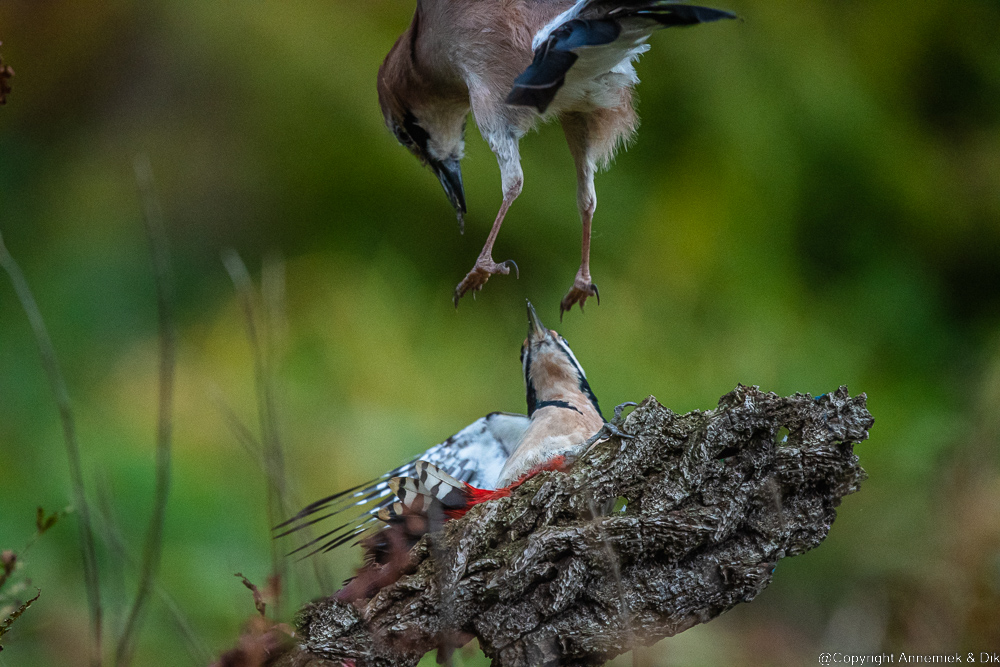
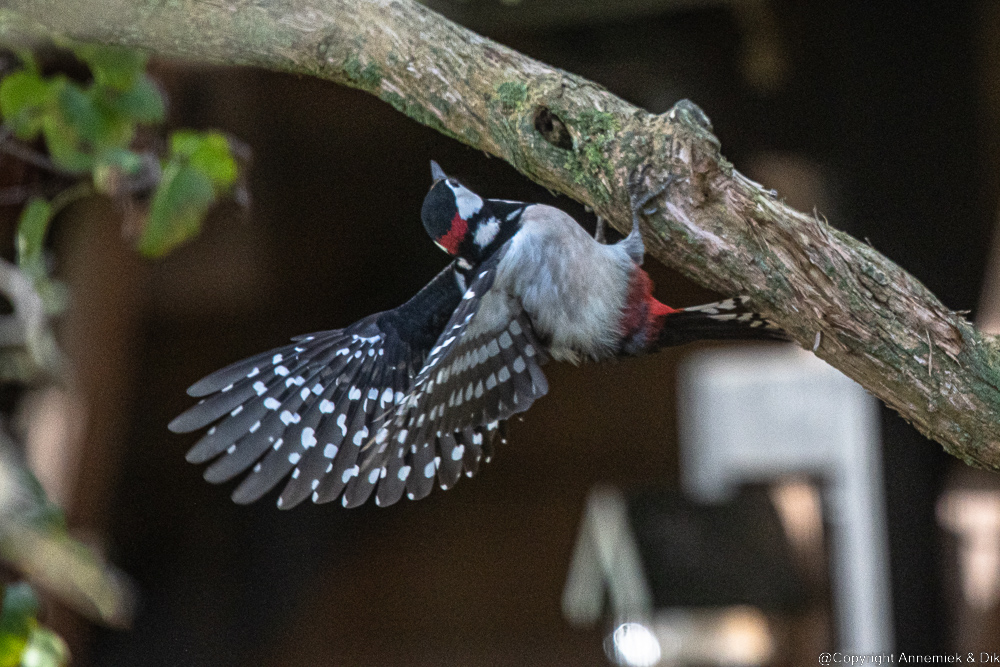
First look at this example of a clean, almost noisefree picture with good detail, true colours and good colour contrast:
The dilemma: too much noise or possibly blurred nevertheless interesting fast action bird pictures
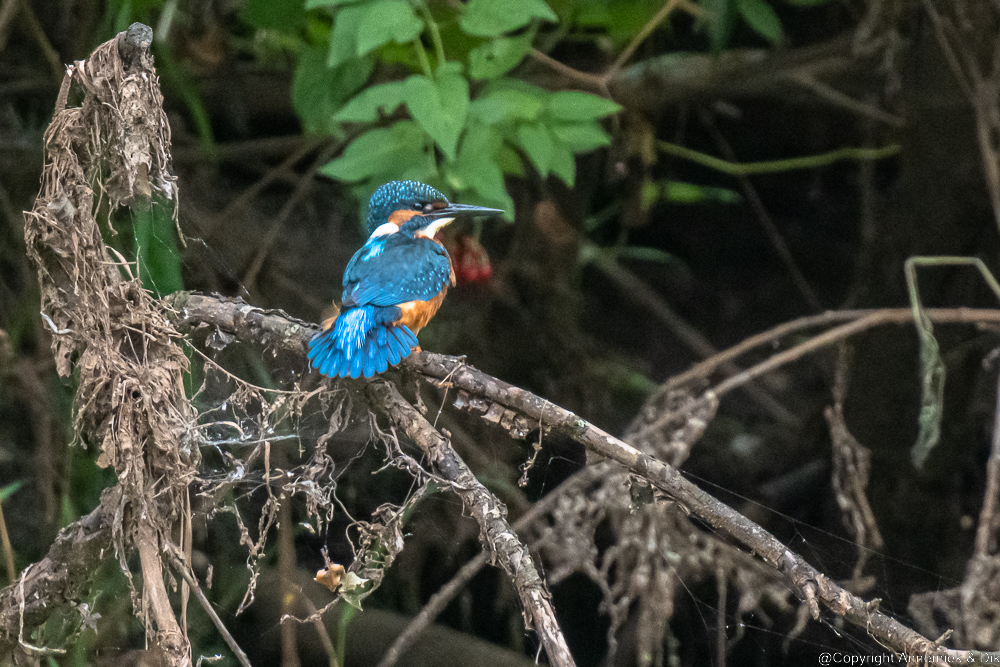
Compare the example above with the one below: a picture of significantly lower image quality:
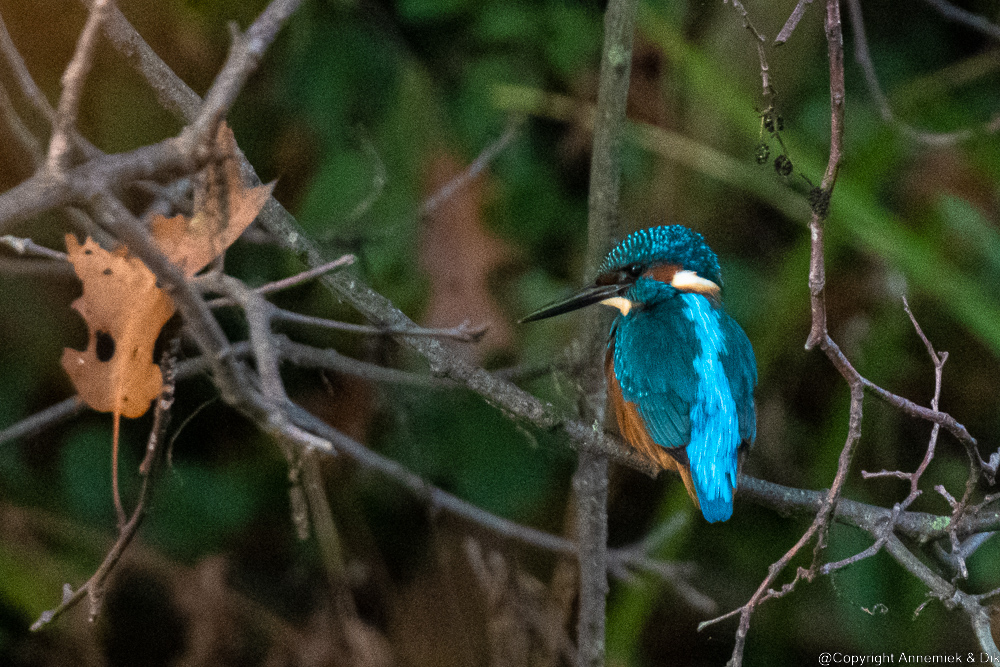
Image quality decreases when you are forced to use high ISO values in order to to avoid blurred pictures using low EXPOSURE TIME: this is your dilemma in many low available light situations.
And besides using some extra EXPOSURE Time Correction +/-, which by the way is a sound and widely accepted technique – using high ISO values is more or less the last trick one can pull when trading off low EXPOSURE TIME (risking blurred pictures) versus low ISO sensitivity (risking overall low image quality and noise).
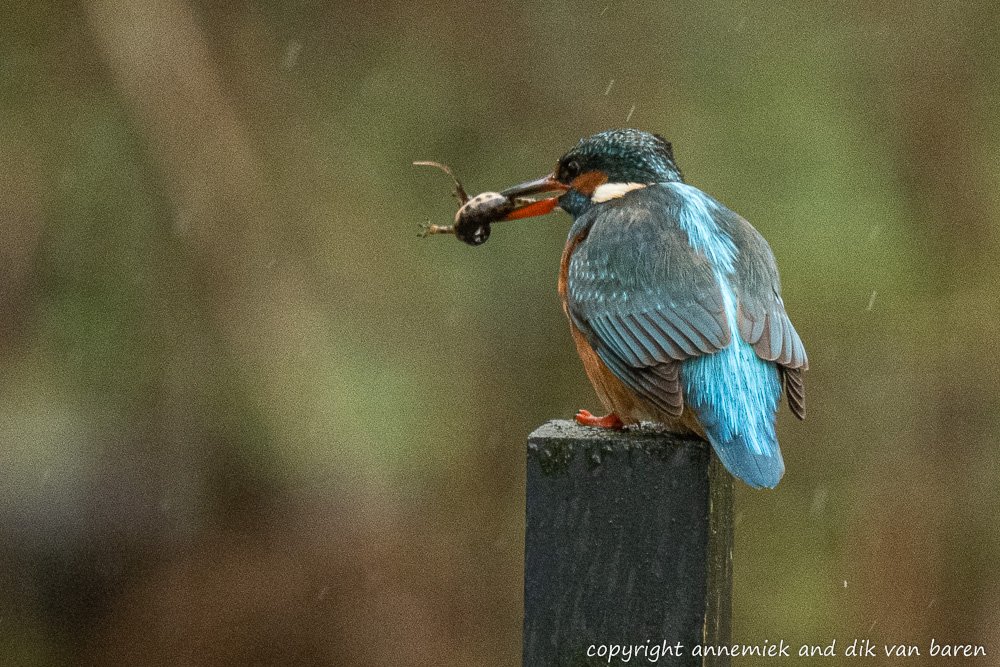
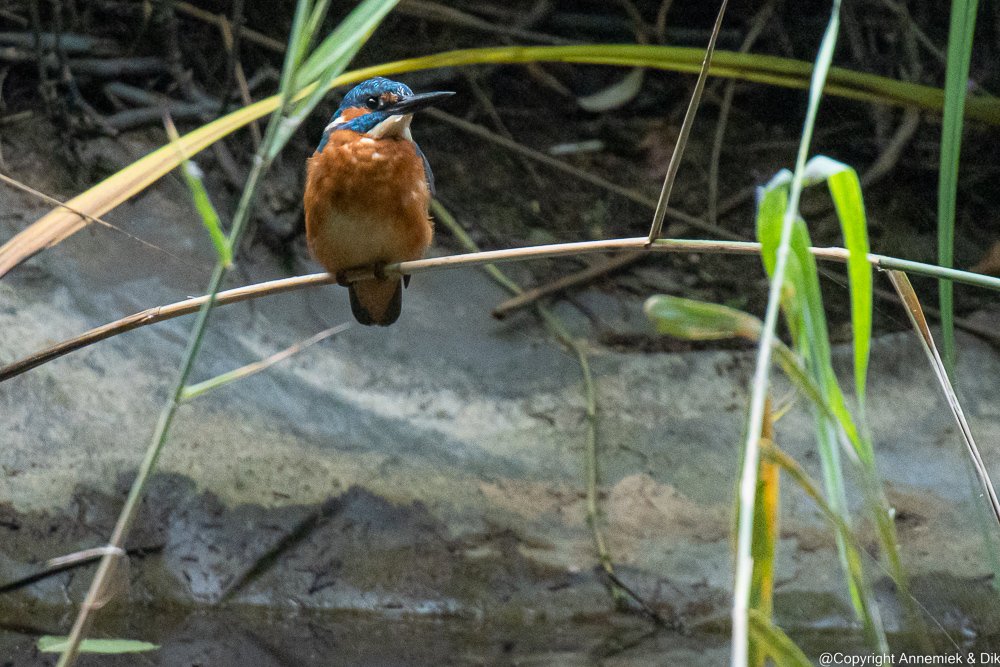
So, trying to get correctly focussed pictures in darker winterdays in Holland can be extremely difficult or even frustrating if one is anticipating fast action and needs short EXPOSURE TIME! Look at the next picture: ISO 2.200 1/750 second was the best deal we could squeeze out of this situation considering the very dark rainy wheather and an acceptable amount of noise (ruis) using a supertele 500mm f/5.6E at the same time being prepared for some fast action like the Kingfisher (IJsvogel) shaking or killing its prey somehow as it usually does or starting a new dive.
The next picture of the Sparrowhawk (Sperwer is another example of High ISO value, 9.000, with nevertheless acceptable result. The problem here was a relatively large depth of field while using a super tele lens. The result was a distracting busy background.

Our personal guidelines for ISO values and Automatic ISO Sensitivity Control
Modern Nikon DSLR‘s and MLC‘s allow using high ISO values up to 12.800 ISO in bird photography in our experience, but usually we try to stay below 6.400 ISO, preferably even below 3.200 ISO in combination with 1/1000 – 1/2000 second in bird photography if we are expecting possible fast action. Of course all these are personal criteria.
Many photographers consider ISO 3200 the absolute limit. We however, when using ISO Sensitivity Control Automatic, set Maximum ISO parameter occasionally even up to 12.800 for several reasons:
- Basically we do accept a certain minimal amount of noise when photographing birds and expecting some interesting action, because:
- If we have sufficient or abundant available light the camera will anyway pick a lower ISO value when using “Auto ISO“.
- Some pictures indeed show annoying noise but mainly in the background. This is less disturbing and can usually be corrected up to a great extent by Lightroom or specialised noise removal tools.
Summarising: in our “level” of bird photography in critical low light situations we do accept some noise and accept the loss of some detail and brilliance in Shadows and Blacks as long as we stay away from getting really blurred pictures and the pictures have interesting content.
Systematic underexposure via EXPOSURE Compensation via +/- button (subdial in APERTURE Mode Plus)
So, in order to avoid loosing detail in the highlights of an image called “clipping”, we systematically underexpose our pictures in lightweight bird photography. We set EXPOSURE Compensation +/- to value -1.5 – -2.5 in sunlight (to protect Highlights detail picture) and value 0.0 – -1.0 in dark wheather and or the dark (parts of) bird e.g. Crow, Goosander, Magpie.
Tip: practice these settings and photograph small and large birds of various species in all kinds of wheather and directions of light situations. It is rather tricky but it pays off! The effect of this parameter is also dependant on the setting of item Automatic Light Measurement and the setting of the relative size of central area in case of using Centre weighted metering in AE measurement! Look at these example pictures (click on picture and hit i to get all details picture):

CLOUDS !
WARNING: white or grey cloudy background usually acts as backlight in bird pictures!
Some example pictures to illustrate the (side) effects of ISO or APERTURE settings
Modern Nikon DSLR‘s and MLC‘s allow using high ISO values up to 12.800 ISO in bird photography in our experience, but usually we try to stay below 6.400 ISO, preferably even below 3.200 ISO and 1/1000 second in bird action photography. And once more: these are our personal criteria. You may judge otherwise in bird photography.
So it is really important to know by heart which higher ISO values start spoiling your pictures. Some examples of different combinations at various ISO values may help you to develop some scale of damage. Over the years – accounting for the significantly improved low light performance and dynamic range of image sensorsfrom DSLR 200 through D500 and D850 via V1, V3 and J5 through Z50 and Z7 through Z7 II Z8 – we developed the following:
ISO guidelines
- <= 3200 ISO okay pictures
- 3200 – 6400 ISO often still acceptable pictures
- 6400 – 12.800 ISO occasionally acceptable often depending on significance of background in the total picture and or actual Depth of field.


Pingback: Z50 Settings – LIGHTWEIGHT BIRD PHOTOGRAPHY
Pingback: Sites, publications, termimology – LIGHTWEIGHT BIRD PHOTOGRAPHY
Pingback: 12 EXPOSURE APERTURE Mode Plus – LIGHTWEIGHT BIRD PHOTOGRAPHY
Pingback: APERTURE Mode Birds (Ned.) – nikonlightbirding
Pingback: APERTURE Mode Birds (Dutch) – nikonlightbirding