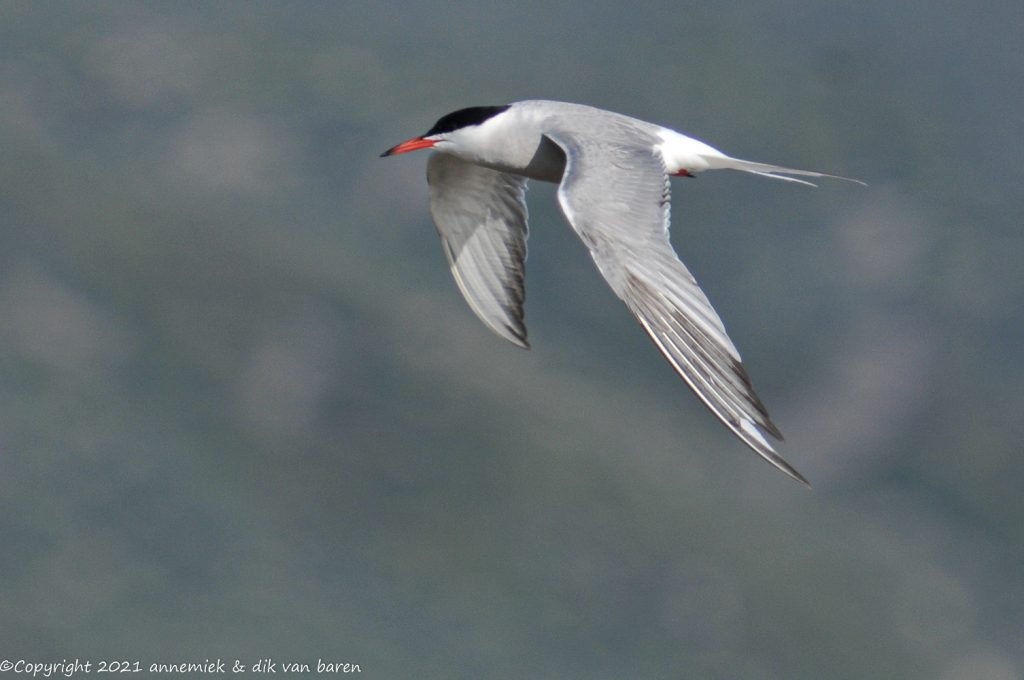
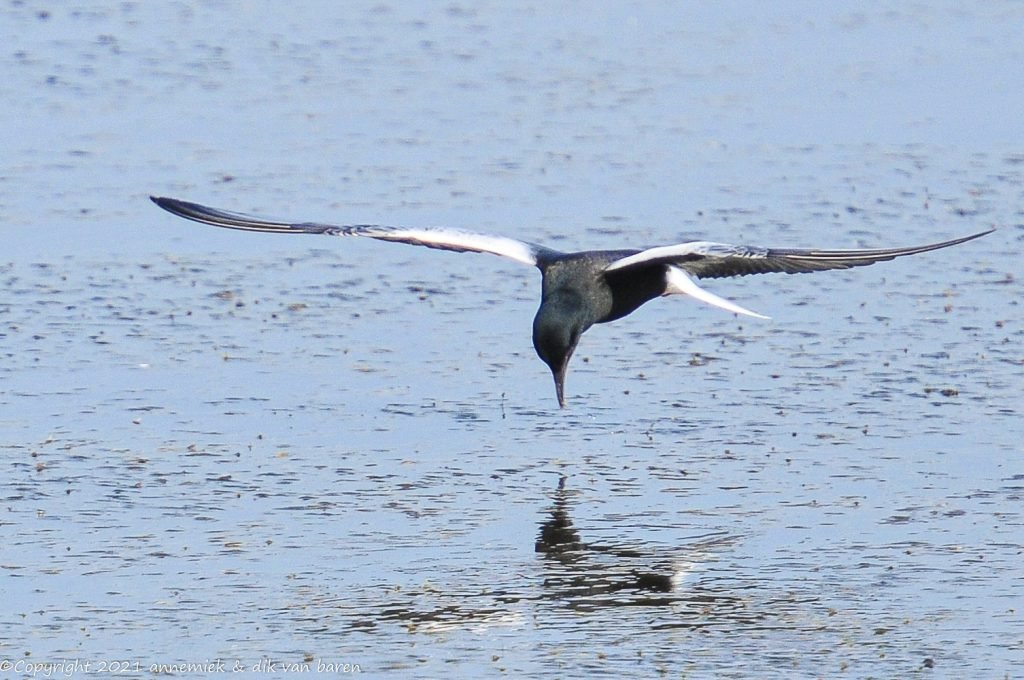
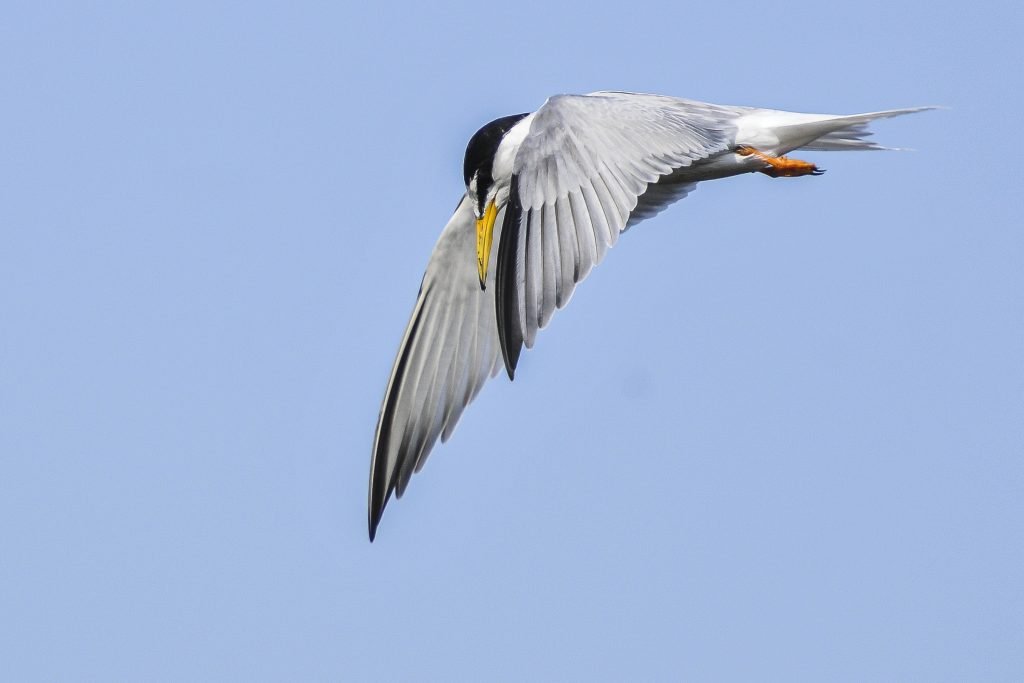
Foto at top: Holland sun Black Tern (Zwarte Stern) size 25cm distance 20m.
F11: full screen
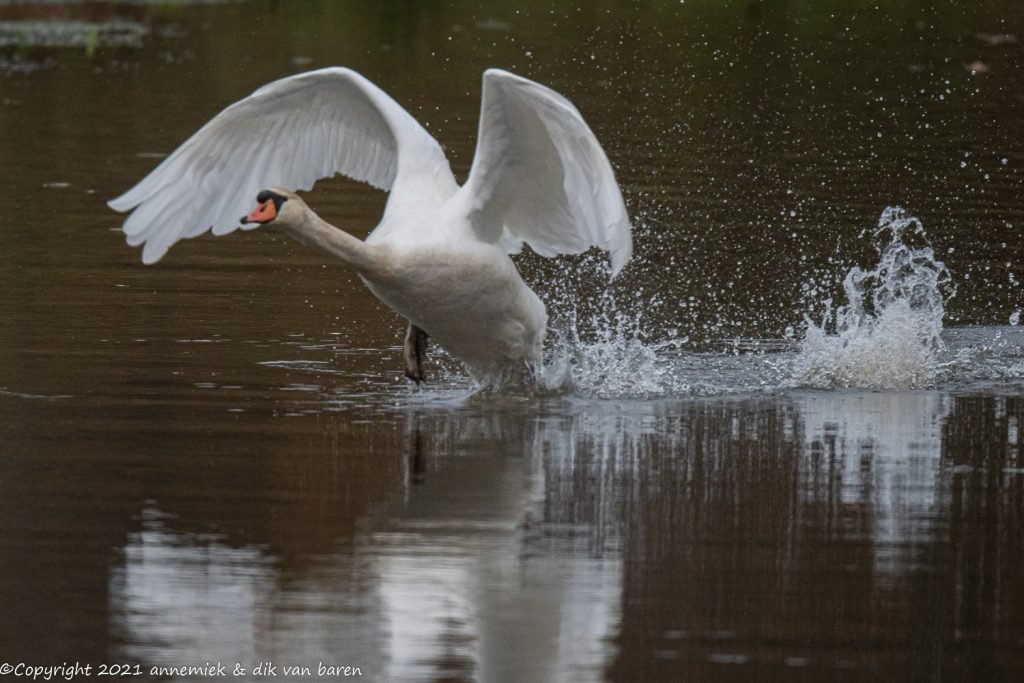
So called “unsharp” pictures versus pictures containing insufficient detail.
Photographers often talk about “sharp” pictures rather yhan “in-focus pictures”. They even talk about “tack sharp” or “razor sharp” picuteres. We do so too. However in the context of this blog we should make a clear distinction between pictures that are out-of focus and pictures that contain insufficient detail called “blurred pictures”. Only then can we exactly define what the underlying problem and solution are. In bird photography one often produces insufficiently detailed pictures when birds are beyond reach (bereik) of equipment used and sometimes because they are out-of-focus.
A picture is in-focus YES or NO. So “in-focus” is a qualitative item, not quantative.
A picture has a certain “amount of detail“: insufficient detail or not somw detail or sufficient detail or nice detail orR rich detail. So “detailed” is a quantative item.
The following pictures should illustrate this:
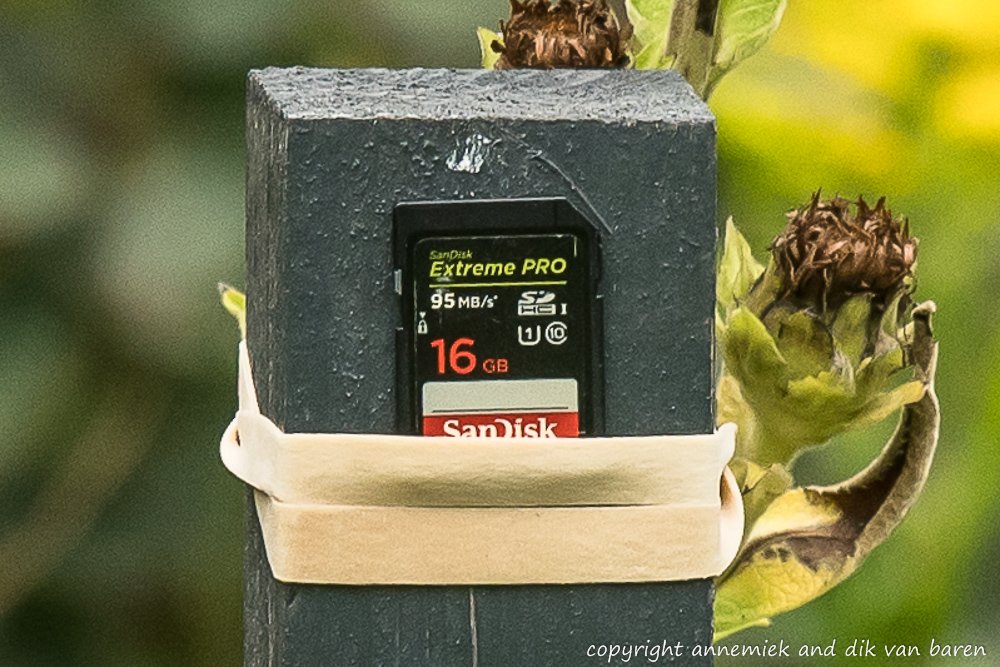
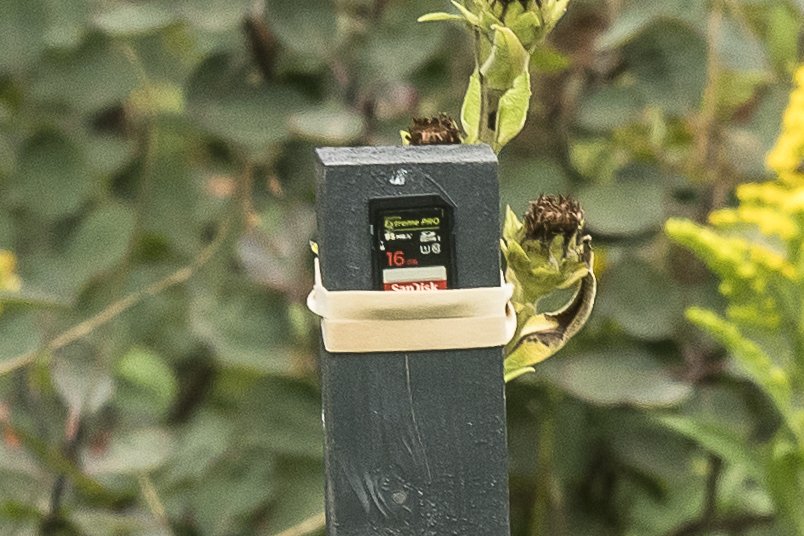
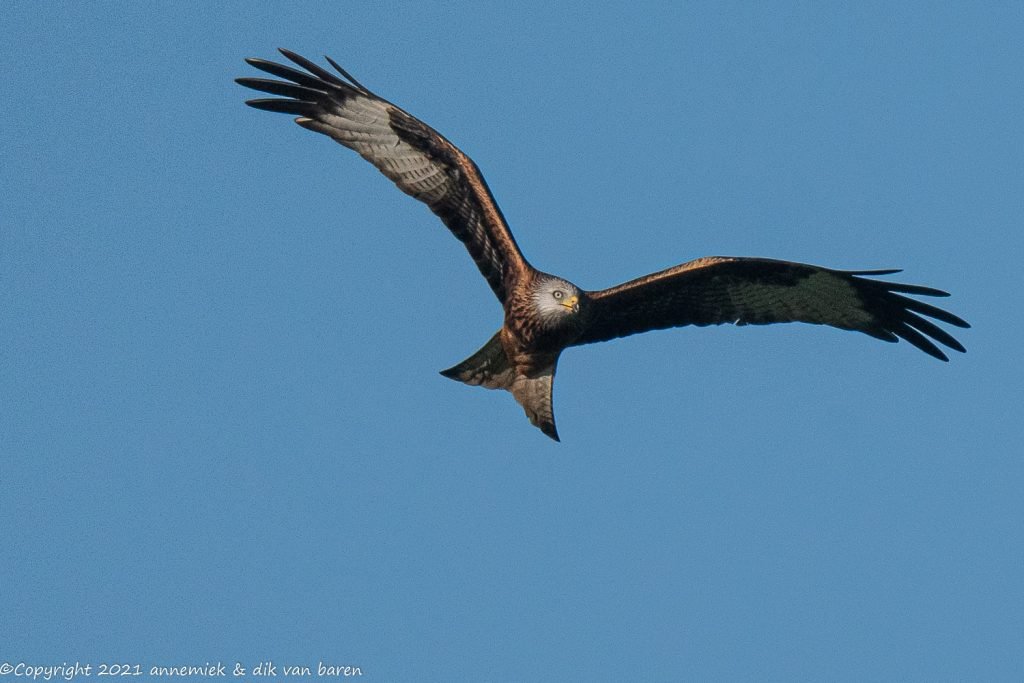
At larger distances like 30, 40 and 50 meter it gets more and more unclear whether the picture is out-of-focus or contains insufficient detail or both.
So you should be able to decide whether your pictures are out-of-focus or lacking detail and why. Therefore you need to understand all about actual reach (bereik) of your camera, your lenses and converters: WS8: Reach II At this page we review techniques for shooting in-focus pictures.
Manual focus, Single autofocus or Continuous autofocus
Out-of-focus-pictures are worthless so priority one always is getting your pictures in-focus. Autofocus at Nikon camera’s implies that camera and lens coöperate using the dedicated autofocus sensor of a Nikon DSLR or the autofocus function integrated on the one and only sensor of Nikon System 1 or Z mirrorless camera’s.
Autofocus is either Single autofocus or Continuous autofocus. The camera will produce one in-focus picture of one (group od) a motionless or perched bird(S) up to one or more series of in-focus pictures in action.
Continuous autofocus can be accomplished using various methods defined by advanced autofocus settings of the camera. You should strive for fully understanding the operation and results of these rather sophisticated advanced autofocus modes to create in-focus pictures of birds in action, so called “birds in flight or “BIF”s.
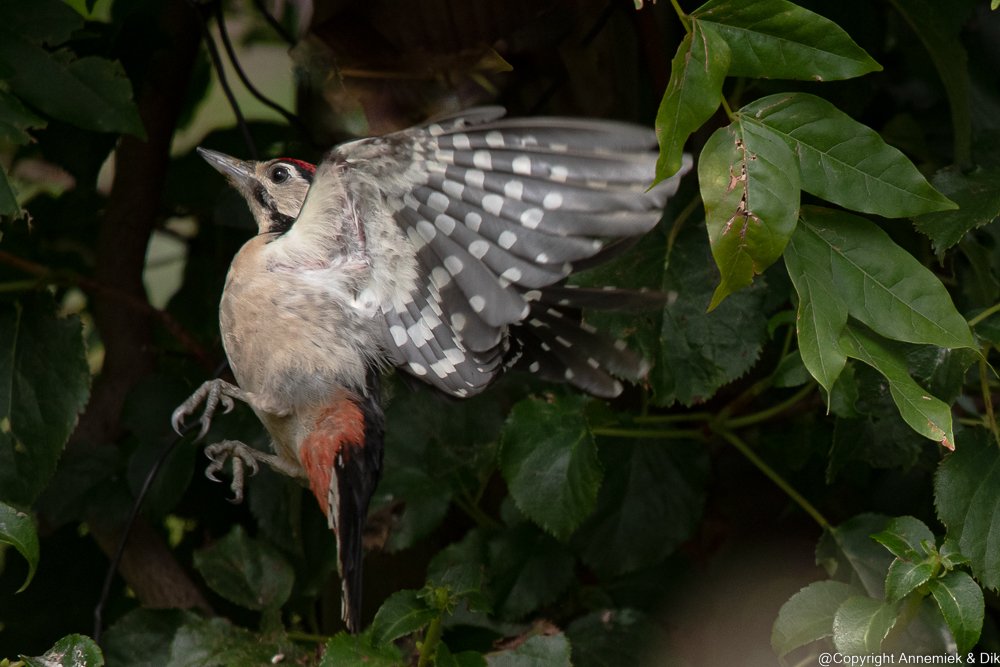
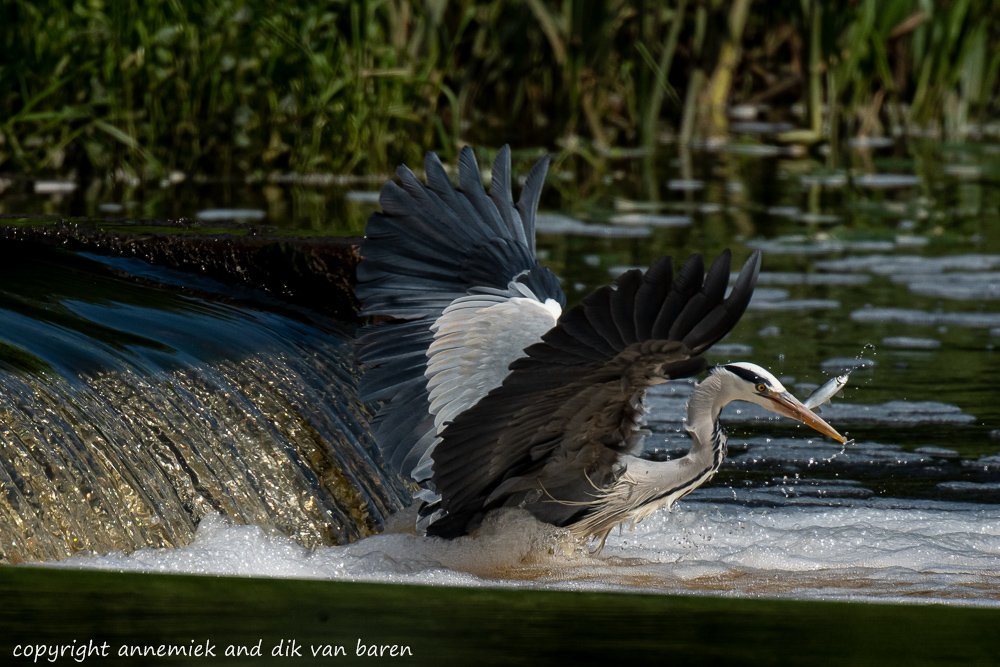
Generally you should understand why your pictures not in-focus, when they are not. This may take some trial and error, setting and resetting your camera and practicing, howeverthis time is well-spent. It is rewarding, sometimes even amazing, what your clever Nikon camera and lens can accomplish with respect to focussing and tracking fast action of speedy birds like Great Spotted Woodpecker (Grote Bonte Specht) or Kingfisher (IJsvogel) or Terns (Sterns), as long as your camera settings and photographing technique are in order.
We will review manual focus, autofocus and “focus tracking“ (bewegend doel volgen met blijvende autofocus). We will also look at using depth of field (scherptediepte) in combination with autofocus. We will also review back button autofocus as part of our special “APERTURE mode Birds” ideal in lightweight bird photography. We review it at page WS10: Why “APERTURE mode Birds”
Release and Autofocus Modes Nikon DSLR’s and Mirrorless camera’s
By default (!) every time you half press release button, the camera will stop doing whatever it is doing (including autofocussing), perform an automatic light measurement and start using its autofocus. When you full press release button, the camera will actually take a (series) of picture(s).
Back button autofocus
If you set your camera to use “Back button focus“, the situation wil be essentially different and you will have to full press and hold AF-ON button to initiate focussing and at any moment thereafter – if and when you wish – press Release to shoot a (series of) picture(s). The two functions Autofocus and Release shutter have been separated and either one can be initiated by a different camera button, Autofocus via AF-ON Button and shoot picture(s) by Release.
Advanced autofocus modes
Nikon camera’s offer several “Advanced autofocus” modes, Some of those are particularly useful in bird photography.The type of (Advanced) autofocus mode used by the camera to acquire focus and to optionally track the subject is always initiated and defined by:
- The setting of the Single-Continuous AF–switch at the left front of the camera
- The values of AF menu items a1 – a13.
At D500 not all items a1 – 13 are relevant in bird photography, however some have significant effect. We will show those in bold print in the table of a1 – a13 settings below. Usually their correct setting depends on the situation: available light, large or small bird, distance to bird, type of action, etcetera. It is our experience that you do not always get all settings optimally (re)set within actual available time. Birds are fast, nature is no zoo. So make sure you have set the important parameters before you start photographing.
Typically Kingfishers (IJsvogels), Terns (Sterns), Kestrels (Torenvalken), Peregrines (Slechtvalken), Lapwings (Kieviten), Pratincoles (Vorkstaartplevieren), Sparrow Hawks (Sperwers) and for example our little Wrens (Winterkoninkjes) can display slow to extremely fast or unpredictable action. It really helps if you can anticipate the behaviour and type of actions of some species and set your camera accordingly into optimal AF mode and AF-parameters. This may take considerable time developih all this over time however it is part of the joy of birdimg and photographing.
Nikons (advanced) AF modes (example D500)
Nikon DSLR’s perform autofocus in various different AF modes as follows. Make sre you understand how these varioud AF modes work.
| Focus mode | Half press Release: | Full press Release | During setting Viewer shows: | Note |
|---|---|---|---|---|
| AF-S | camera focusses once | foto | (red text) "S" | if bird changes position after Release pressed, foto maybe unsharp !!! |
| AF-C dynamic | camera anticipates movement bird and focusses continuously even if bird leaves AF-area briefly | foto | (red rectangle) containing 25 or 72 or 153 AF points | more AF points better tracking but more work |
| AF-C group | camera focusses continuously | foto | (red text) "GrP" | focus dropped if any AF point leaves GrP |
| AF-C 3D | camera focusses continuously & RGB sensor assists AF sensor | foto | (red text) "3 D" | focus dropped if colours change (e.g. if colours back bird & front different) |
| AF-C auto | camera chooses subject, thereafter uses 3D | foto | (empty red rectangle) | AF priority item in foreground or the only item in the picture! Full press Release to start new AF auto cycle. |
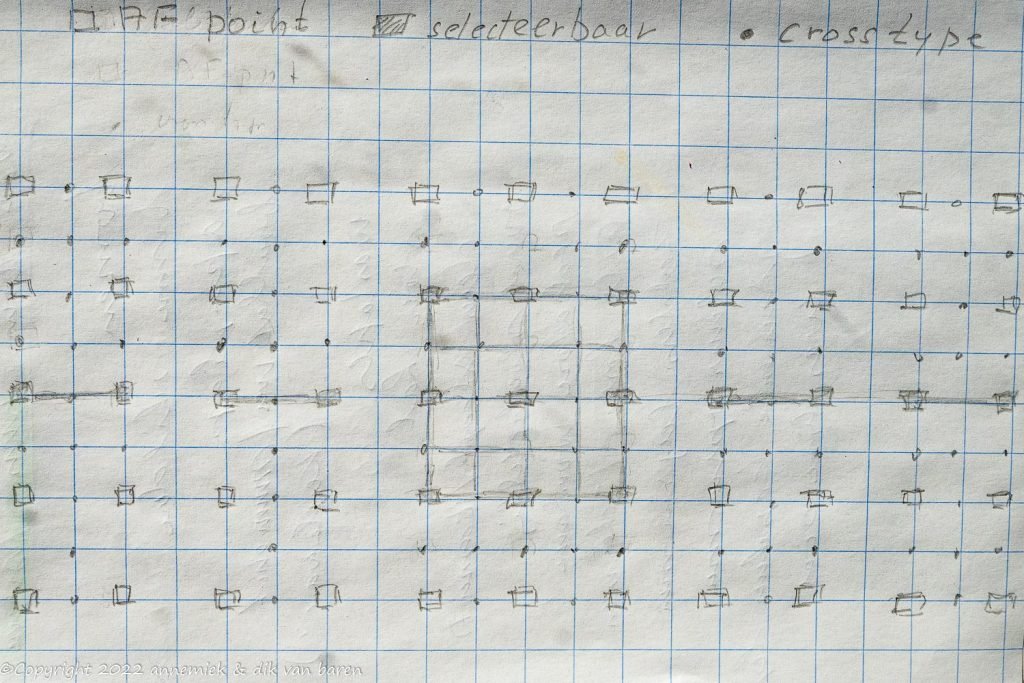
- Dynamic anticipating mode uses 25, 72 or 153 AF points (at D500). The “virtual lines” connecting these AF points within the AF area are horizontal, vertical or cross type (extra sensitive) located at the autofocus sensor of a DSLR or the one and only sensor of an MLC like Z50 or Z7 II. See the diagram of the AF sensor of a D500 below.
- 3 D mode operates like Dynamic anticipating mode but the RGB sensor of the camera assists with extra AF points (positioned in between the standard AF Points) and colour tracking which may speed up autofocus. Use this mode when bird colours are obviously different from the environment like in case of for example Woodpeckers, Kingfishers, Oystercatchers, Bee-Eaters, Rollers, etcetera.
- Group mode (Nikon DSLR model D500 or higher): camera prioritizes on the group in forground most close to the camera. You have to set the AF points wich will be part of this “group” using the multiselector. The selected group will be moved as such by photographer (again using multiselector) but the camera will change focus when the subject leaves any one of the selected group’s AF points. You then have to react again (again using multiselector). We feel using multiselector in bird tracking is too slow a technique so we never use Group mode in bird photography. It may be more adequate when tracking tennisplayers, soccerplayers, children or dogs. @dik update !!!!
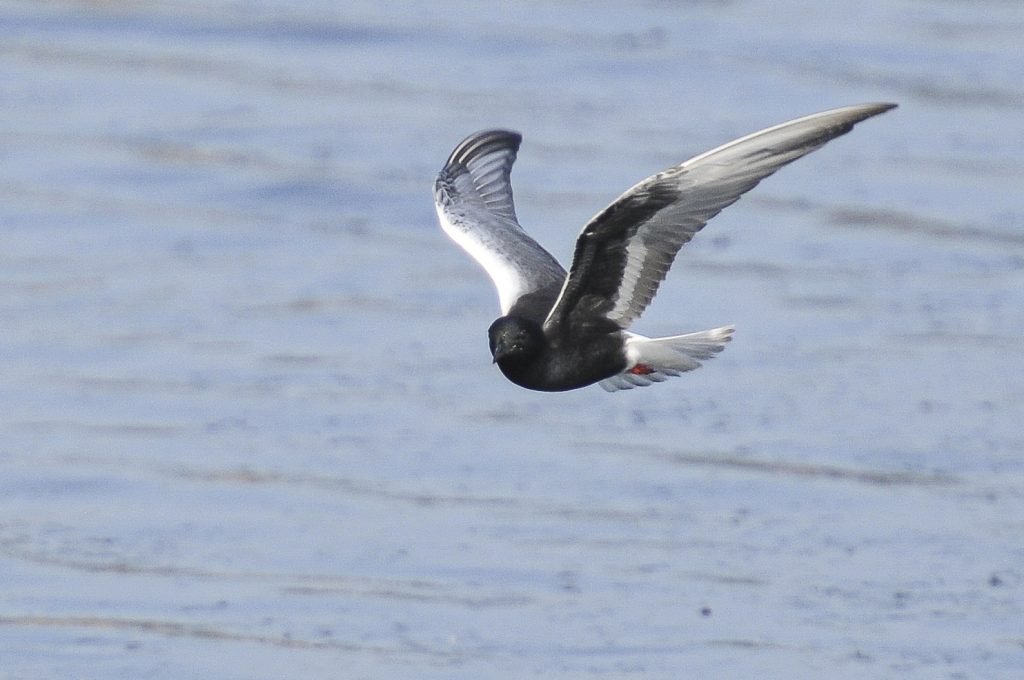
- Auto mode: the camera chooses the subject! This feels a bit weired at first but it is an interesting way to track for example the unpredictable turns of Whiskered Tern (Witwangstern), Pratincole (Vorkstaartplevier), Lapwing (Kieviet) or other air acrobats. This Auto mode is differently implemented at various Nikon camera models but camera’s priority is autofocus at a subject obviously in the foreground, like a in the air stunting or towards the camera flying bird. Be aware: you can only exit an unsuccesful Auto mode cycle by (repeatedly) pressing Release button (and subsequently start another Auto mode cycle if you like). Just point at a bird wherever your bird is and often the camera will pick up focus at your bird right away. You need to practice this Auto mode. We did so and got used to the feeling of “having no control whatsoever” and now do appreciate this Auto mode in situations of unpredictable action. For example Black and Whiskered Marsh Terns (Zwarte en Witwangstern) and Common Tern (Visdief) are often rather slowly and calmly inspecting reed borders or the like but may suddenly make a quick twist or turn or unexpectedly dive down when they notice prey. Auto mode has often been our best choice in those situations.
Setting (advanced AF modes) at Nikon DSLR’s and MLC’s
At Nikon DSLR‘s you set autofocus modes via the AF switch at the left front side of the camera and via standard menu or via INFO button. At Z50 you set AF modes via standard menu or via i-menu. Their nomenclature and functioning are somewhat different, for example in Z50 i-menu nomenclature is:
- Focus Modes: AF-A, AF-S, AF-C, MF
- AF-area modes: Pinpoint AF , Single-point AF, Dynamic-area AF, Wide-area AF (S), Wide-area AF (L) Auto-area AF.
AF-C in combination with Wide-area (L) has proven to be the optimal setting when subject tracking. “L” stands for “Large”.
Overview AF parameters a1- a13
| a1 Release priority MF | Focus | only in-focus pictures | if distance camera-bird constant! if not set priority Focus |
| a2 Release priority AF-C | Release | always a picture | Release: camera definitely makes picture. We accept some unsharp pictures. It will increase FPS in BBAF with about 20% (D500 8 -> 10 fps). |
| a3 subject tracking with lock ON | 1 (quick) lock actual AF position as soon as AF is acquired | camera will react immediately when bird is in focus and lock focus | |
| a4 use face detection | Off | not relevant in bird photography | |
| a5 area subject tracking in 3d | wide | birds move fast so camera should follow everywhere | |
| a6 number AF points displacement multiselector | we never use slow multiselector in bird photography | this applies to movement multiselector during setting! | |
| a7 separately store position of horizontal and vertical AF points | No | not very relevant in bird photography | related to landscape/portrait position camera |
| a8 AF-On button | ON | AF-On only: if you want to prepare camera for back button autofocus BBAF | separate autofocus function (AF-ON button) and shutter release (RELEASE button) |
| a9 limit options AF-area | 72 and 153 points NOT selectable, other area sizes selectable | we never use >25 AF points in bird photography | we may use but 25 points when using converter, all other cases we want up to 153 points |
| a10 AF-S, AF-C , no limits | no limits | AF-S and AF-C selectable | |
| a11 selected AF point automatically wraps around when hitting screen side | Off | we do not use this | in bird photography |
| a12 MF help dynamic area-AF 3 presentation Group-AF 3 4 illuminate AF point | 1 yes 2 yes 3 yes 4 yes | ||
| a13 MF operation inititated via focus ring on Nikon compatble lens | enable | applies to e.g. Sigma Sport 600mm and Tamron G2 600mm |
Advanced AF starting location in te picture
When you set your camera into one of this advanced autofocus modes, you implicitly choose the location of the starting point of the autofocus. You implcitly define at which point “in the picture” the camera should start focussing. For example th first time it may be confusing that the camera and not you is going to “decide” at which point it wil lbe focussing and tracking! You may have to try this out for a while to get used to it.
About AF points
Modern Nikon DSLR‘s and MLC‘s over time tend to have more AF points, better firmware and more processing power which results in faster more reliable autofocus and better tracking. Interesting Examples are Z7 II, Z5 II and Z9. Flagship Z9 is safely beyond the scope of affordable lightweight bird photography. The other two MLC‘s with their two Expeed processors though are quite interesting for the category of serious enthousiast bird photograpers. In combination with 600mm Z lenses and Z Teleconverters 1.4 X and 2.0 X one may get wonderful lightweight equipment with large 35mm equivalents!
One gets easily lost when trying to understand all different types of AF points and their weight and operation. In our opinion the only thing relevant in lightweigt bird potography is that but 37 AF points maximally are supported if one uses combiations having small APERTURE value f/11, f/13, etcetera.
qqq yet draft qqq
Setting AF parameters a1 – a13 at Nikon DSLR’s
At Nikon DSLR‘s you set autofocus modes via the AF switch at the left front side of the camera and a1-13 parameters via standard menu. At Z camera’s you set autofocus modes via the standard menu or i-menu.
Back button autofocus
In bird, wildlife and sports photography one often uses so called back button autofocus. We ourselves are using it almost permanently in our lightweight bird photography, particularly when using APERTURE mode Birds. When using telelenses and photographing fast action or more or less unpredictable action or small birds far away, it definitely pays off to use this mode. It has been integrated into our APERTURE mode Birds also.
Back button autofocus basically separates autofocus-function from Shutter release-function as follows:
- Camera starts autofocus (and VR !) as soon as AF-ON button (or any button AF-ON function is assigned to) is pressed.
- Camera holds focus until AF-ON button (or reassigned button) is pressed once more.
- In this way the camera facilitates focus and recompose and EXPOSURE A Mode Plus.
We are using it all the time in our lightweight bird photography.
Autofocus and “fast” Nikkor lenses
Especially when you think your settings are all right but your pictures are still not in-focus, it may be difficult to determine whether either you have made a mistake (incorrect settings or movement of camera or lens or yet insufficient skill) or the speed of the bird was beyond the focussing potential of camera and lens. Some birds are just too fast in certain situations! Anyway keep trying till you start getting results. To get started we will give you an overview of Nikon’s autofocus features and some tips for practicing below.
But anyway: in order to succesfully accomplish autofocus a camera needs as much available light as it can get. So never ever sell your precious “fast” f/2.8- or f/4-telelenses unless you are sure you have a better alternative. Particularly the Nikkor 300mm f/4E PF VR of 770 gram is a wonderful lightweight lens. Many, also professional, bird photographers confirm this.
Low light-conditions and modern Nikon camera’s
In order to produce clean noisefree pictures a camera also needs good light. Nevertheless modern camera’s like Nikon D300(S), D7200 and D7500 and, even better, semi pro D500 and some latest Nikon Z MLC’s can autofocus admirably fast and accurate and produce clean low noise pictures at high ISO values. So today one can succesfully photograph birds also in low light situations.
Some examples of autofocus in lightweight bird photography
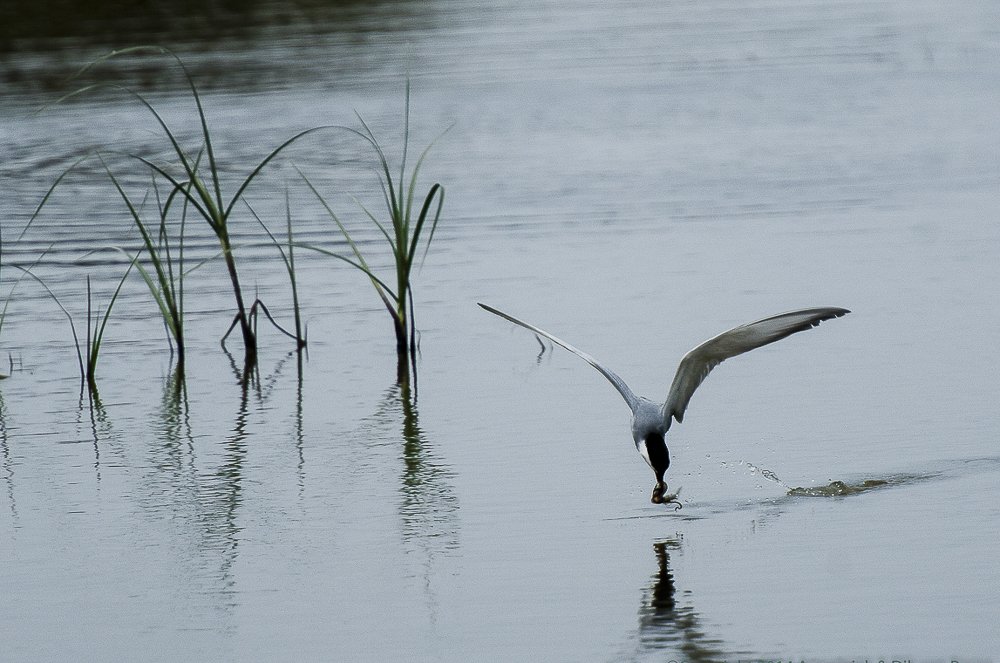
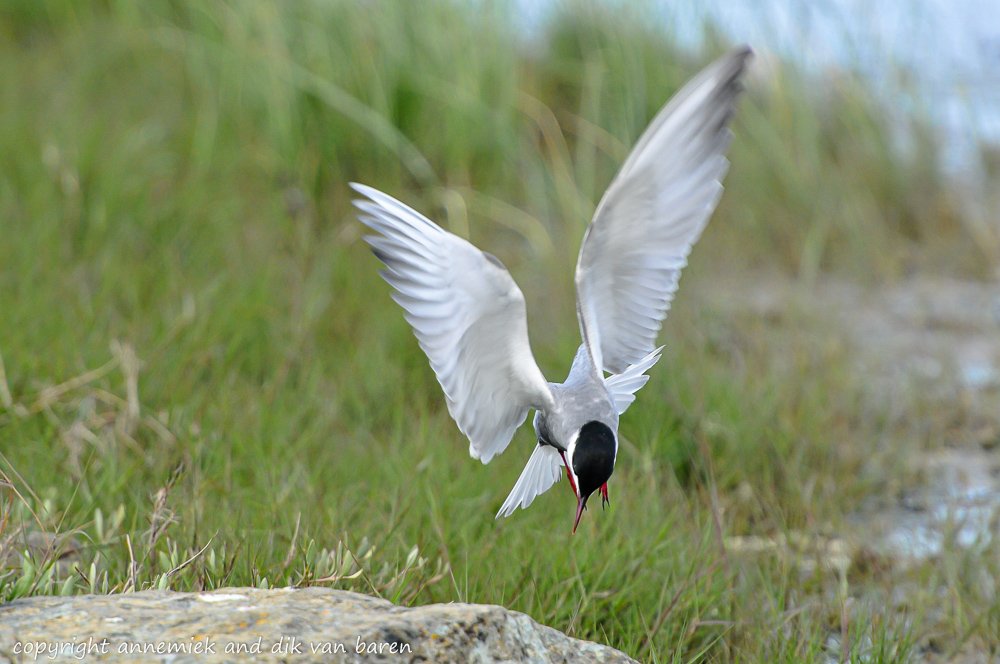
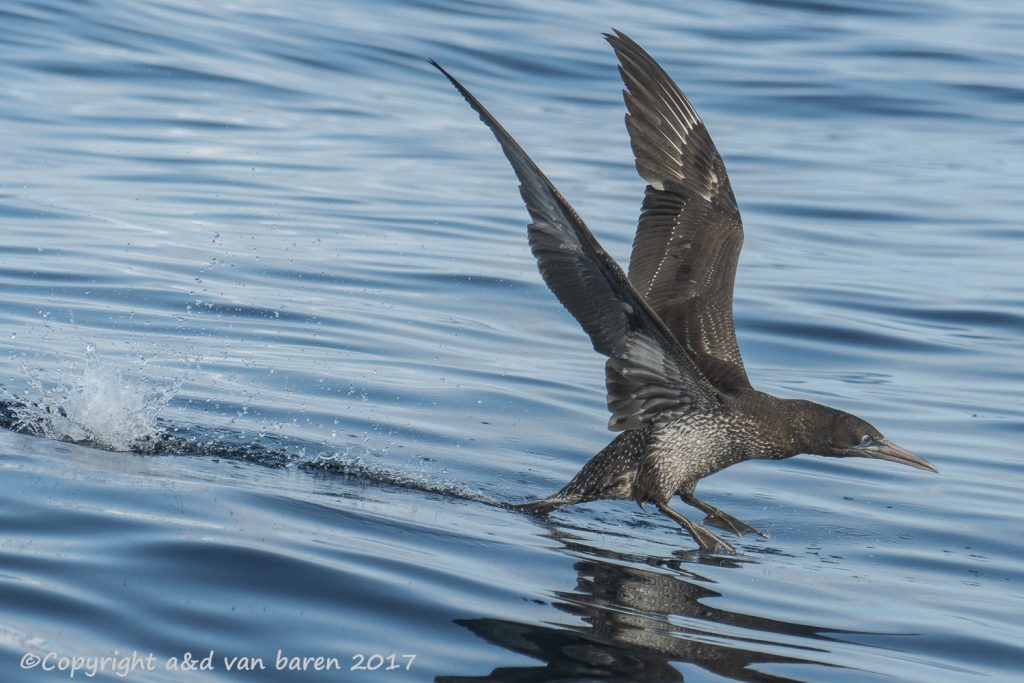
Example 1. A Whiskered Tern (Witwangstern) in action: this is a BORDERLINE CASE (low amount of available light and restricted autofocus potential of the “oldtimer” type D300). Nevertheless this Tern has been focussed accurately in dark cloudy wheather thanks to our fast 200mm f/2.8 lens. Using a converter or stopping down a fast telelens may degrade its autofocus speed. Nevertheless in this situation, even when using aspherical TC-20E III, we managed to make the shot in dark cloudy wheather.
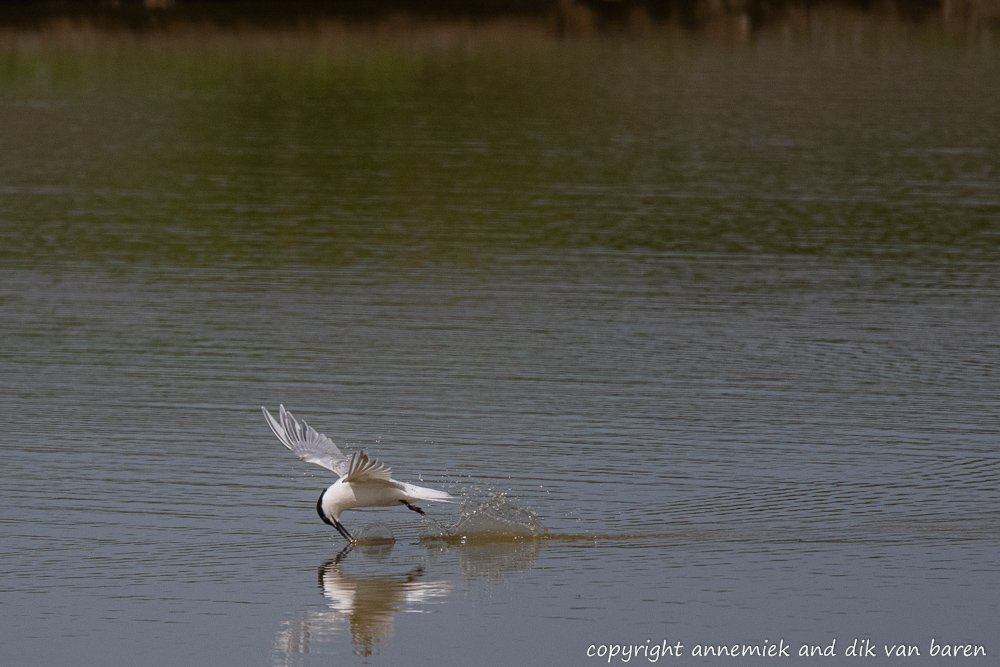
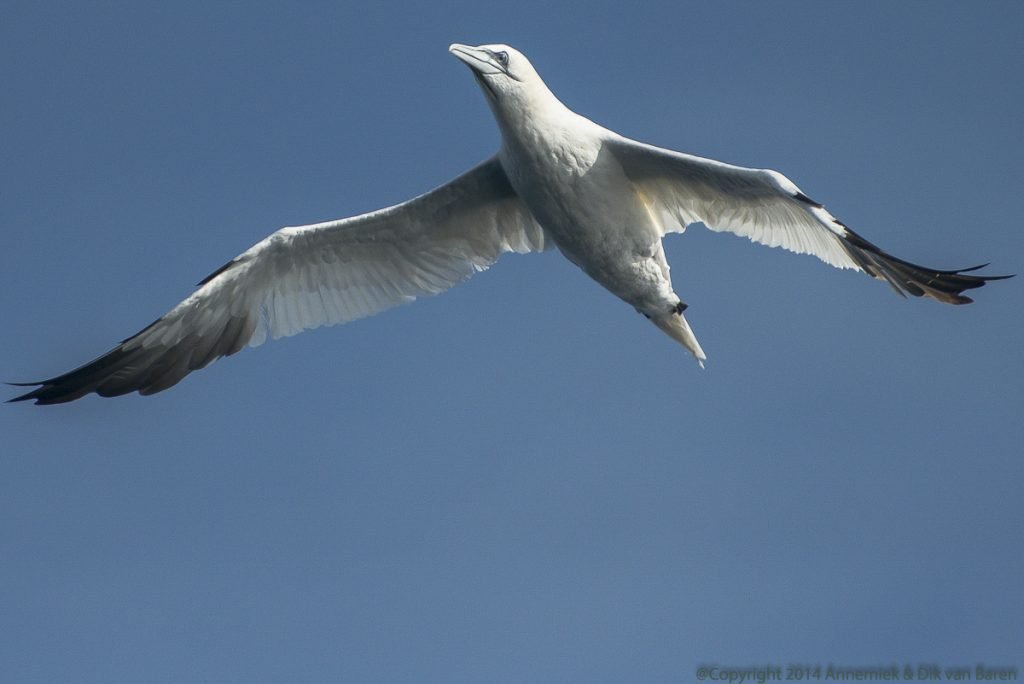
Example 2: Abundant available direct sunlight but a fast moving bird. Autofocus settings: Dynamic anticipating mode 25 AF points, a3 autofocus with lock on=1 (Quick). This f/4-lens still supports 25d advanced autofocus mode using 2.0 converter because actual APERTURE value (lichtsterkte) of the combination is still <= f/8. (Detailed technical explanation at paragraph “Nikons f/8 support” below.)
Our handheld D500 could operate at EXPOSURE TIME 1/8000 second and still receive sufficient light to focus admirably accurately at 40 meter distance at the flying Tern. By the way Nikon’s D500 DSLR is worldwide being regarded as an autofocus champion with great price/performance. In our experience it is indeed a great camera, ideal for bird action photography.
Manual focus
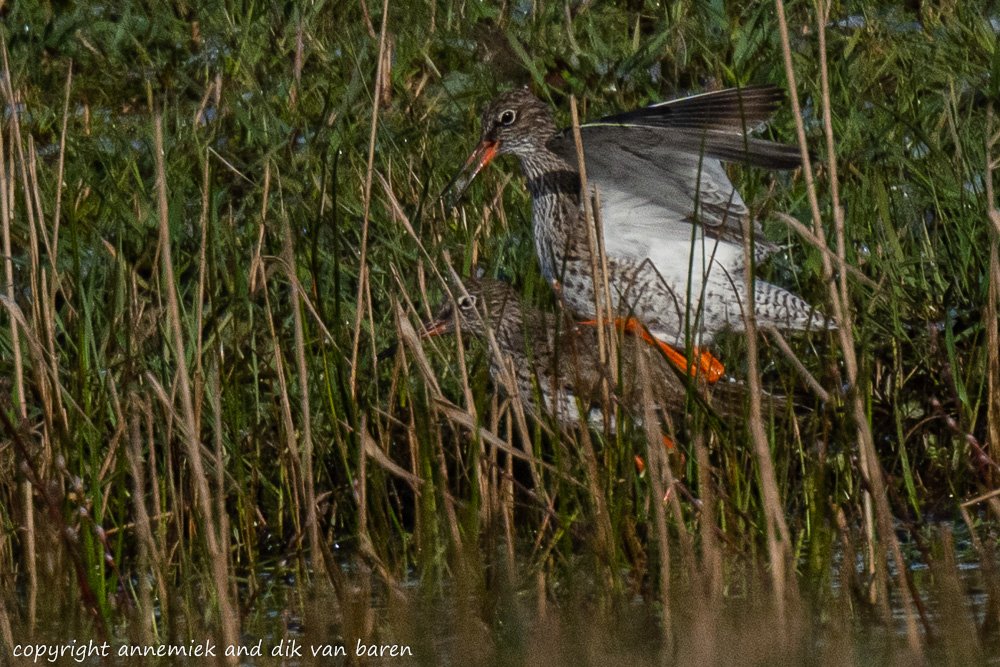
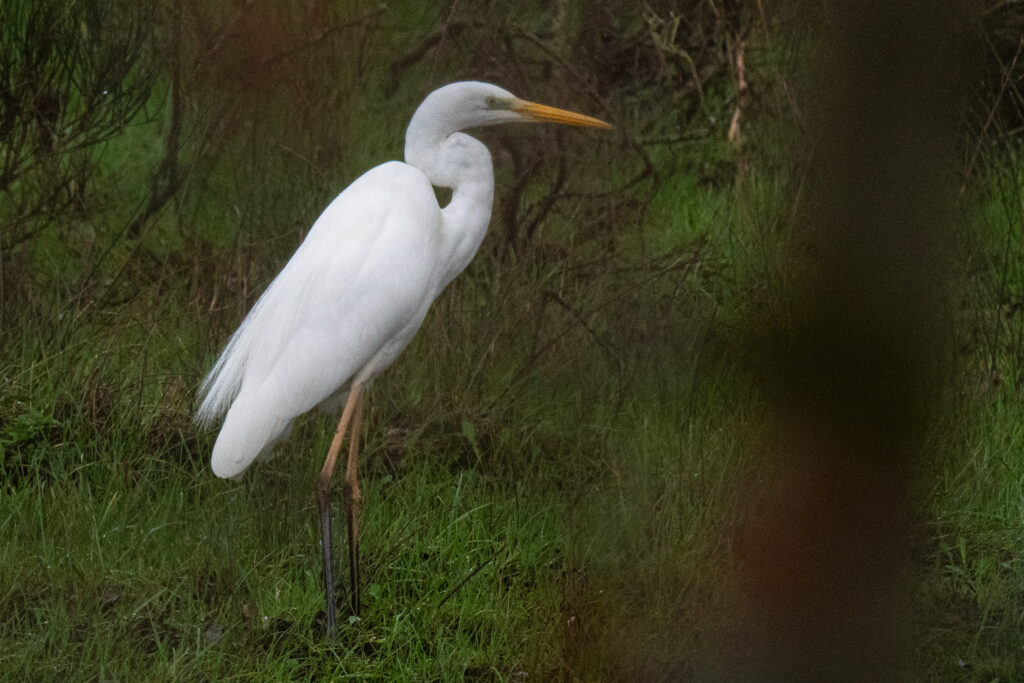
Particularly in bird photography you sometimes have but one alternative: use manual focus, for example when a bird is behind branches, leaves or reed. Also when camera’s autofocus is not immediately reacting, just briefly using manual focus may kick off autofocus. This may also happen in case of insufficient light or when using a converter in low light situations or if the subject has low contrast, etcetera. Anyway, when autofocus is not working right away, briefly touch manual focus ring and thereafter continue using camera’s autofocus. In most cases autofocus will take over the job.
We show two examples where (temporarily) Manual focus was the solution:
Pinpoint autofocus Nikon Z50 camera
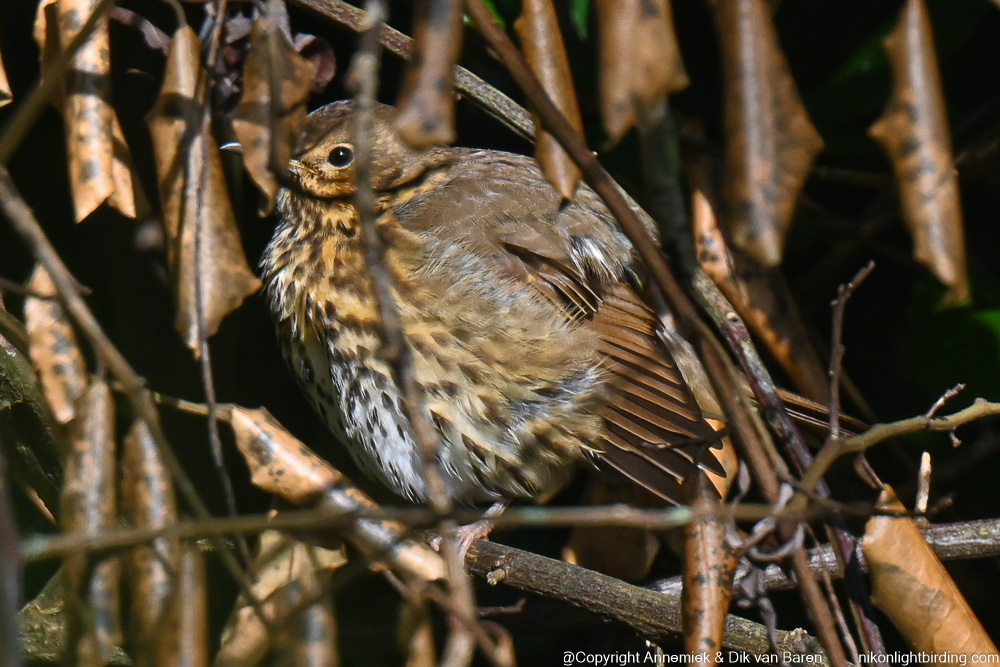
We also frequently use Pinpoint AF (Single point AF being prerequisite) enabling Z50 to focus at birds in between reed or in a tree behind branches and the like. This is often surprisingly succesful. We also appreciate the audio feedback: the beep confirming autofocus.
This feature comes in handy frequently in bird photography if one wants to shoot a picture of a bird hiding partially behind branches, reed or the like. The prequisite is Single Point autofocus. The camera gives also usefil audio feedback i as son as the bird is in focus : a beek b and green coloured little swyar a the spot the camera is focussing. Really useful feature! We use it quite often. Two examples of the same bird in this situation hiding behind branches:
More about setting parameter a3 Autofocus with Lock on
With regard to subject tracking in bird photography setting value a3 Autofocus with Lock on is important in some cases:
When you set a3 AF with lock-ON = delayed (value 5) the camera will wait a some time and keep actual focus locked when something like a tree, bush, reed or another bird, is temporarily between the camera and the subject bird, so you can continue photographing the bird which is still in facs, as soom as it “returns in the picture”. Also when you are handheld tracking some bird of prey hoovering high in the air and you loose from the viewfinder it for a second or so, the camera will hold autofocus for a while and shortly later continue tracking in stead of changing actual focus right away in sted of loosing the bird.
However when a sitting bird suddenly leaves its spot (branch, rock, tree top, etcetera) and flies or dives away or starts hunting, you would like the camera to react promptly and start tracking the bird in stead of trying to focus at the “empty spot” the bird just left behind or, even worse, starting “hunting” (onverrichterzake blijven proberen te focusseren). So in that sort of situations you might set a3 AF with lock-ON = quick (value 1) because the camera should react immediately and track the bird from the very moment it starts flying, diving or hunting or the like.
The underlying problem is of course that in reality you do not always know what will happen in the field. We always make our best quess trying to “read” the situation, like the type of species or the biotope or the expected bird action and thereafter hope for the best. By default we set a3 Autofocus with Lock on = 1 however this is but a calculated guess. This way we try to be always prepared for fast action and get maximal AF responsiveness of our D500.
About Nikon DSLR “f/8 support”
In bird photography one almost always uses telelenses. If however one adds a 1.4, 1.7 or 2.0 converter the lens opening may get smaller than value f/8 (/11 or f/13) so a Nikon DSLR combination will not any more support two advanced Autofocus functions, 3D and auto. When a combination is operating at APERTURE values (“lichtsterktes”) equal or lower then f/8, like f/9, f/11, f13, etcetera, the autofocus sensor cannot use the required large number of AF points to support the two advanced AF modes mentioned. The other advanced autofocus modes, Dynamic anticipating mode and Group mode of the D500 will still be available. If you are using a Nikon DSLR check it out to see how this works.
Some examples:
- D500 Nikkor 500mm f/4E PF VR TC-14E (APERTURE value f/4) will support 3D and auto.
- D500 Nikkor 500mm f/5.6E PF VR (APERTURE value f/5.6) will support 3D and auto.
- D500 Nikkor 500mm f/5.6E PF VR TC-14E (APERTURE value f/8) will support 3D and auto.
- D500 Tamron G2 150-600mm f/5.0-6.3 (APERTURE value f/6.3) will support 3D and auto.
- D500 Tamron G2 150-600mm f/5.0-6.3 TC X14 (APERTURE value f/9) will not support 3D and auto.
- D500 Sigma Sport 150-600mm f/5.0-6.3 (APERTURE value f/6.3) will support 3D and auto.
- D500 Sigma Sport 150-600mm f/5.0-6.3 TC 1401 (APERTURE value f/9) will not support 3D and auto.
Autofocus and depth of field (DOF)
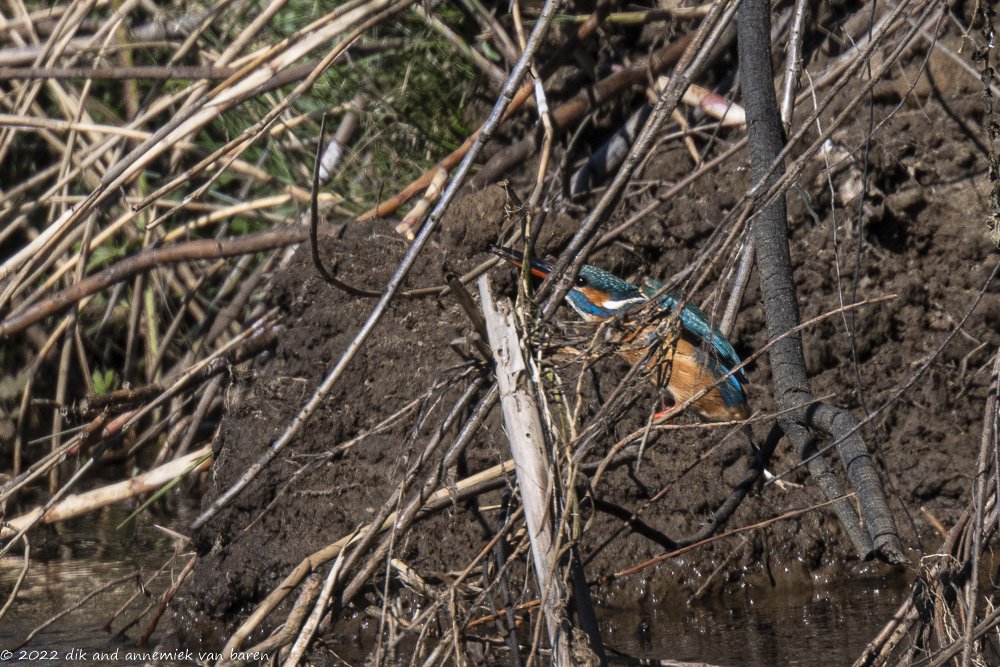
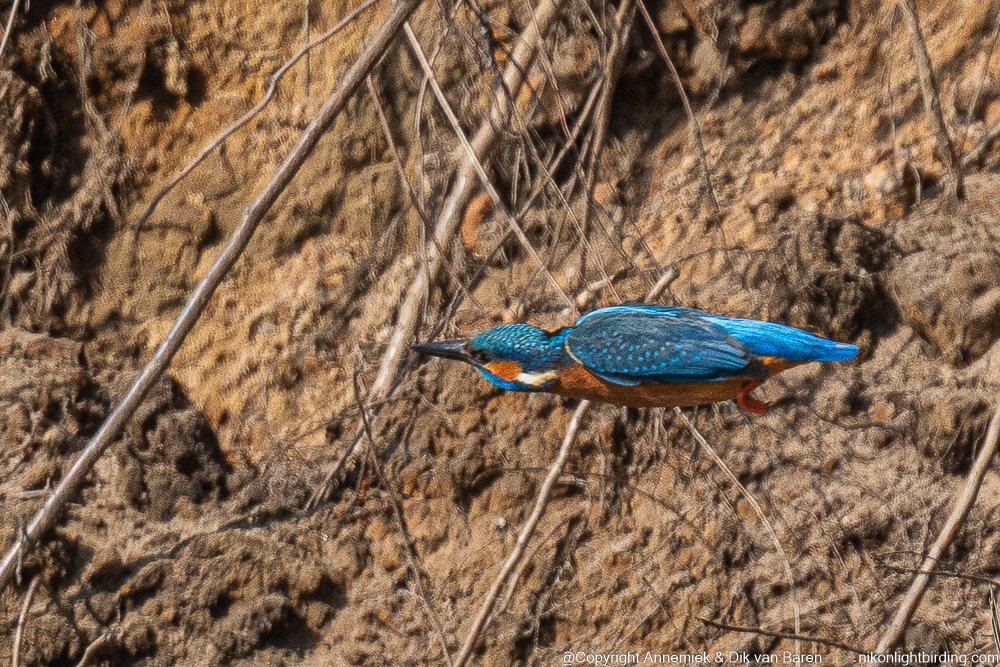
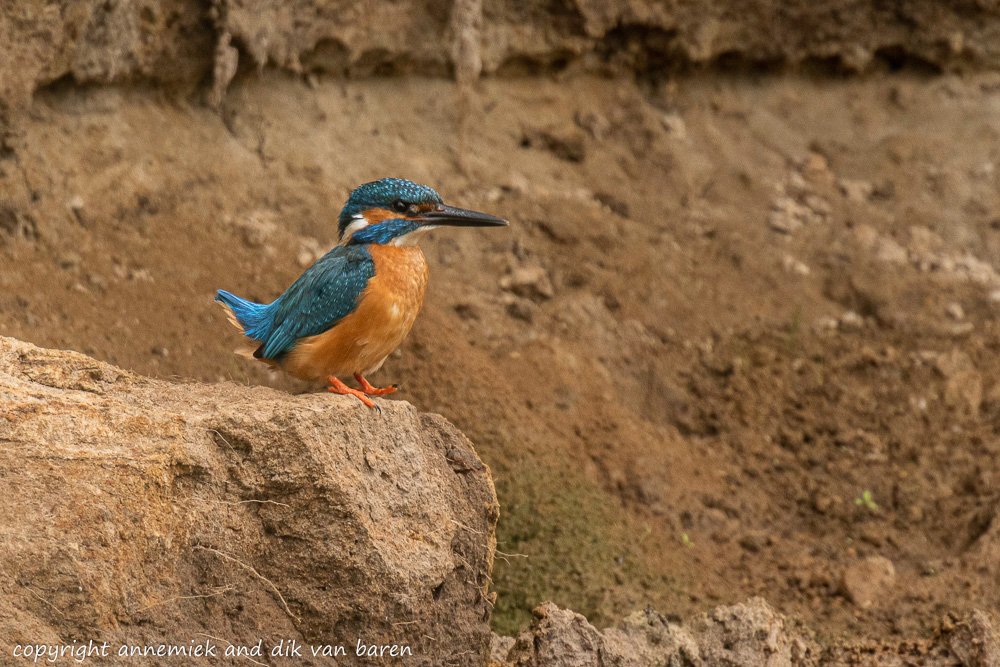
“DOF“, short for ‘depth of field” is the distance within which your subject is still sufficiently in focus even when moving to or from camera. You can use this DOF when you have focussed accurately on a bird that shortly thereafter may move to or from the camera and the camera does not succeed subject tracking a fast starting bird like a Kingfisher (IJsvogel) or Woodpecker (Woodpecker). In such a situation you can use actual DOF as follows:
- When bird is still stationary, focus at the bird
- Press and hold AF-AE Lock button (or other button reassigned to AF-AE lock function) to lock autofocus at current distance and lock current EXPOSURE measurement)
- Move camera away to the expected next spot where the bird will be located (upper right corner in example Kingfisher below)
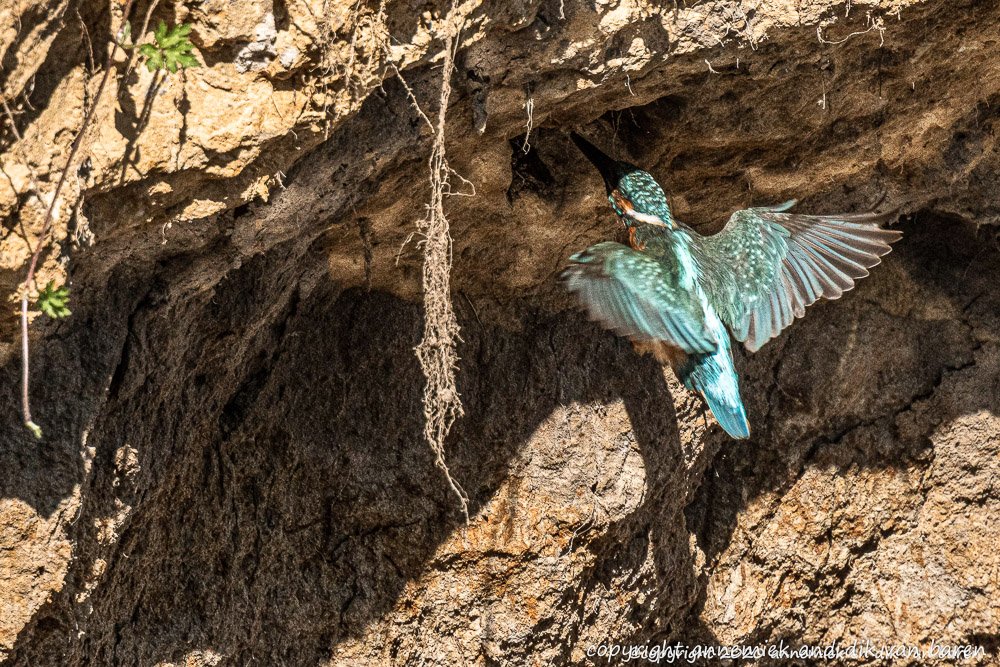
- Full press & hold Release as soon as bird starts flying (upwards to nest in example Kingfisher below).
The resulting pictures may be in focus as long as the bird has been moving within actual DOF. Often this method yields surprisingly good results although when using telelenses actual DOF is usually restricted to decimeters. See the example below of a Kingfisher (IJsvogel) expected to fly up to his nest.
More easy of course is using back button autofocus & focus and recompose. This situation is a typical focus and recompose situation.
qqq overall pic here yet qqq
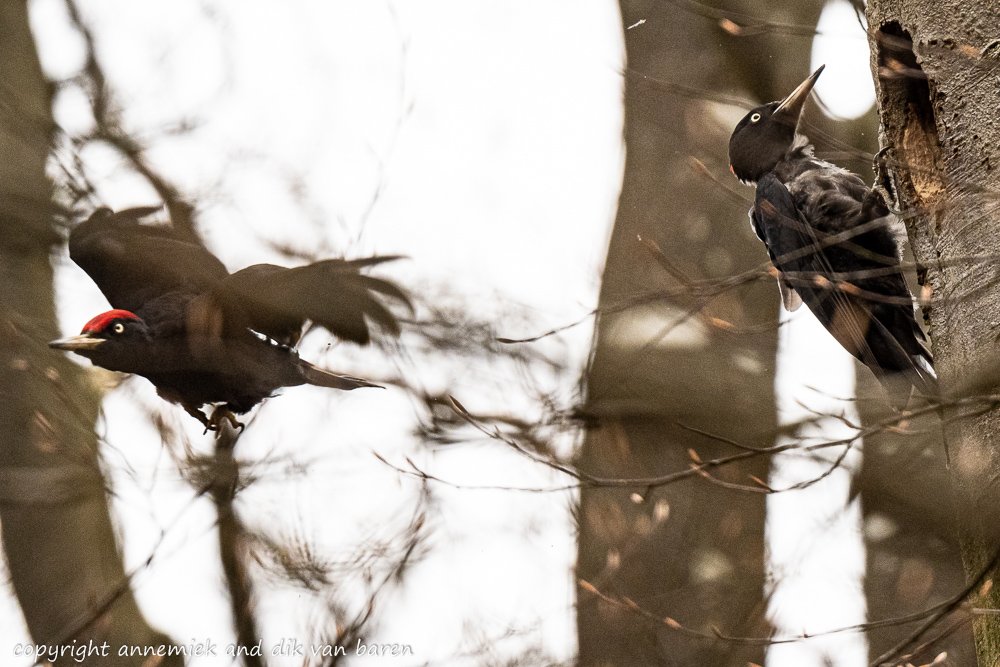
Focus locking at subject at same distance as bird
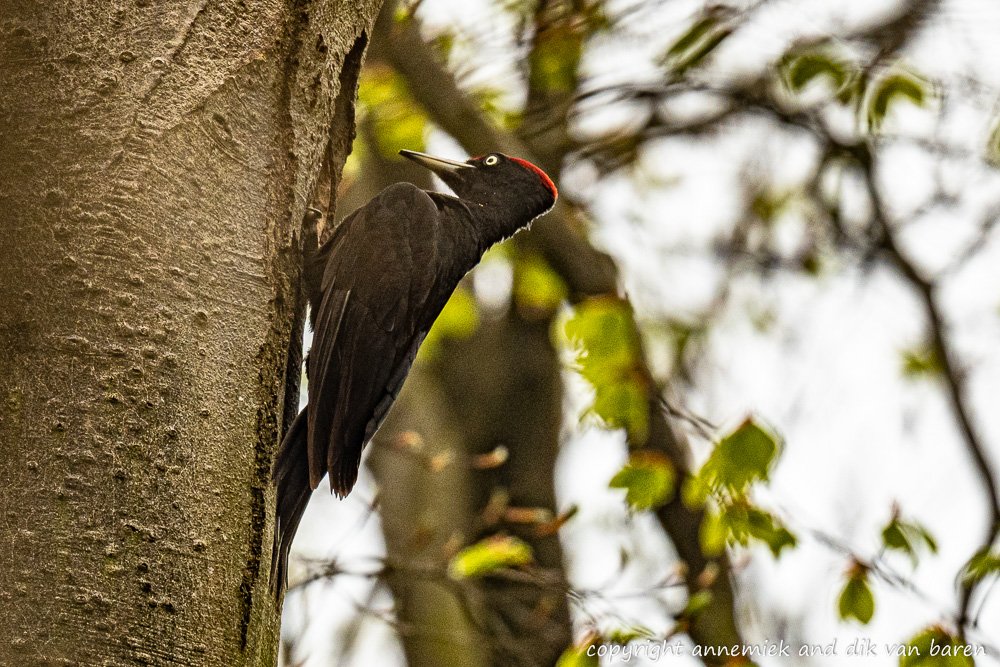
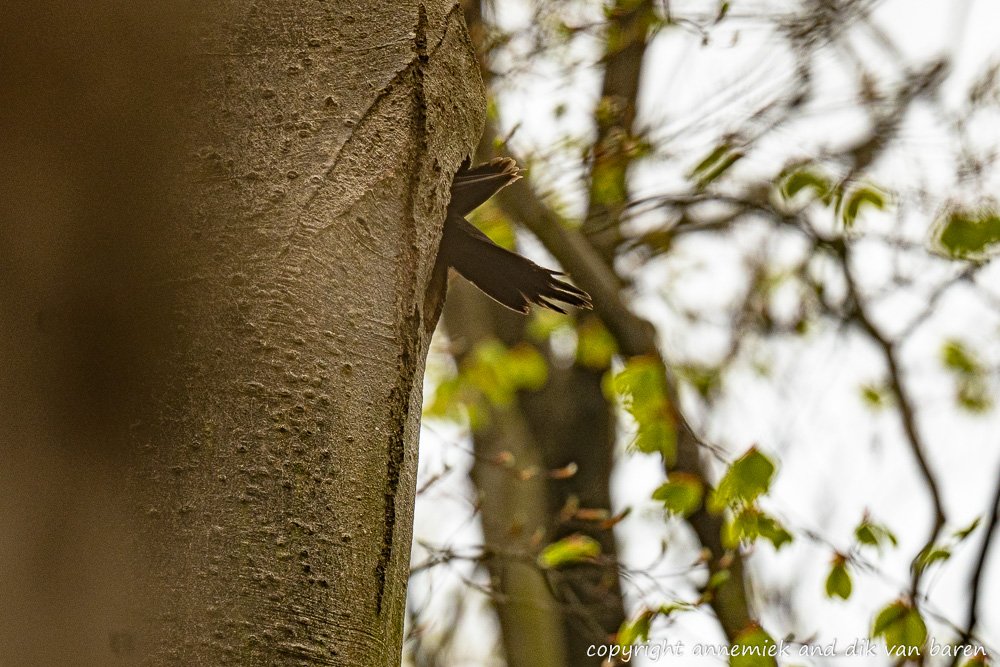
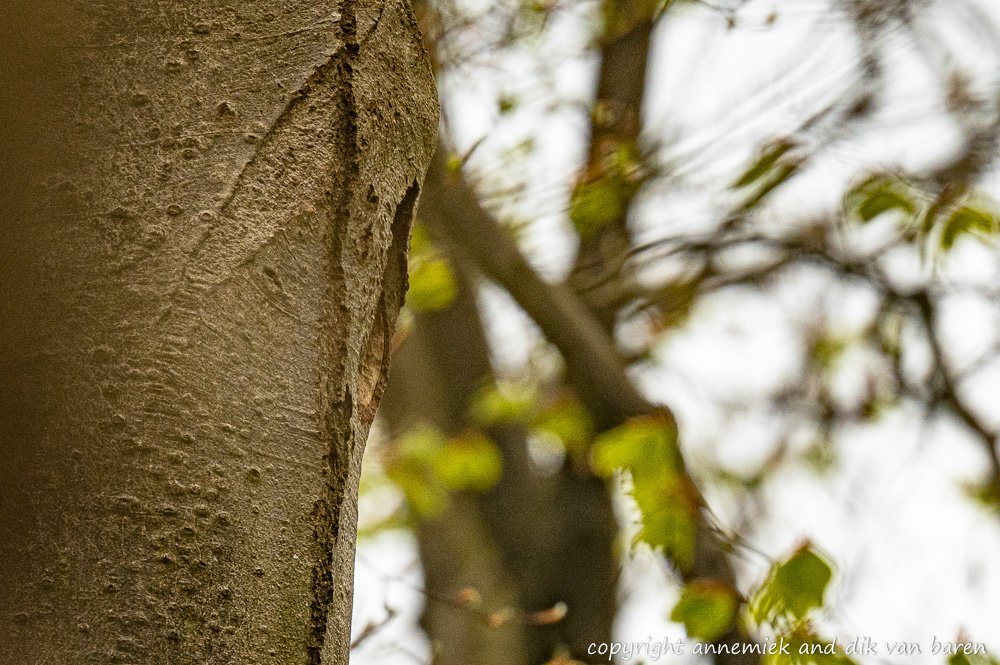
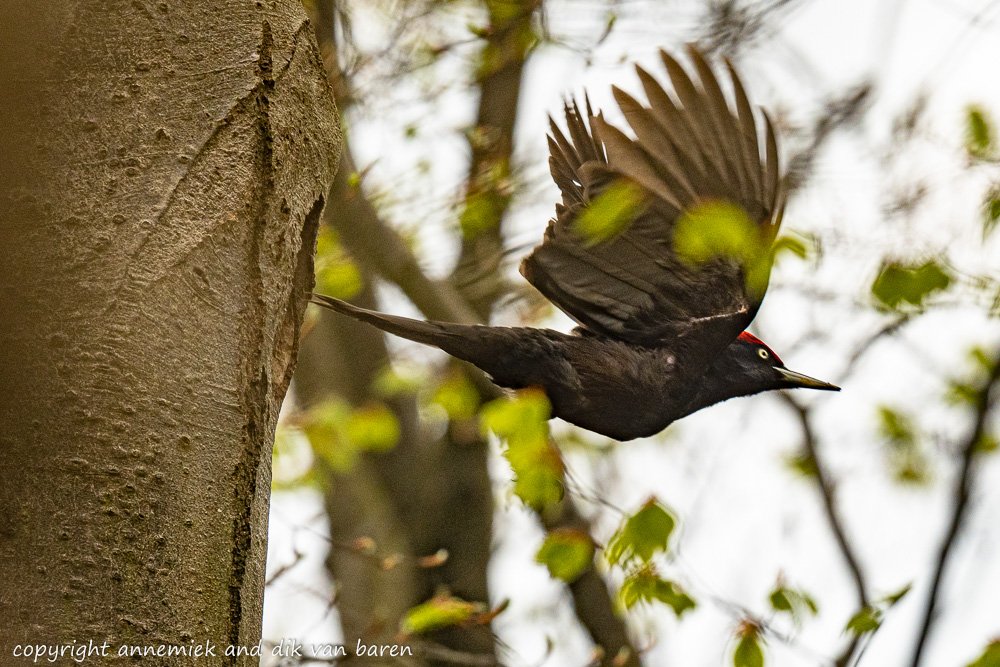
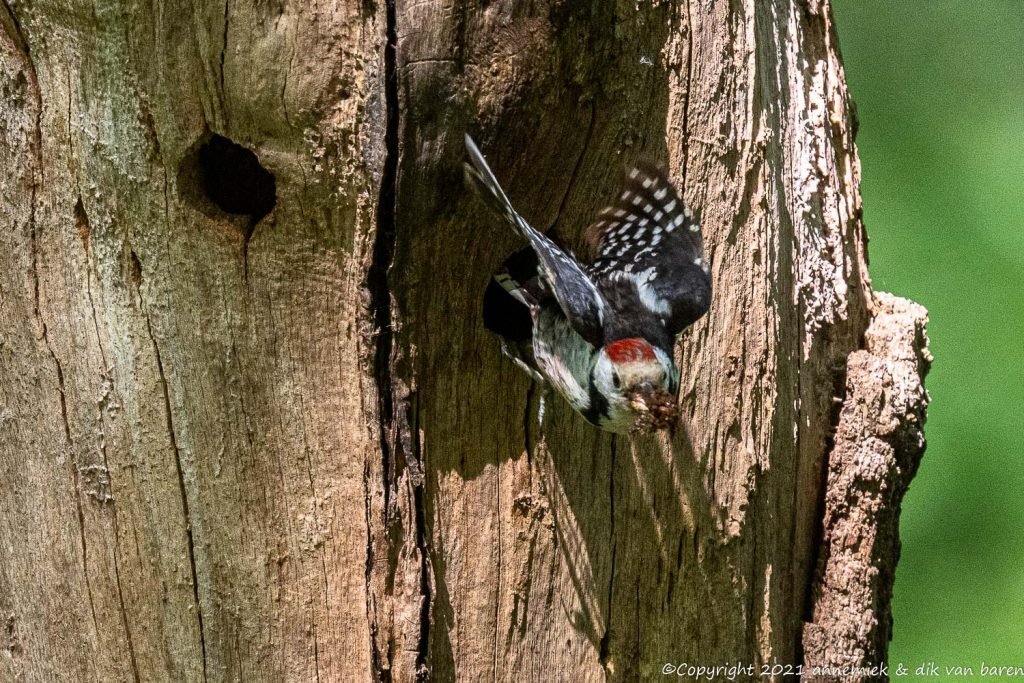
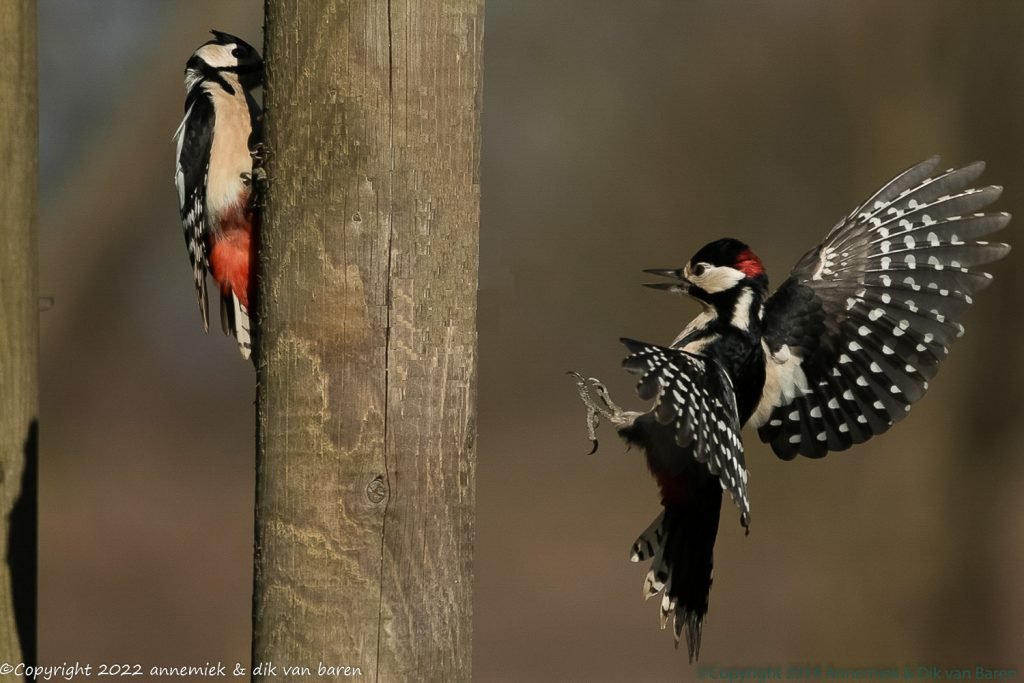
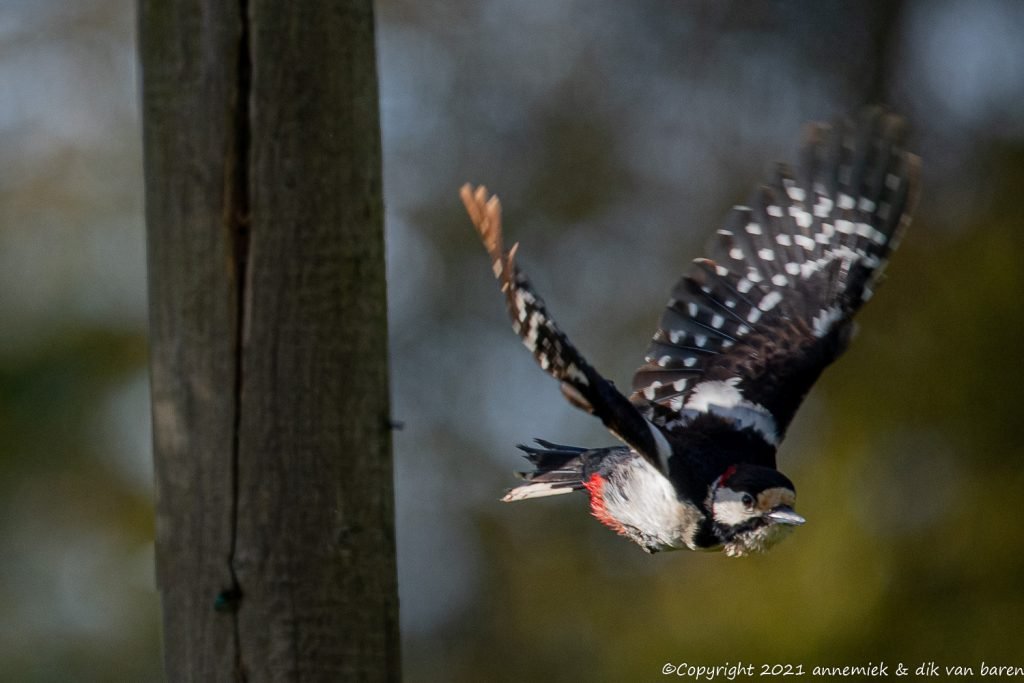
Look at a second, somewhat different example, of focus locking technique. A Black Woodpecker (Zwarte Specht) is expected to arrive at his nest and to leave the nest soon afterwards once he/she has fed his/her young. Focus tracking on the bird when arriving or leaving the nest may not work here, because this bird is fast and you may not react quickly whenever it arrives or leaves its nest inside the tree. So you have to once more anticipate and:
- 1) Focus camera in advance at a spot at the same distance as the bird will be, like the tree itself
- 2) Press and hold AF-AE Lock button and thereafter point camera at yet “empty”spot near tree hole
- 3) Wait … (this may take several minutes…)
- 3) Full press Release button as soon as the Woodpecker is leaving the nest.
If you would do all this without first locking autofocus at the tree you might have caused the camera to start “hunting” and “trying to focus at emtpy air” when the bird leaves nest and you full press Release not at the right moment and or miss the shot of the bird flying out off the nest opening. By the way you better do all this using camera on tripod. The same technique can be used when photographing a bird feeding its young or other complex activities.
More easy of course is also here using back button autofocus & focus and recompose. This situation is also a typical focus and recompose situation.


Practicing advanced autofocus settings
It definitely is worthwhile to spend ample time in practicing focussing skills, learn about AF advanced modes and the effect of camera and lens focus settings. Also practicing focus and recompose and back button focus is very rewarding. When practicing this may help:
- Practice on objects in stead of birds. Only very expensive camera’s do notice the difference between a tree, stone or bird. You can also choose any “speed of bird” when testing the effect of switching camera in 3D mode or Auto mode because you can see the illuminated central autofocus focus point moving in your viewer and figure out at what speed the camera looses autofocus at your bird! This is also a good method of getting some insight about maximum tracking speed of your camera in various AF modes.
- You can check at which point the camera has actually focussed when viewing your pictures in the camera, option red illuminated, or when using for example program ViewNX, menu option focus point.
- Move camera instead of bird. The camera does not notice any difference in what is moving, bird or camera.
- Practice at slow and common birds like Crested Tit (Koolmees). Thereafter try faster or more “advanced” birds.
- Use colourful objects or birds to try out 3D mode.
- Keep trying until you know how to get focussed pictures and when and why and when and why you do not succeed: lack of skill, too fast bird, restricted potential equipment, great party the night before ...
Continue practicing and analyzing your test pictures until you succeed. Particularly modern camera’s like D500, D850, D750, Z7 II or Z6 II can do a great job in tracking fast or unpredictable flying birds. On the average though Nikons DSLR‘s still perform tracking a bit better than the MLC‘s. This may change over time. Be aware also that photographing these birds can be discouraging if you are somewhat unsuccesful in the beginning. You would not be the only one. Keep trying. In the end you may get amazingly rewarding results and be happy ever after.
Some extra information regarding focus and focus tracking:
Active AF points red illuminated
In all advanced autofocus modes the camera will show all active AF points red illuminated during a short time . Thereafter it will only show central AF point red illuminated. This will give you a mor clean overview of the action in the following moments when you have to decide if and when to half press Release button once more or to start a new cycle of tracking bird action or to full press to make a picture.
Switching camera from any advanced AF mode to standard dynamic mode
Make sure you know by heart how to quickly switch camera from any advanced AF mode back to standard dynamic mode (for example: D500 requires two backward clicks front wheel while pushing AF switch frontside to switch back from Auto mode to d25 mode for example when you want to resume dynamic focus tracking after having lost your target bird in Auto mode.
If using a 1.4 converter a Nikon DSLR will maximally use 37 AF crosstype points
When you add a 1.4 or 1.7 or 2.0 converter to a combination like D500 Nikkor 500mm f/5.6E PF VR your Nikon DSLR camera willl only use 37 of its total 99 cross type AF points. This will significantly decrease autofocus accuracy and tracking potential.
Avoid stopping down lenses.
Use stopping down lenses selectively. It decreases autofocus speed and reliability.
Fast (starting) birds can not always be tracked by D500 or Z50
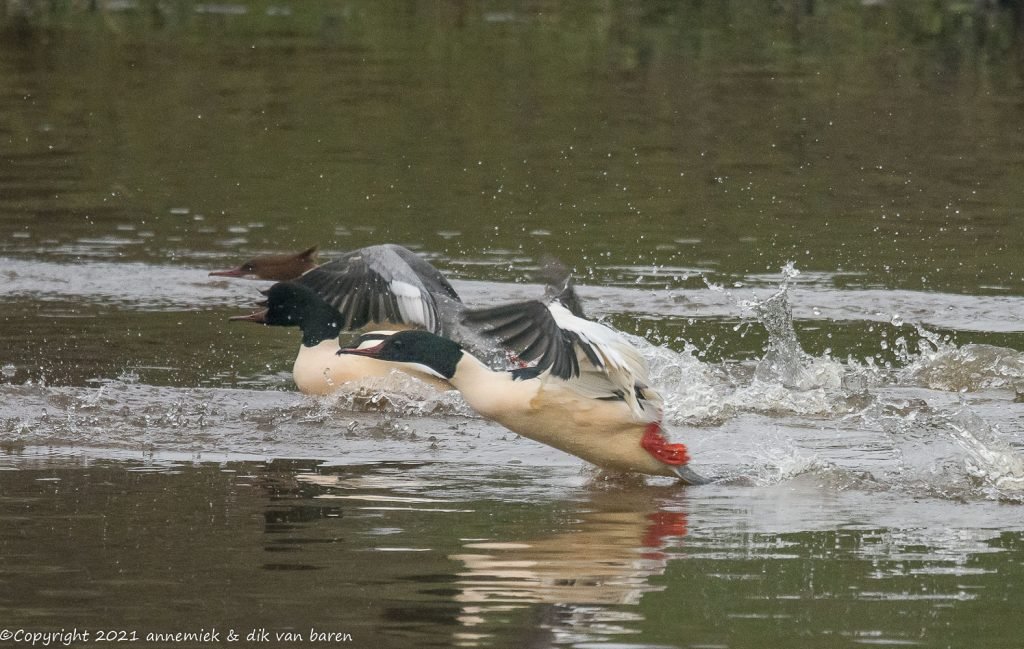
Once more: Using time stamped pictures by D500-speed measurement shows that for example our D500 and surely our Z50 often do not always manage to track fast starting, fast moving or unpredictably twisting and turning birds like Great Spotted Woodpecker (Grote Bonte Specht) or Terns. You may need more powerful equipment like D6 or Z9 for these cases. Even when, without converter, using our fast Nikkor 300mm f/4E PF VR, wich gives us twice the amount of light of a Nikkor 500mm f/5.6E PF VR, the D500, as good as it is, could not always keep up with all twists and turns of this fast Woodpecker or some Terns.
Nevertheless we are quite happy with the results using our lightweight Nikon equipment. And anyway: setting autofocus related switches and menu items correctly, developing skill and practicing are absolutely and definitely key in this area of bird photography. And this always works: photographing fast moving birds within their actual depth of field, particularly when they are flying “horizontally through the picture”, often even when to or from you.
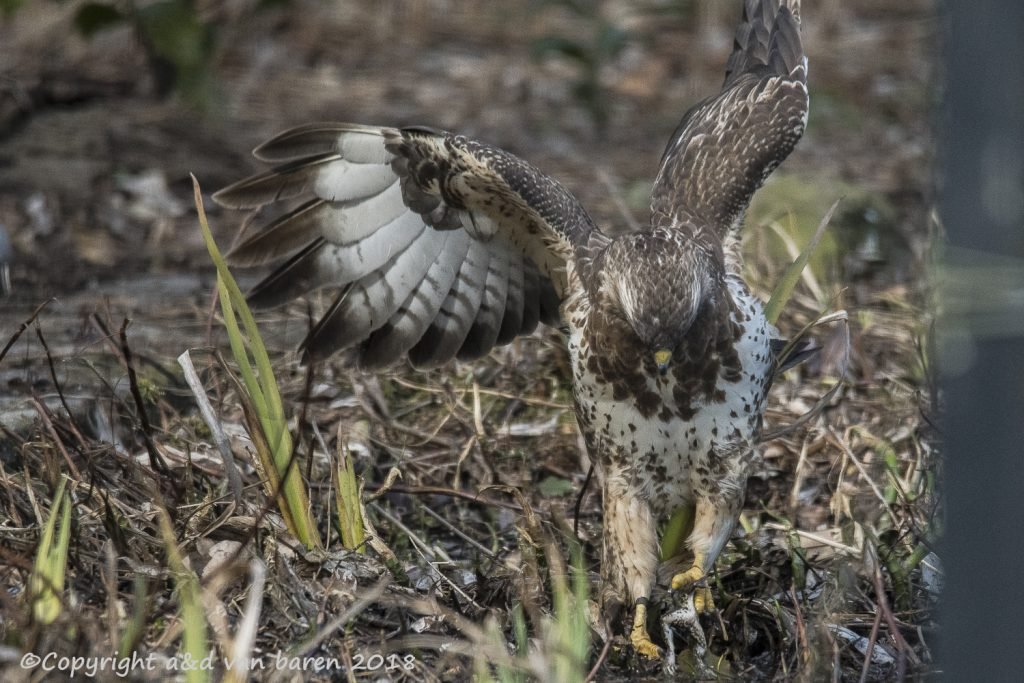
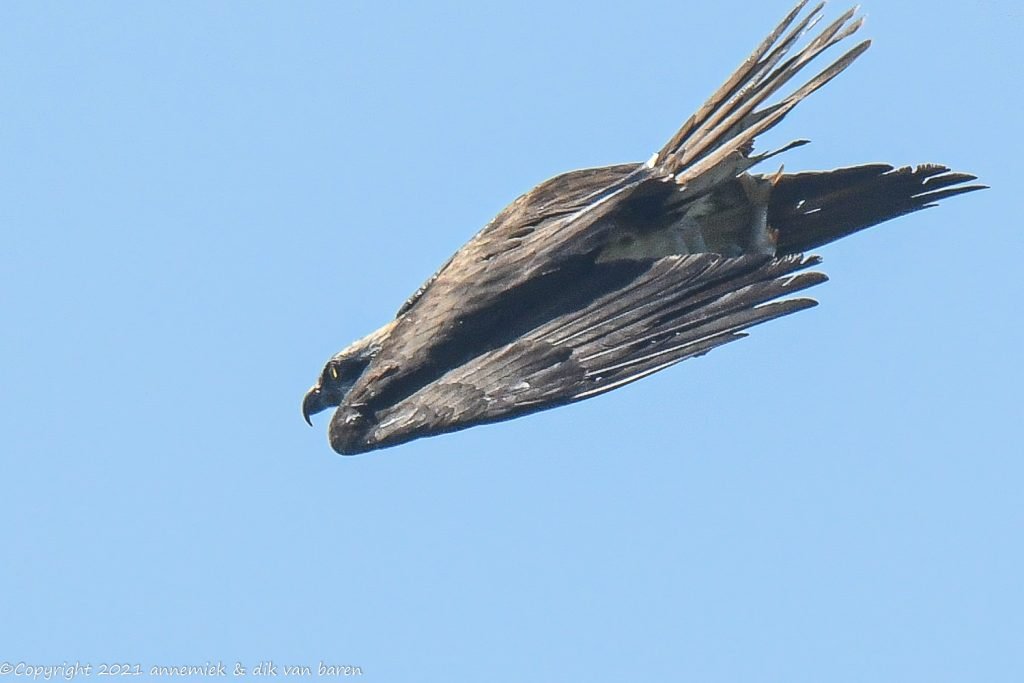
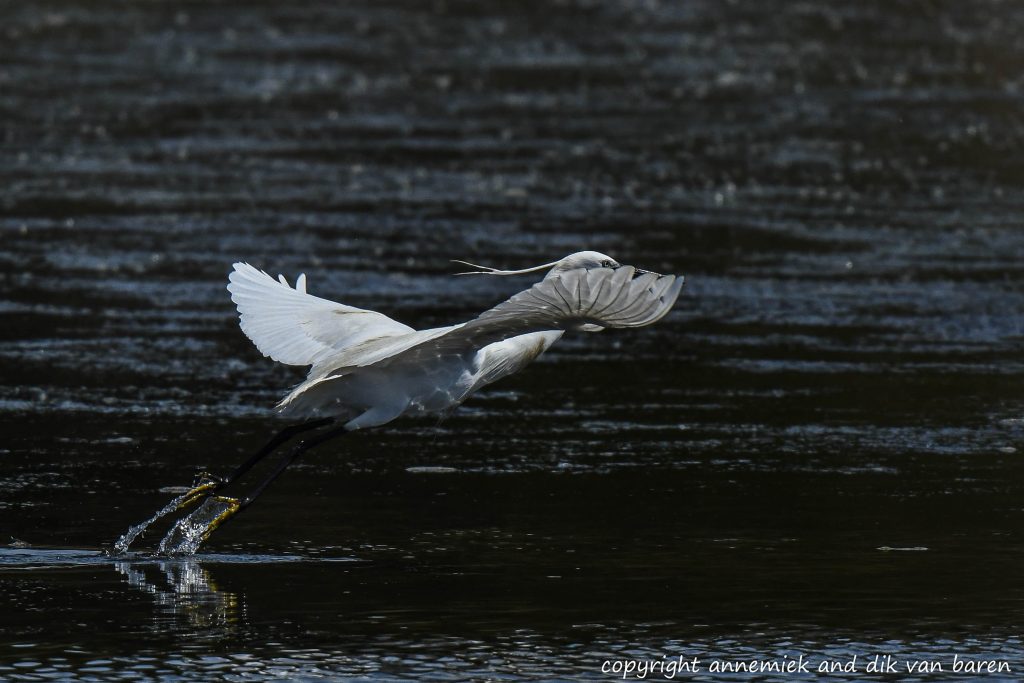
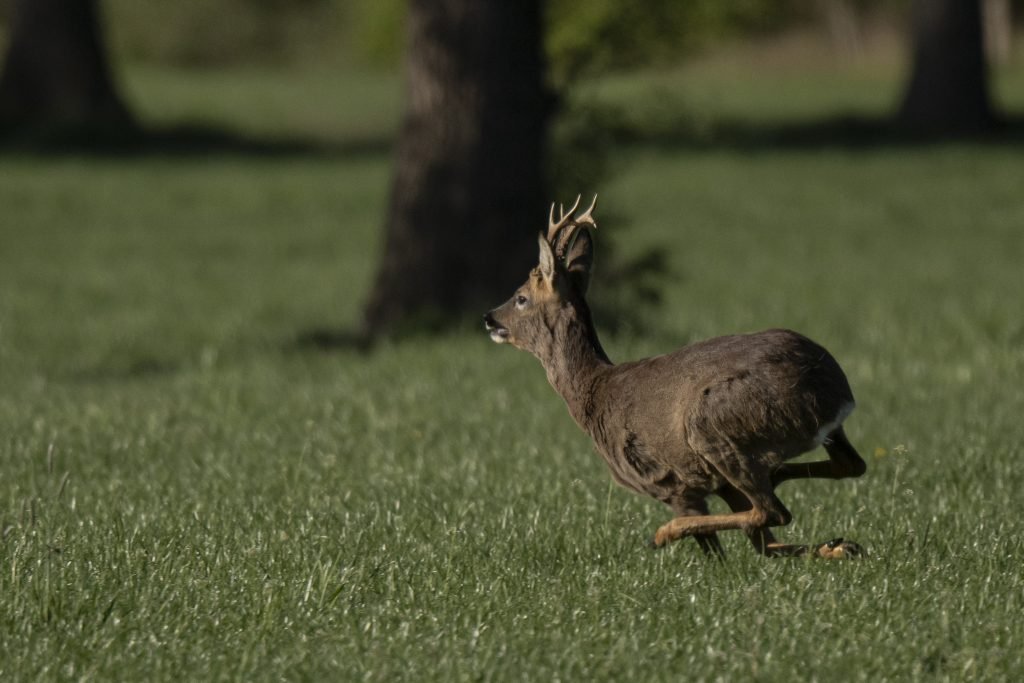
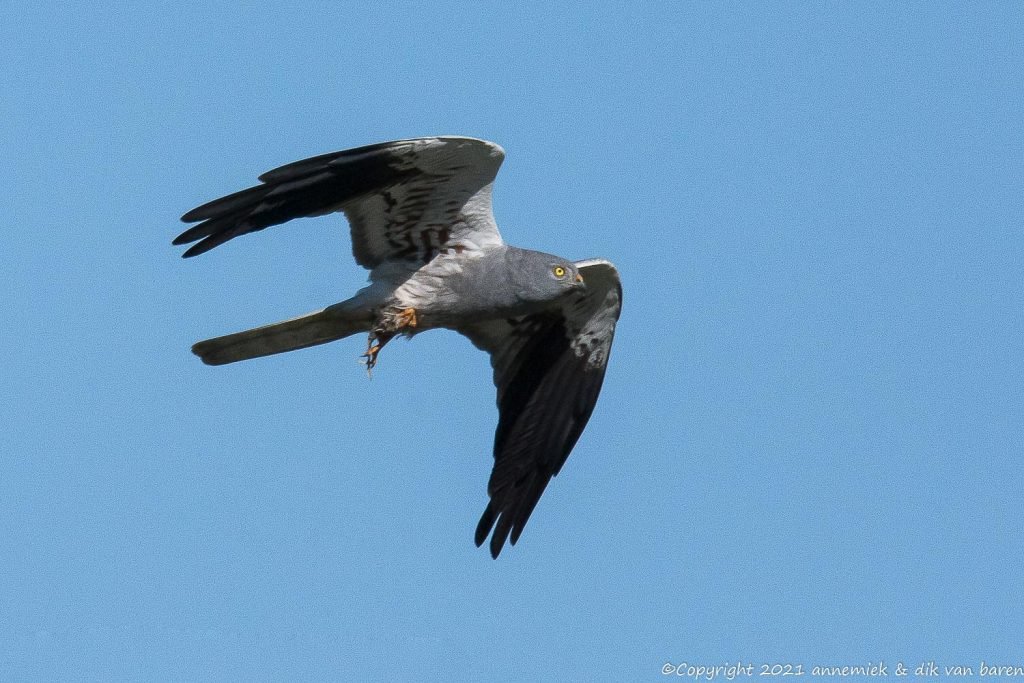
Examples of focussing action or focus tracking:
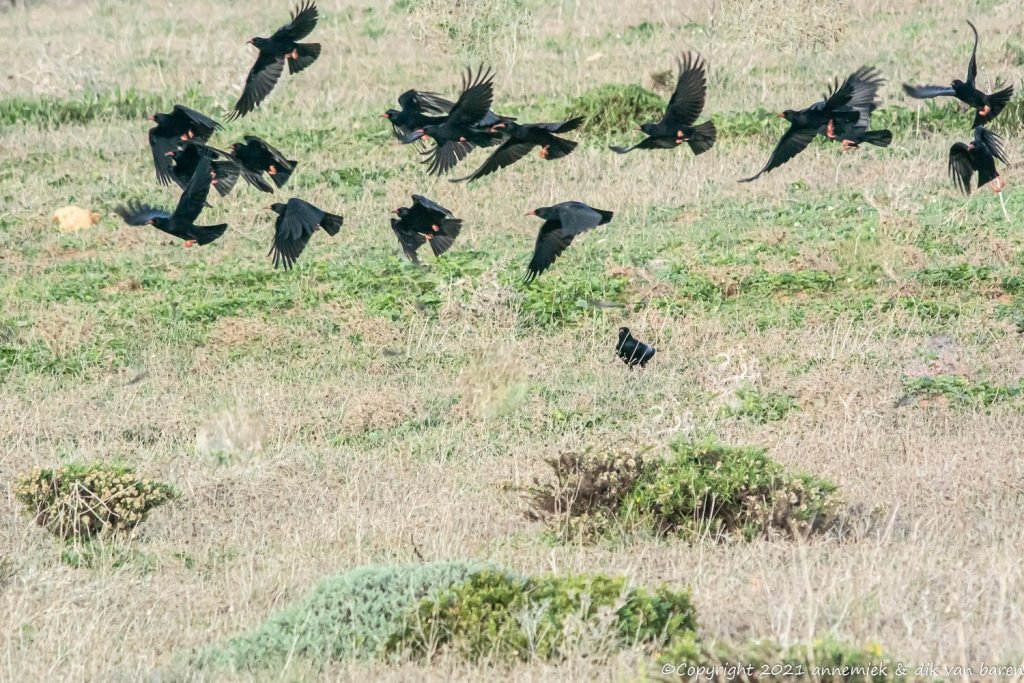
The following series of pictures of active birds (and other animals), all situations where we expected action or anticipated some activity like the Peregrine (Slechtvalk) we expected mating, or could focus track a fast moving bird succesfully because our D500 combination could manage this. Mostly we worked handheld but used Z50 Nikkor 500mm f/5.6E PF VR TC-20E III almost always on tripod using sight to immediately and precisely direct the camera at bird(s) at large distance like the Caspian Terns (Reuzesterns) at over 100 meter in the examples below.
(F11 for full screen, mouse click (at + sign in the middle of the picture) to start, Esc to stop:)


click: start arrows: next/previous picture Esc: stop/repeat

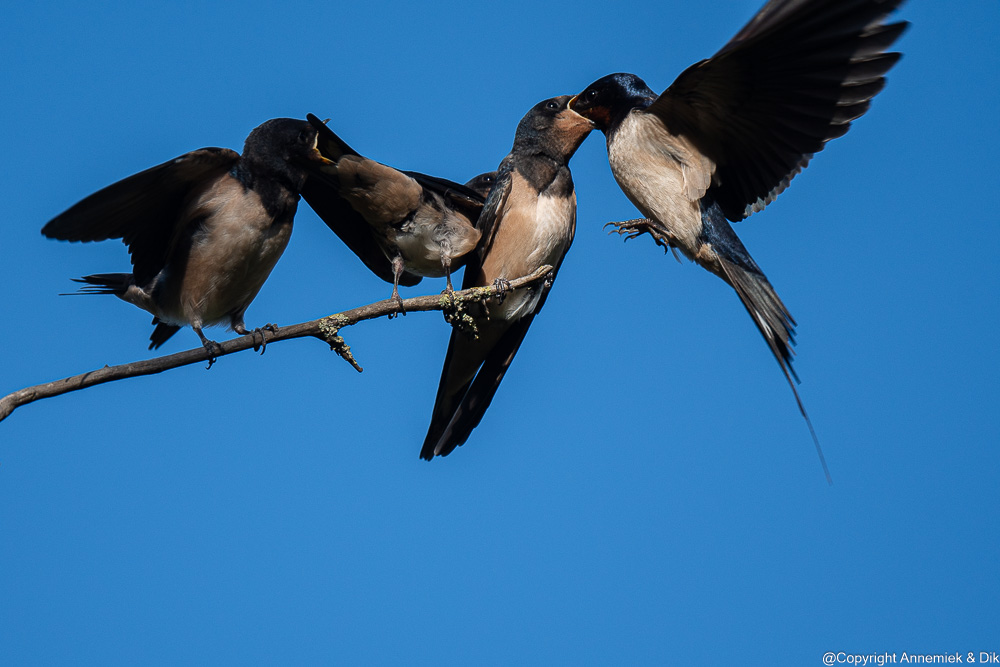
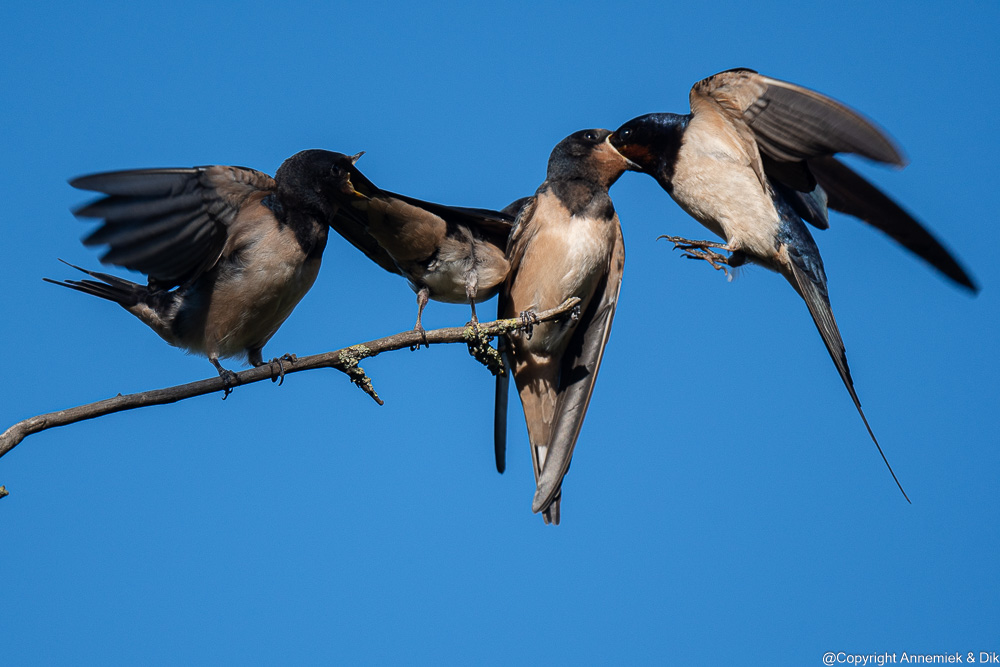
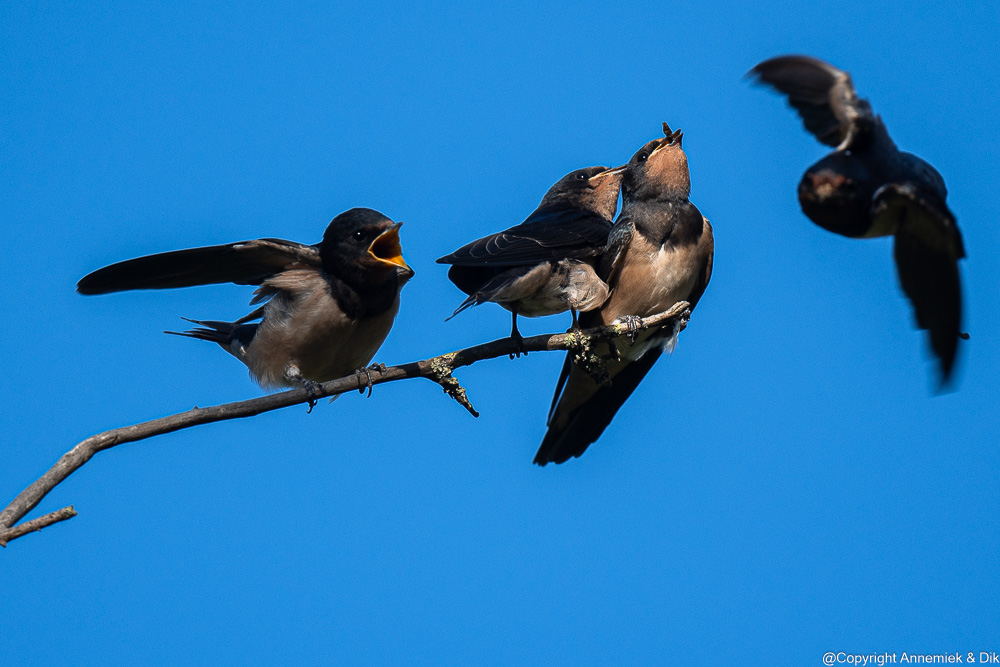
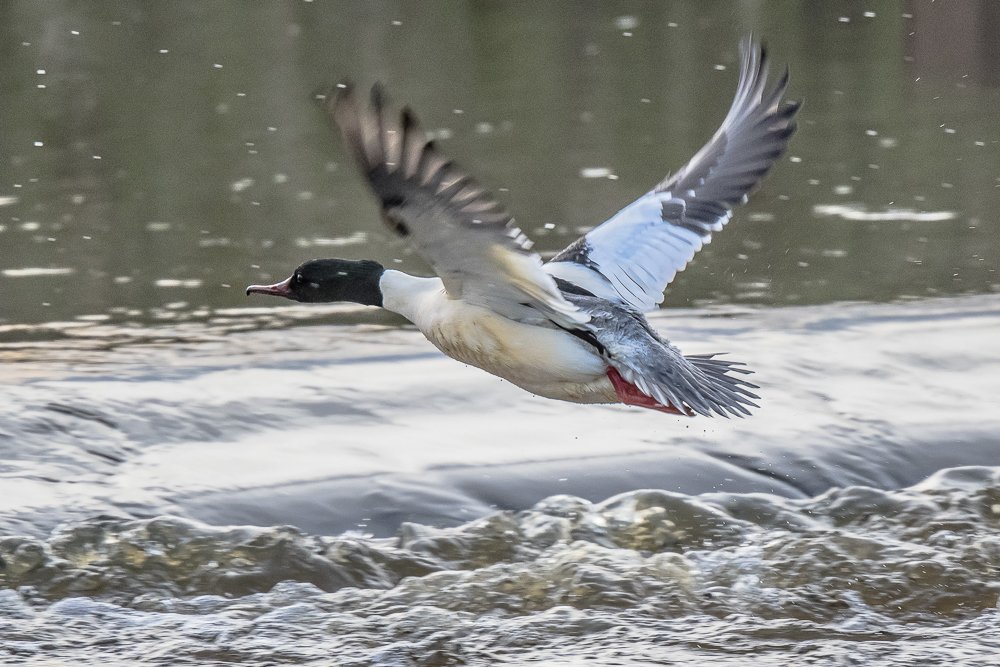
Holland 2023 sun Swallow 18cm distance 9m equivalent 750mm D500 Nikkor 500mm f/5.6E PF VR 750mm (5 subsequent pictures).
Pingback: Bird photography
Pingback: WS4 APERTURE – nikonlightbirding