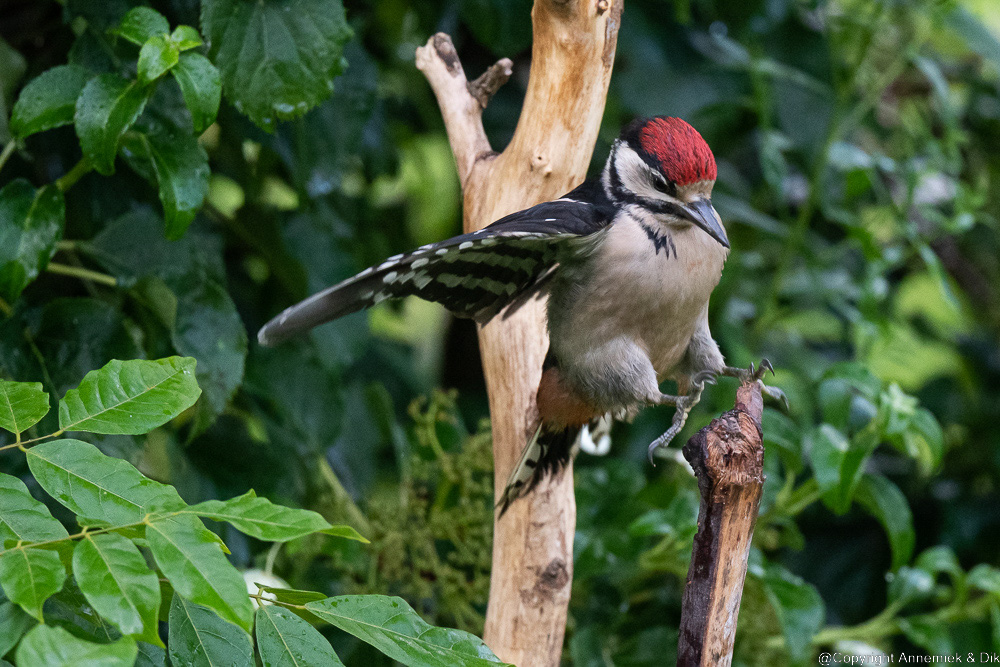
Foto at top: Holland June 2022 cloudy Great Spotted Woodpecker (Grote Bonte Specht) juvenile size 22cm distance 12m equivalent 750mm D500 Nikkor 500mm f/5.6E PF VR total camouflage, ISO Sensitivity automatic Max ISO 3200 Min. shutterspeed 1/2000 (anticipating fast action). Actual values 1/1000 f/11 ISO 1800. Focussed at head bird.
F11: Full screen !!!
D500 and the D6 autofocus module Nikon
Decennia ago, as soon as we could afford it, we bought our first serious Nikon DSLR EL2 with Nikkor 50mm f/1.4, a wonderful combination that gave us many lovely pictures. Many years later Nikons D300 saw the light, also targeted at “serious enthousiasts”. We bought this camera, used it also loved it many years and waited for the next generation Nikon DSLR, year after year. It took Nikon until 2016 to introduce their D500. Why did Nikon wait so long?
One explanation is that in 2007 the “almost perfect” D300 could at the time not significantly be improved any more except by transplanting advanced feature(s) from one of its big brothers into this camera. In 2016 Nikon produced its probably last model semi pro DSLR, D500. They integrated the powerful Multicam 37k 105 crosstype AF points autofocus module of their pro camera D6 into it. The great D500 became the fastest autofocussing DX DSLR in the world ever. We are using it up to today, next to our mirrorless Z camera’s. The following table lists D500 optimal settings for lightweight bird photography.
Settings APERTURE mode Birds D500
| Item | Setting | Explanation, comment |
|---|---|---|
| =========== GENERAL =========== | ||
| Language: | English | matching camera buttons, shortcuts Lightroom, online info |
| Camera PASM switch | A | APERTURE mode |
| Picture Quality | RAW 14 bits lossless | maximum detail and contrast |
| Color Space | Adobe | compatible with Lightroom, ViewNX, Faststone Editor, etc. |
| Camera speed (Pictures/second): | Continuous High | prepared for fast bird action … |
| Beep Pitch | low | possibly strong if windy |
| ============ LIGHT ============ | ||
| No stopping down lenses | Irrelevant modern telelenses. 100% light for AF, contrast detail | |
| Actual photography using … | stay under f/11 APERTURE value | 1) reliable AF 2) AF 3D & auto |
| Centre weighted sensor area automatic light measurement: | 6 mm | significant part bird image |
| (we) mostly position bird in centre viewfinder | centreweighted light measurement | we mostly position bird in centre viewfinder, focus and possibly recompose … |
| Apply systematic underexposing | -0.5 – -2.5 EV | protect detail highlights picture |
| Increments | 0.5 EV | quick and easy changes EXPOSURE during photography |
| b4: EASY EXPOSURE | ON | set under/over EXPOSURE via subdial camera, not via small +/- button |
| Auto ISO Sensitivity Control: | ON | Camera calculates actual EXPOSURE TIME picture. You define parameters used: 1) Base ISO D500 100 2) Max. Sensitivity 3.200 ISO *) 3) Min. Shutterspeed 1/1000 sec |
| Whitebalance | Automatic, AUTO2 (occasionally imperfect white) | Whitebalance is perfectly correctable in post production. |
| ========= AUTOFOCUS ========= | ||
| AF mode default: | AF-C GROUP mode | |
| AF parameter a1 | focus | priority focus: only in-focus pictures written to card |
| AF parameter a3=1 | focus | Hold current AF value until subject reappears in picture any time subject temporarily blocked by something passing by in front of it. Also “applied” when bird suddenly starts flight, dive, etc. |
| a8 | AF-ON Only | AF via AF-ON button (and shoot picture via Release button): “Back button autofocus“: separate autofocus from shutter release function! |
| a9 | Only Single point mode and GROUP mode are enabled. | qqq |
| CAMERA HANDLING ***) | ||
| Front dial camera not used | APERTURE value constant! | |
| Thumb at AF-ON button: enabling autofocus camera | Forefinger at Release: shoot picture(s) at the right moment(s) | When required use focus and recompose (often repeatedly). |
| Thumb at back dial camera for EXPOSURE Conpensation | Thumb controls “Easy EXPOSURE Compensation“ | Far more easy and reliable than using small +/- button camera. |
*) Standard Maximal ISO 3.200, by exception 6.400 or 12.800 if bird/situation unique or exceptionally valuable.
**) only if significant changes in amount of light: sun <-> cloudy, backlight <-> frontlight, etcetera!
***) Easy, comfortable camera handling is an essential element in lightweight bird photography!
****) WARNING ! Don’t use standard camera button Easy EXPOSURE Correction +/- any more once you have set menu parameter “ISO sensitivity automatic” ON!
With the above settings your Nikon D500 camera will set ISO and EXPOSURE TIME values automatically within your personal limits. Also you can adjust EXPOSURE TIME infrequently with thumb at subdial and always have your other hand free to redirect camera or tripod, support telelens, touch manual focus ring, etcetera.
Autofocus settings APERTURE mode Birds D500
We set up our D500 for two different autofocus modes, GROUP mode, our standard default mode and an alternate mode, SINGLE POINT mode used for special situations where you need to precisely aim at bird(s) notin the open but partly hidden behind leaves, reed, branches or the like. We also want to be able to easily choose between these two modes in appropriate situations.
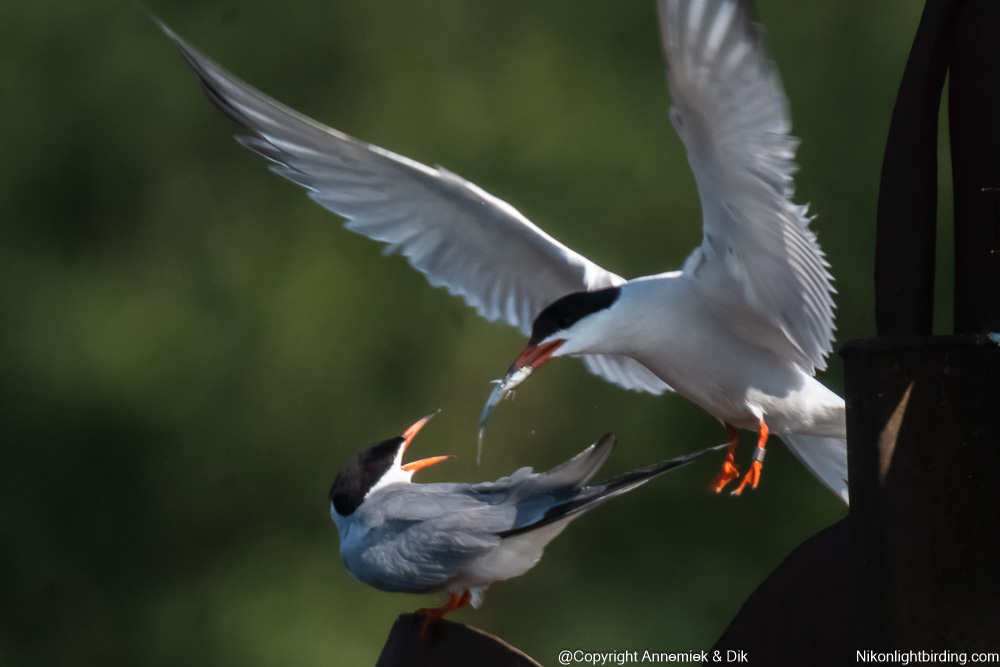
- Our default AF mode: AF GROUP mode: maximally quick autofocus in case of moving, flying or starting birds. You can direct the GROUP of AF points acting as one “large sensor surface” at the target bird(s) in your viewer and use the power of the AF module to acquire focus precisely at the bird(s). This GROUP AF mode seems to be the most successful mode in that kind of situations and is reported as sometimes “incredibly accurate” by quite a few bird photographers including ourselves. It also usually chooses anything which happens to be close by to lock focus. This is often the matter if a (group of) bird(s) is up in the air is more or less the only thing there is to focus on. Mind you: we assign this mode to AF-ON button D500.
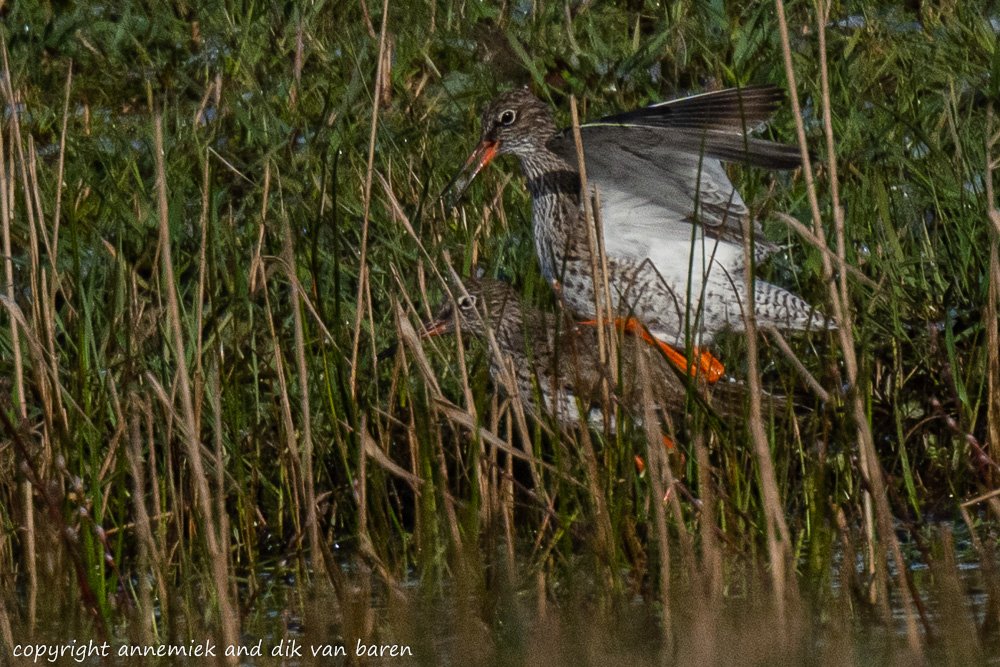
- As our second mode we will AF Single point (one AF point): we use this mode if we need precisely located autofocus for example in case of birds behind reed, leaves, branches or the like. In our experience the combination D500 Nikkor 500mm f/5.6E PF VR [TC-14E] can rather precisely lock focus on a bird which happens to be (partially) hidden behind branches etcetera. This happens rather often that we use Single point AF frequenty. In order to facilitate quick and easy switching between default Group mode and AF Single Point mode, we disable all five other modes: D25, D72, D143, 3D and auto. The result is that only Single Point mode is left as valid choise next to GROUP mode. So we can quickly switch (in either direction) between Group Mode and Single point mode.
By the way some photograpers use the Joystick D500 (officially called “subselector“) to explicitly assign this type of alternating AF mode. We prefer the more standard method via a9 as described here because it offers more flexibility. By disabling one or more modes via a9 you can program your Nikon DSLR to operate in several different subsets of valid alternate choices of AF modes, like the one we proposed above: AF Single point (1 AF point) or Group Mode.
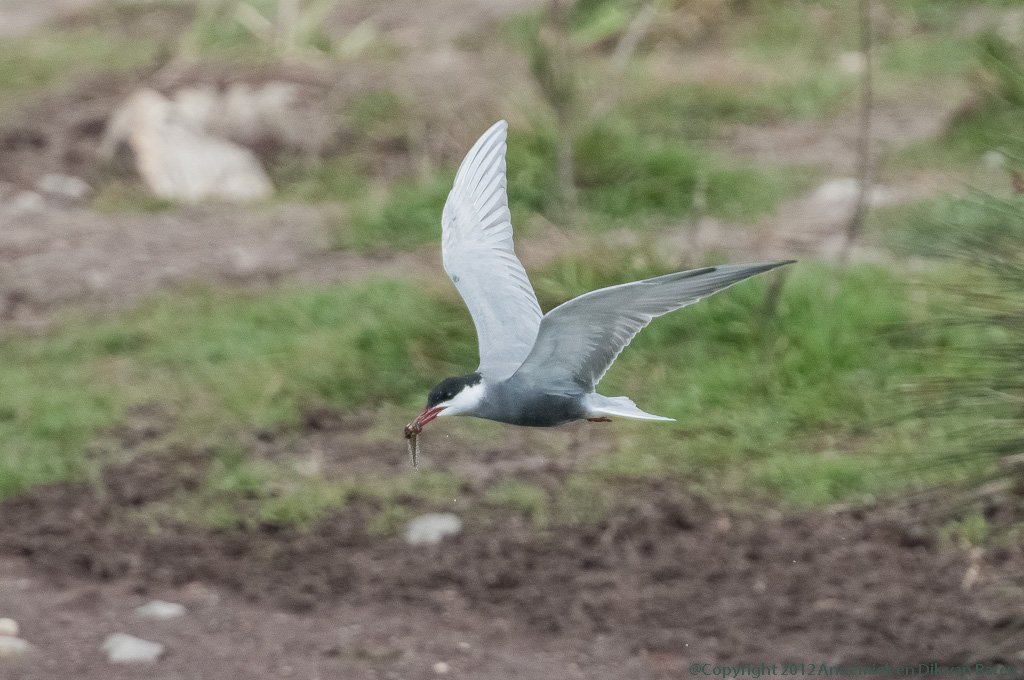
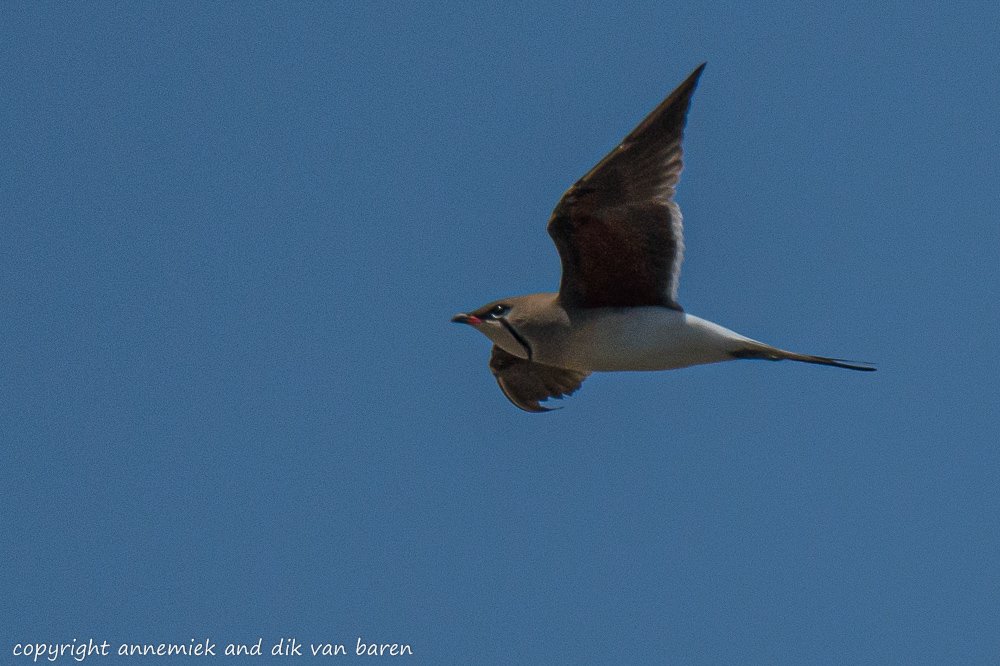
AF Group Mode will always be our default mode, but we may – via resetting a1 – switch to Single Point AF mode (bird between/behind branches) or Auto (unpredictably moving bird like slowly hunting Whiskered Tern (Witwangstern), Lapwing (Kievit) or Pratincole (Vorkstaartplevier)).
So in the end we are photographing with three AF sets “at our fingertops”: AF Group Mode, AF Single point and AF Auto. It may sound a bit complicated but it works quite comfortable in the field. Just try it!
Examples of some difficult autofocus situations in the field:
By all means do NOT stop down modern telelenses and try preserving all available light for accurate autofocus and the availability of advanced AF functions 3D and Auto of a Nikon DSLR. For example: using D500 Nikkor 500mm f/5.6E PF VR with APERTURE f/5.6 is okay, after adding converter Nikkor TC-14E III resulting in f/8 is okay also, however stopping down to f/11 or even f/13 is NOT advisable.
Using these settings your Nikon camera will set ISO and EXPOSURE TIME values automatically within your personal limits in bird photography. You can adjust EXPOSURE TIME when really require b fast and safely using subdial at the rear of your D500 body with thumb at subdial. You always will have you other hand free to redirect camera or tripod, support telelens, touch manual focus ring, etcetera.
More about about autofocus parameter a1
Autofocus parameter a1 = focus (priority Focus, not Release): we want no blurred pictures, camera may need more time checking this, so sustained burst rate may drop from 11 fps to 8 fps or the like.
More about autofocus parameter a3
Autofocus parameters: a3 = 5: camera will keep using actual autofocus value also if subject bird if anything in foreground temporarily is blocking camera’s sight at bird.
The dilemma here is: 1) In case of a steady flying bird we need non-interrupted continuous autofocus however we do not want the camera to react immediately when some object in foreground (branche, reed, etc. temporarily blocks view camera 2) However in case of some stationary bird, for example just sitting at a branch, we want the camera to immediately start focussing and tracking when this bird starts his flight, dive, etcetera.
However we think this is often unresolvable as such so we deliberately set a3 as follows (in either case we make a best quess what to expect in the actual situation or because of the actual bird):
- Either: Autofocus parameters: a3 = 1 react quick: (“Dear camera, start autofocus and track this “fast” bird (of prey) whatever happens.”): This way we set the camera to definitely and promptly start or keep focussing and tracking the bird which for the time being ony is temporarily sitting still or being stationary. We use this setting in (anticipating) situations we expect the bird to start its flight or dive and want camera to react at once at this action. Examples: Kingfisher at a “fishing” branch or with fish in beak waiting to start flying up to its nest or Great Spotted Woodpecker hanging off a tree but expected to soon start flying (all of them are by the way also in typical focus and recompose situation).
- Or: Autofocus parameters: a3 = 5 react with some delay (“Dear camera, hold autofocus value also if some object may block your view temporarily”. This way you instruct camera not to drop autofocusright away but continue focussing and tracking bird even if some tree or other object temporarily blocks camera’s view or when you loose the bird from your viewfinder for a few seconds!
When you set parameter a3, set related parameter Subject motion to erratic in case for example Whiskered Tern (Witwang Stern), Black Tern (Zwarte Stern), Lapwing (Kievit) and set to steady in case of birds like Crane (Kraanvogel), Buzzard (Buizerd) or (Kingfisher (IJsvogel), species with more or less steady flight, or set parameter to medium value as default for any bird.
Once you have set up your camera to operate in APERTURE mode Birds – including Automatic ISO sensitivity! – and you try changing ISO sensitivity via the standard combination ISO button & subdial, you are de facto applying EXPOSURE Correction +/- in stead of ISO value so you may later find out that your camera has made underexposed or overexposed pictures! In other words don’t use EASY EXPOSURE Correction +/- if you have not at the same time set ISO Sensitivity automatic.
If you use “APERTURE Mode Birds“, which includes ISO sensitivity Control ON, camera’s ISO button as such has been set “unoperational” by the camera and you can safely use EASY Exposure correction +/- . It will exclusively function in combination with pressing ISO button AND menu function ISO sensitivity automatic has been set by you via the camera menu.
More about APERTURE values
We like to report also that – only in case of sufficient available light – we frequently use values up to f/11 at Nikkor 300mm PF VR or 500mm PF VR lenses with quite well detailed in-focus pictures. Autofocus is definitily slower, sometimes even difficult, but after all it works fine. Particularly in direct sunlight we get perfectly detailed pictures with these wonderful Nikon Phase Fresnel lenses.
More about Raw workflow and Quality
Set Quality to: RAW 14 bits lossless compressed: compress without any loss of image quality and maximum detail and (colour) contrast.
In case of RAW workflow the RAW images will not be optimized by the camera. They need to be cropped and edited in for example Lightroom into high quality pictures with minimal noise, good light, color contrast and detail. This implies larger files and more work but results in far better pictures.
More about Colour Space
Lightroom, Capture NX, View NX also use Adobe Color space.
More about switching between advanced AF modes 3D, Group or Auto
If you frequently use advanced AF modes 3 D, Group or Auto, make sure you know by heart how many dial clicks you need for resetting D500 for example to standard AF-C d25 and vice versa.
Example pictures D500 in APERTURE mode Birds


4. Know the following settings D500 and or Z50 (or other Nikon camera you use) by heart and (re)set camera only when required during actual photography:
- ========== D500 =================
- a1 = release (save picture(s) on card every time you press Release, in-focus or not)
- a3 = AF only (Back button autofocus).
- a9 = limit AF options: restrict D500 to 2 options out of 7 like: Single point and GRP out of Single point, dynamic 25 points, dynamic 72 points, dynamic 153 points, 3-D, GROUP or auto AF.
- b4 = Easy Exposure Compensation.
Setting a9 at D500 this way you can extremely fast switch between the two options left: Single point AF (fast and accurate) and GROUP (our preference when tracking active or moving birds).
- ========== Z50 =================
- a1 = release (save picture on card every time you press Release, in-focus or not)
- a3 = AF only (Back button autofocus).
- b2 = Easy Exposure Compensation.
Pingback: 3 Lenses Light – LIGHTWEIGHT BIRD PHOTOGRAPHY