Foto a top: Algarve 2019 sun Sardinian Warbler (Kleine Zwartkop) size 14cm distance 8m (exceptionally close probably thanks to substantial camouflage with this usually very shy bird!) equivalent 1050mm D500 Nikkor 500mm f/5.6E PF VR sbstantial camouflage qqq sec f/8 ISO qqq qqq EV.
F11: full screen
Extra info: This page may be rather technical and a bit hard to digest Just read, read once more and look at the examples. Keep readon an d rereading until you understand it. It will pay off in your bird photography. Anyway make sure you understand most or even better all of it over time.
Camera modes
Via camera’s Mode button (“PASM switch”) and main dial (front camera) you can set your camera to operate in one of four photographic main modes.
Via buttons ISO, WB, +/-, QUAL and button size automatic light measurement area you set remaining settings of the camera: ISO (lichtgevoeligheid camera), White Balance (Witbalans camera) and EXPOSURE time COMPENSATION camera.
“P” stands for “programmed mode”. In that mode you can use the camera as a programmed “point and shoot “digicompact“. This mode works all right in average situations of available light, indoors, outdoors, not too fast moving subjects, etcetera, however definitely not for sports, wildlife and certainly not for bird photography of birds from smaal birds far away to large (flying groups of) birds close by, birds resting, running, hunting, bathing, diving. mating, fighting, backlight, direct light, twilight, deep shadow, almost night, rain, snow, storm, colorful birds, black and white birds, completely black or white birds, expected bird action or birds suddenly appearing in front of your camera. So if you are a (semi) professional bird photographer you better make the right choice.
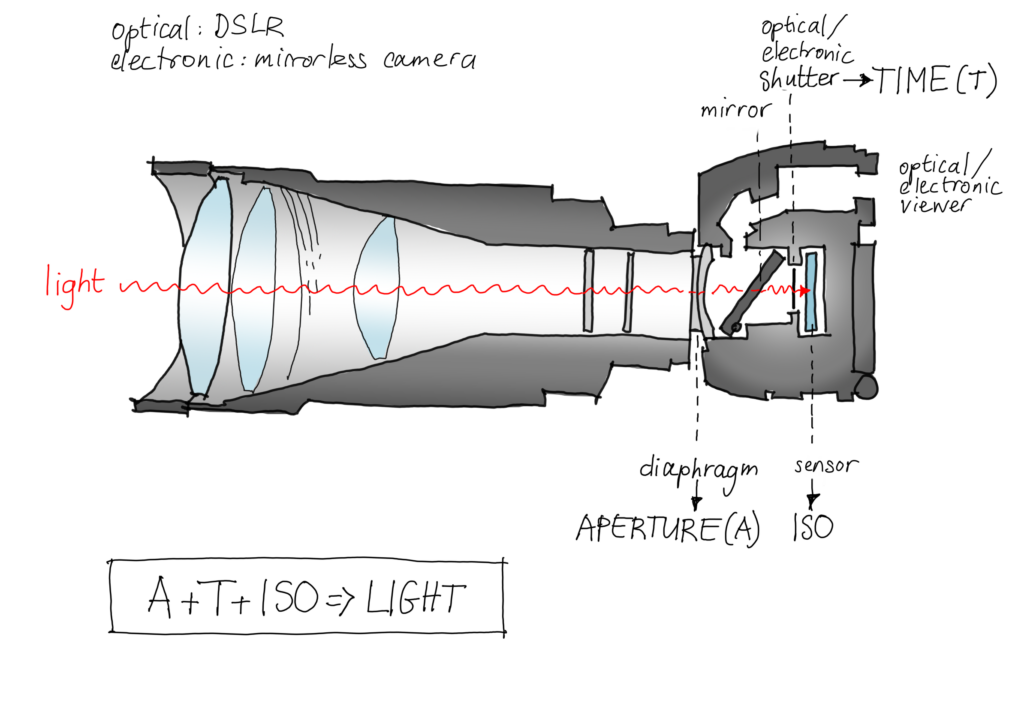
APERTURE Mode, usually combined with other settings, is the favourite choice of most bird and wildlife photographers because they control APERTURE value which defines depth of field and results in isolation of subject bird(s) or other nature from background and foreground in the picture. Some even use MANUAL mode also combined with some other camera settings.
We structurally use APERTURE mode as basis of our bird potography. In APERTURE mode “standard” the value of EXPOSURE time is calculated by camera. We add quite a few other settings and then call it “APERTURE mode Birds“. We will review “standard” APERTURE mode at this page and our APERTURE mode Birds at Settings APERTURE Mode Birds D500 and at page Settings APERTURE Mode Settings APERTURE Mode Birds Z50.
Automatic light measurement AE (automatische lichtmeting) in APERTURE mode (Diafragmagestuurd)
Every time you half-press Release button the camera will, using its built-in light meter, automatically measure the amount of light reflected by the subject, our bird(s):
- Camera performs automatic light measurement.
- Camera calculates required EXPOSURE time
Thereafter and right after you full press Release, the camera produces a (series of) picture(s).
This automatic light measurement AE (automatische lichtmeting) determines the average and partial (highlights, lights, shadows, darks) and average light intensity and contrast in your pictures. You can instruct the camera how it should perform this automatic light measurement selecting one of four light metering modes:
1. Matrix metering: camera determines measurement on overall amount of received light in the total image. Advantage: modern Nikon camera’s like D500 and Z50 produce almost perfect out-of-the-camera pictures using Matrix metering. Also in case of tracking a flying bird the camera will continuously use a more or less correct value of EXPOSURE TIME with every shot made. Disadvantage: If the bird itself is obviousy almost white light or black tinted or the bird is in partial sunshine or partial shadow or the like, centre weighted metering is a better choice.
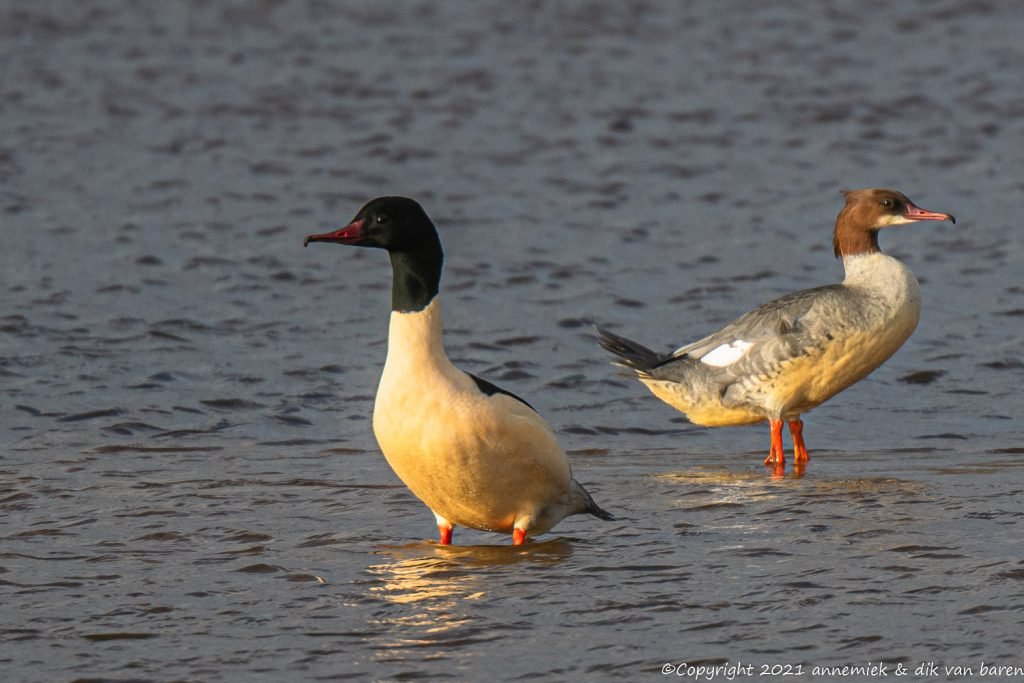
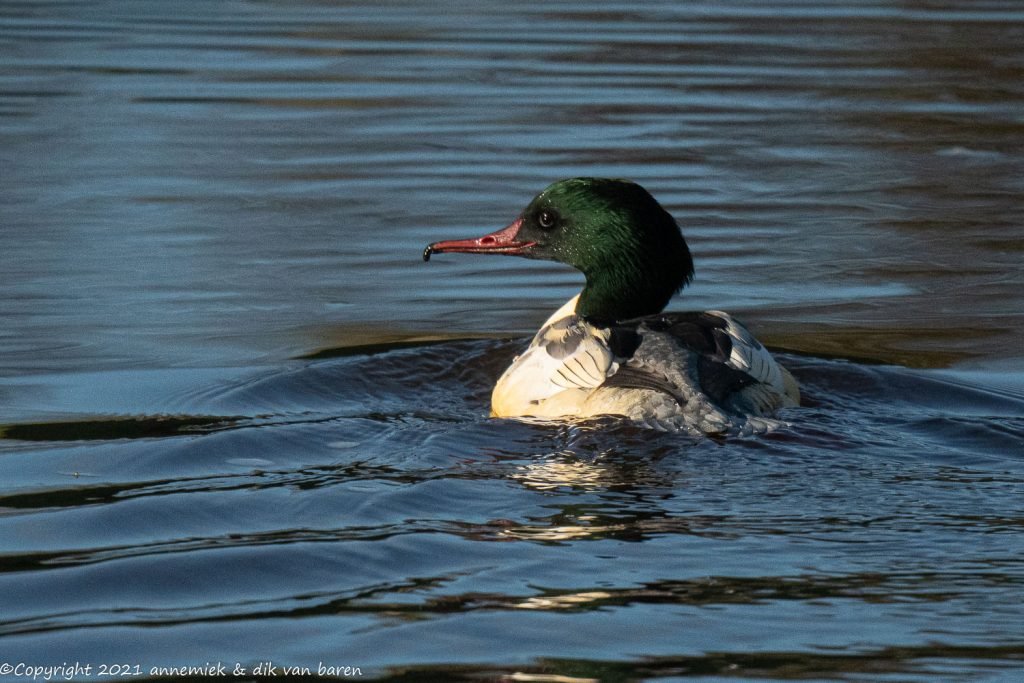
2. Centre weighted metering: Centre weighted metering is our preferred setting in bird photography, in combination with systematic underexposure (about -0,5EV – -2.5EV). The amount of light measured in the central area of the image will put maximal weight in camera’s calculation of required EXPOSURE time. The relative size of this central area can be set separately via another camera menu item. We always point the camera in such a way that the bird is in the centre of the viewfinder. Advantage: perfect if you indeed keep the bird in the centre or the picture. Disadvantage posibly special effect of centre weighted measurement if large “black and white” bird like male Goosander (Grote Zaagbek), Avocet (Kluut) or Magpie (Ekster). This measurement generally also optimizes color contrast and detail (doortekening) in Darks of picture. Look at pictures below of Goosander (Grote Zaagbek).
3. Spot metering: the camera measures amount of light at a relatively small spot in the image. Advantage: very accurate if required in special situations. Disadvantage: if the selected spot happens to be in the middle of a white or dark area of the bird, like male Goosander (Grote Zaagbek), Avocet (Kluut) or Magpie (Ekster), the amount of light measured at this particular spot will determine the EXPOSURE time entire picture. So we use spot metering almost only when photographing small birds at large distance when the entire bird is a relative (light) “spot” (in the shadow).
4. Highlight protecting metering: Advantage: prevents clipping (verlies van detaillering Hoge Lichten door overbelichting), sound and safe method. Disadvantage this method may conflict with your own underexposure via EXPOSURE Compensation +/- button, like we almost always use in bird photography like for example in the photo at the top of this page. So be aware of all your settings.
Menu item Size Of Central Light Measurement Area
Also via this menu item can one direct Size Centre Weighted metering and this setting too is important. Dp experiment with these last two settings and check whether your pictures show correct detail and contrast in all four light areas given the amount and type of available light.
Camera button EXPOSURE time Compensation +/-
You can, if you want and whenever you want, via EXPOSURE Compensation +/- button incidentally or permanently adjust camera’s camera’s automatic calculation of EXPOSURE time until you reset this item again of course.
Photographing in this “standard” APERTURE mode you may often all the time be checking and resetting camera settings whereas you rather might pay maximal attention at observing birds and anticipating their actions. In an attempt to solve this, we developed a variant of “standard” APERTURE mode: APERTURE Mode Birds. We used DSLR D500 and mirrorless Z50 as representative camera of these two categories of Nikon camera’s. You can make your life as a “serious enthousiast” bird photographer easier by using these effective, quite comfortable “Point & Shoot-like methods“. They eliminate the need for this continuous check & reset of your camera and grant you more time to anticipate bird action and to shoot pictures by pressing RELEASE at the very right moments and produce correctly exposed and in-focus. Your photographs are usually better composed as well.

Setting EXPOSURE time in APERTURE Mode
When setting EXPOSURE time your priorities are:
- Avoid too long EXPOSURE time. It results in blurred pictures. They are incorrectable and worthless.
- Avoid high ISO values resulting in more noise and lower color contrast in Darks picture.
- (If no backlight) underexpose (onderbelicht) 0.5 – 2.5 EV to protect detail in Highlights picture.
So, assuming you have succesfully focussed camera at subject bird(s), to shoot a (series of) picture(s)
Cycle repeatedly through next three steps:
………1. Decrease ISO value to (minimize noise (ruis) & protect detail in Darks picture
…….. 2. Increase EXPOSURE time (to anyway avoid blurred pictures!)
……. 3. Check value EXPOSURE time calculated by camera
Until camera calculates a “safe” value EXPOSURE time (“safe” values listed below)
Then full press Release button every time you want to take a (series of) picture(s).
Check result.
This procedure of setting EXPOSURE time will generally produce in-focus pictures with minimal noise (ruis) and optimal light, contrast and color contrast in all four light areas: Highlights (Hoge Lichten), Whites (Lichten), Shadows (Schaduwen) and Blacks (Lage Lichten).
By the way: deliberately forcing camera to lower EXPOSURE time values by using underexposure (onderbelichten) up to – 2.5 EV is a widely accepted technique in bird photography to avoid blurred pictures. This is one of the major trade offs in bird photography: accepting moderate noise level (& use “denoise” tools in post production) vs. avoiding blurred pictures.
So called “safe” values of EXPOSURE time:
Out-of-focus (“blurred”) pictures are created either via (too much) movement of (unstabilised) equipment or by incorrect focussing of the camera-lens-combination. To get in-focus (non-blurred) pictures, we suggest the next “safe” values of EXPOSURE time (and we know these numbers by heart):
| Situation bird | Safe EXPOSURE time | Note |
| “stationary” bird: (in bird photography one can always expect some action!) | 1/250 – 1/500 second | Birds often make unnoticed fast movements head or tail! Our definite limit ISO Sensitivity is 3.200 (sunlight) or 6.400 (cloudy) however by exception up to 12.800 (D500 or Z50) if special bird/unique situation. |
| (expected) relatively slow action | 1/1000 second | E. g. in the sky cruising/seaarching Buzzards (Buizerds), Terns (Sterns), Harriers (Kiekendieven), Kites (Wouwen). |
| (expected) fast action | 1/2000 – 1/4000 second | Fast birds or extremely fast action of e.g. starting/flying Woodpeckers (Spechten), fishing/diving Terns (Sterns), Kingfishers (IJsvogels), Kestrels (Torenvalken), Peregrines (Slechtvalken), stunting Lapwings (Kievieten). |
Too high or too low values of EXPOSURE time
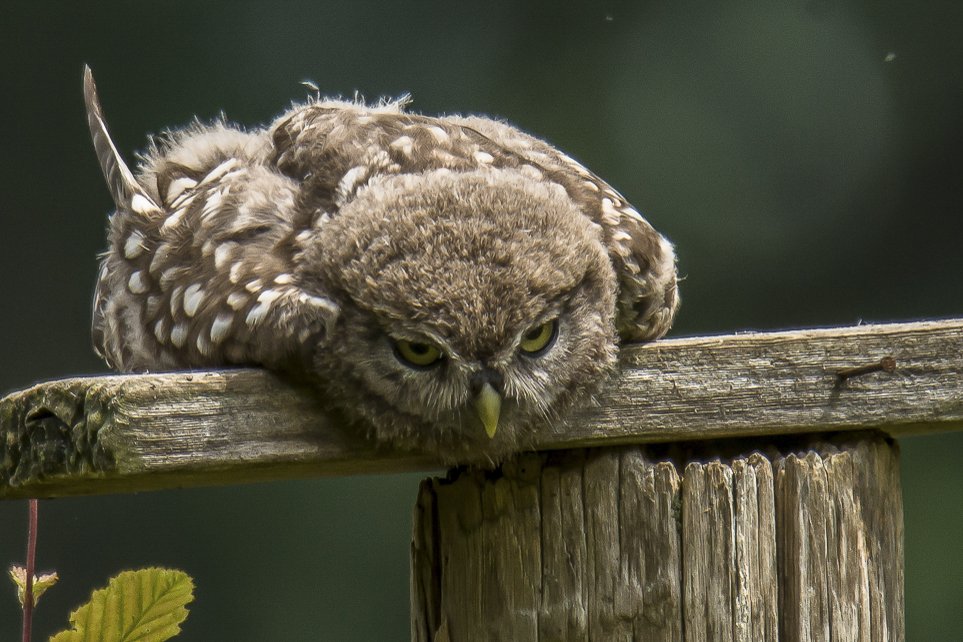
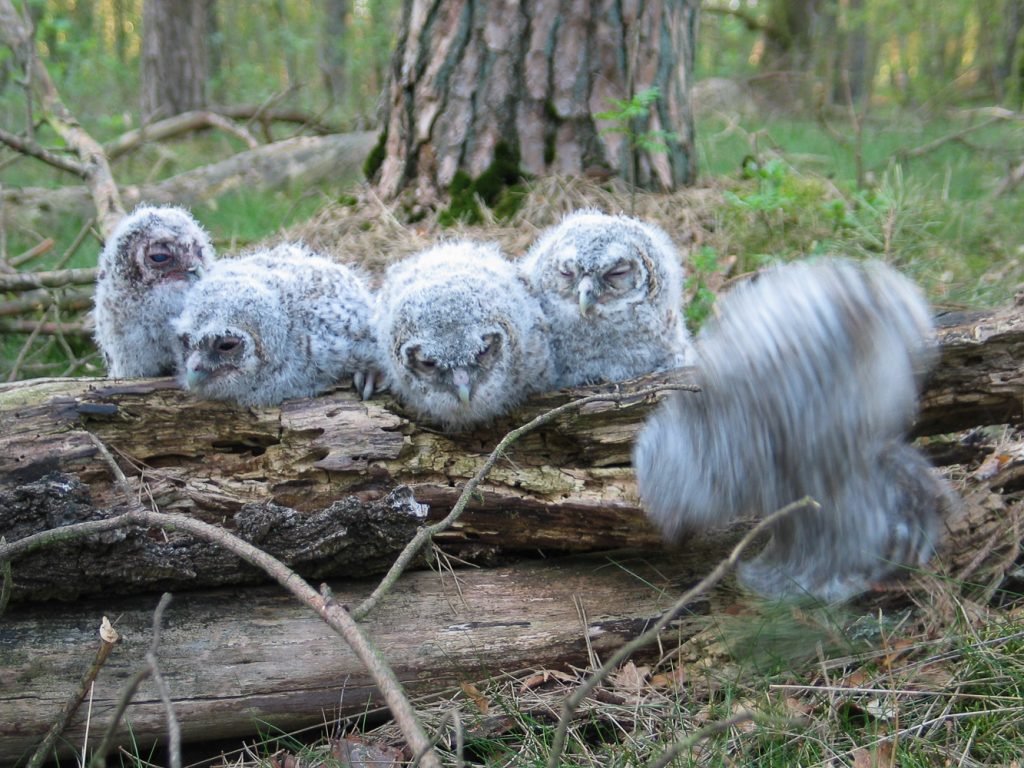
Too high values of EXPOSURE time may result in blurred, worthless, pictures unless the bird absolutely does not (or is not expected to) move (part of its body), like the Little Owl (Steenuil) below. Otherwise stick to the “safe” values listed above.
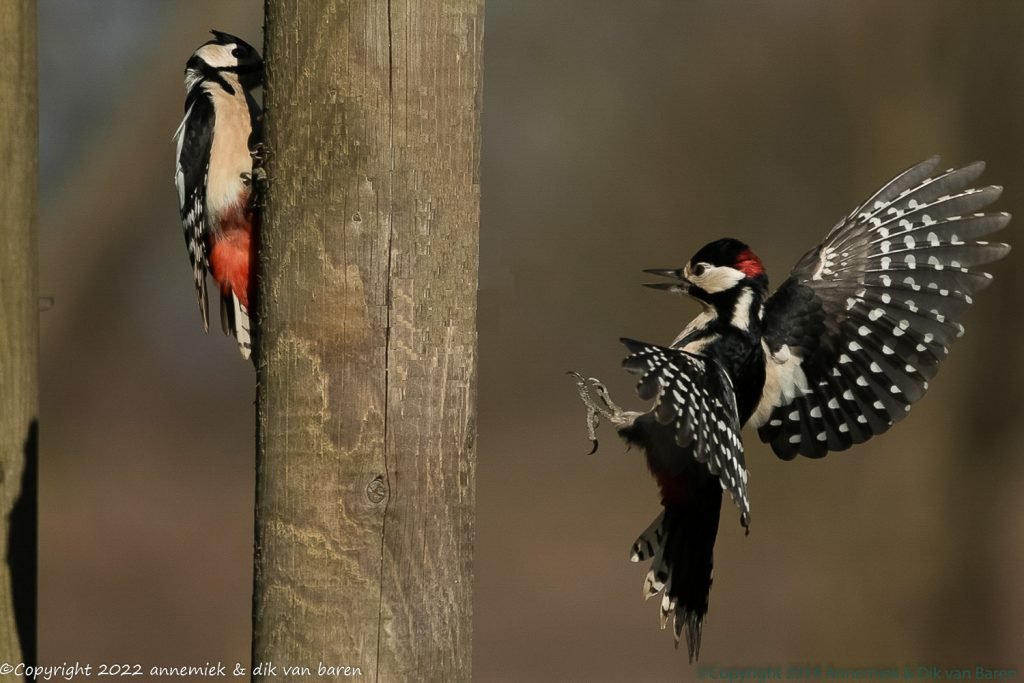
Relatively low values of EXPOSURE time are sometimes used to empahsize or picturize “movement” or “speed” in the picture. In this way you can make for example tips of wings of birds blurred in your pictures to emphasize action in stead of freezing it. Completely frozen movement can even look somewhat unnatural. Look at examples Woodpeckers below.
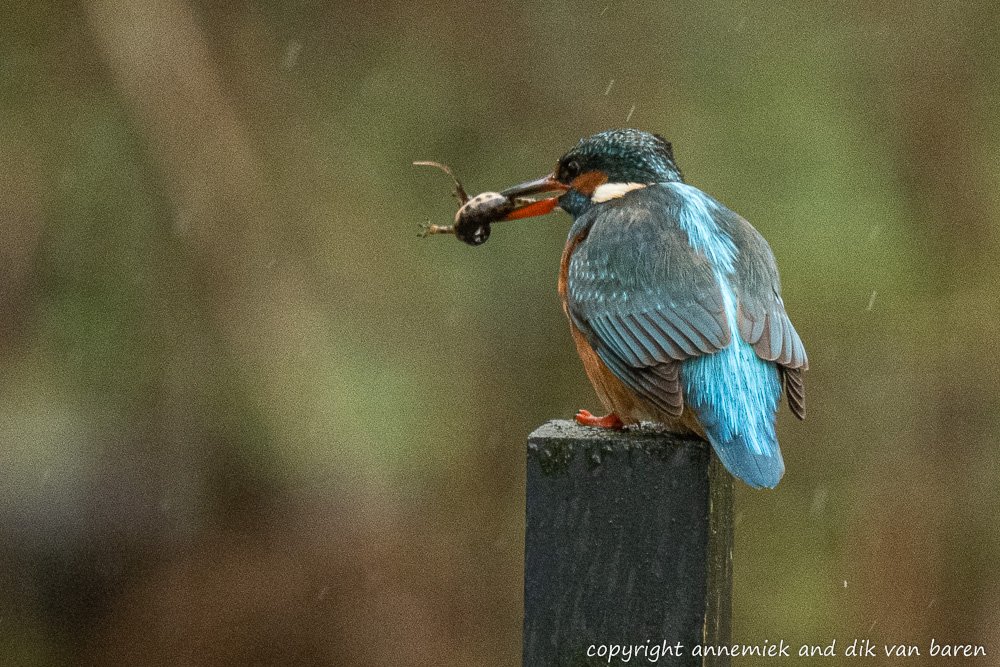
Trying to get correctly focussed pictures in darker winterdays in Holland can be difficult or even frustrating if one is anticipating fast action and needs short EXPOSURE time! Look at the next picture: ISO 2.200 1/750 second was the best trade off we could squeeze out of this low light-situation considering the very dark wheather and marginally acceptable amount of noise (ruis) using a supertele 500mm f/5.6 at the same time being prepared for some fast action like the Kingfisher (IJsvogel) forcefully shaking or killing its prey by knocking it against a branch or so as it usually does or starting a new dive.
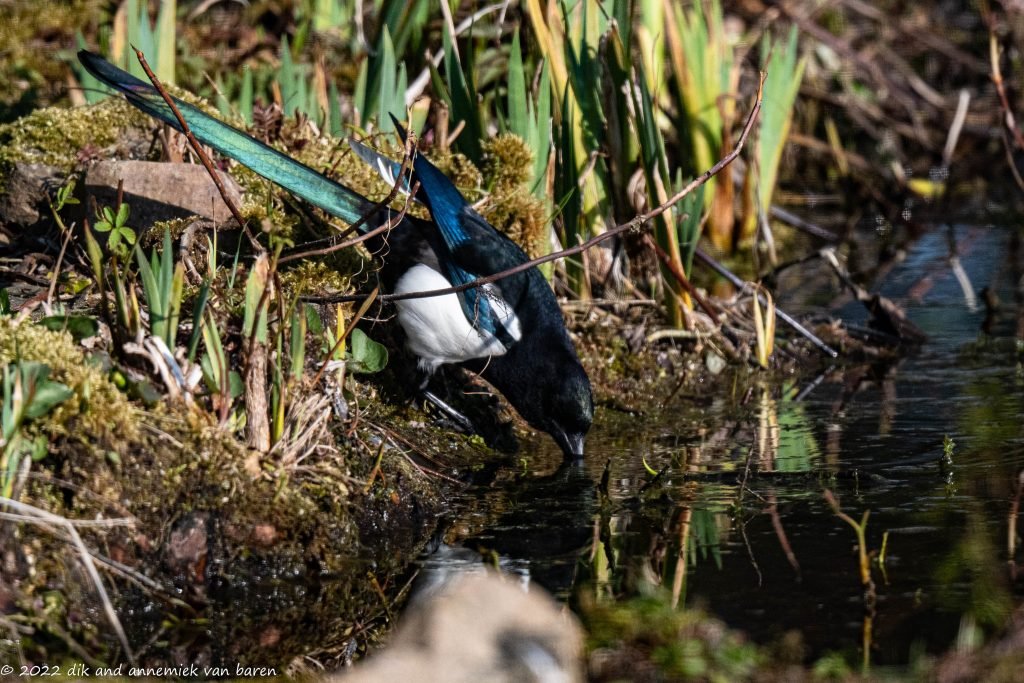
However and particularly when a bird has darker areas like head or wings, you should not underexpose too much. For example when photographing birds like Goosander (Grote Zaagbek) or Magpie (Ekster) the extra noise and lack of colour contrast in de dark areas of the bird may be unrecoverable in post production.

EXPOSURE time compensation button +/-
In order to avoid loosing detail in the highlights of an image, so called “clipping”, we systematically underexpose our pictures in lightweight bird photography. We set EXPOSURE Compensation +/- to value -1.5 – -2.5 in bright sunlight (protecting Highlights detail) and value 0.0 – -1.0 in dark wheather and or tp ptotect dark (parts of) a bird like a Crow, Goosander or Magpie.
Practice this setting by photographing small and large birds of various species in all kinds of wheather and directions of light situations! It is rather tricky. The effect of EXPOSURE Time Compensaation is also dependant on the setting of item Automatic Light Measurement (at this page) and the setting of the relative size of central area in case of using Centre weighted metering in AE measurement! Look at example pictures down at this page.
Underexpose (onderbelichten)
This technique is often required to avoid loss of detail, so called “clipping” (uitbranden Hoge Lichten) of pictures if one has abundant available light, which may cause unrecoverable loss of detail.
Noise (ruis) in Darks (Lage Lichten) can usually be eliminated or at least be restricted to an acceptable level in post production but lost detail in High Lights may be lost forever. So in bird photography we deliberatiley underexposures (onderbelicht) pictures like -1.5 – -2.5 EV.
However particularly when a bird has dark (coloured) parts do not underexpose too much. For example when photographing birds like Goosander (Grote Zaagbek) or Magpie (Ekster) extra noise and lack of colour contrast in dark body parts like neck, wing or tail may be unrecoverable in post production!
Overexposure (overbelichten)
Overexposure (overbelichten) is required in case of birds photographed in backlight situations. In some cases, particularly in case of full direct sunlight behind the subject bird, the loss of detail, light contrast or colour contrast is not (completely) recoverable. The amount of overexposure is usually in the range 0.5 – 3.0 EV. This is also a matter of practice.
A serious WARNING: cloudy skies may effectively be backlight
Keep in mind that cloudy sky, light fog, hazy sky and the like can operate like backlight! In cloudy wheather you should rather overexpose (overbelichten) than underexpose (onderbelichten). It seems like clouds, in fact large amounts of small water drops or ice crystals in cold layers of the atmosphere, behind the bird(s) are acting as one huge light-reflecting mirror. So in stead of using underexposure (onderbelichten) -0.5 – -2.5 EV we use overexposure (overbelichten) of +0.0 – +2.5 EV in those wheather situations.
Examples backlight and other situations with like low availble light, high or low contrast


@dik image sparrowhawk and hancate sperwer lately 22 oct qm