Foto hierboven: Holland Steenuil (Little Owl), size 22cm, distance 30m, D300 Nikkor 300 F/4E PF VR equivalent 630mm standard camouflage. (Overigens een schoolvoorbeeld van “Focus and recompose”, hier met autofocus camera op ogen uil gericht (door in feite eerst op de dikke tak te richten waar de uil op zit) en niet op het takje ervoor en daarna camera weer op ogen uil te richten en de uiteindelijke opname te maken!
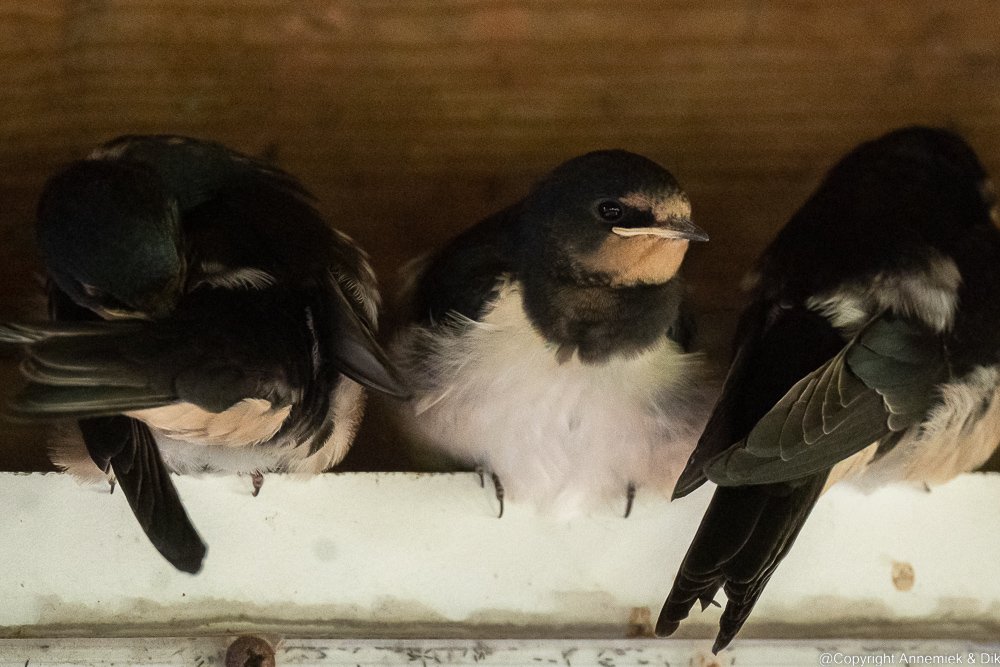
Als je bovenstaande Kauwtjes-vergadering wilt fotograferen heb je mogelijk slechts enkele seconden de tijd voordat een van de vier opvliegt. Iets dergelijks geldt voor het Steenuilje (Little Owl) dat tussen de takken door recht in je lens kijkt…
In vogelfotografie werk je bij voorkeur met wendbare lichtgewicht telelenzen en met zo kort mogelijke belichtingstijd om bewegingsonscherpte te voorkomen. Maar eigenlijk heb je een zo groot mogelijke diafragmawaarde om voldoende scherptediepte te behouden en bijvoorbeeld een groep vogels of kop en staart bij grotere vogels scherp af te beelden. Hierdoor wordt je al vlug gedwongen met (niet altijd noodzakelijke maar uit voorzorg gekozen “veilige”) ISO-waarden te werken en dat resulteert geregeld in onnodig veel noise (ruis) en minder heldere foto’s. Dit onvermijdelijk geschipper met tegengestelde eisen die vogelfotografie je stelt in plaats van je simpelweg met een constant solide stel optimale instellingen (settings) te laten fotograferen is essentieel in vogelfotografie.
Met APERTURE Mode Birds en liefst de voortreffelijke lichtgewicht Phase Fresnel lenzen, Nikkor 300mm f/4E PF VR en vooral Nikkor 500mm f/4E PF VR, los je dit alles redelijk elegant op en kun je comfortabel heel bevredigend vogels en hun doen en laten fotograferen en het denkwerk overlaten aan je Nikon camera. Wij doen dit naar grote tevredenheid al jaren met onze D500, Z50, Z7 II en het werkt echt!
Waarschuwing
Echter: maak niet de denkfout dat je nu niets meer hoeft te begrijpen van het samenspel van wat wij elders in deze blog noemen “Big Three”: APERTURE (diafragmawaarde), EXPOSURE TIME (belichtingstijd) en ISO (ISO-waarde). Fotograferen blijft fotograferen en je moet nog altijd je camera en lenzen goed kennen en dobegrijpen wat het effect is van die drie grootheden, APERTURE, EXPOSURE TIME en ISO.
Als je APERTURE Mode Birds gaat gebruiken kun je hoef al die storende voortdurende “check & resets” camera achterwege laten en kun je redelijk onbezorgd lekker fotograferen. Je moet wel een keer de minimum- en maximumwaarden van het een en ander instellen en dus weten wat dat betekent. Uiteindelijk blijf je onvoorspelbaar bewegelijke vogels fotografen, klein, groot tot heel groot, dichtbij, ver weg, met licht mee en tegen, in zwaar bewolkt weer en bij fraai zonlicht. Echter zonder die hinderlijke voortdurende “check and reset”!
Het principe van “APERTURE Mode Birds“
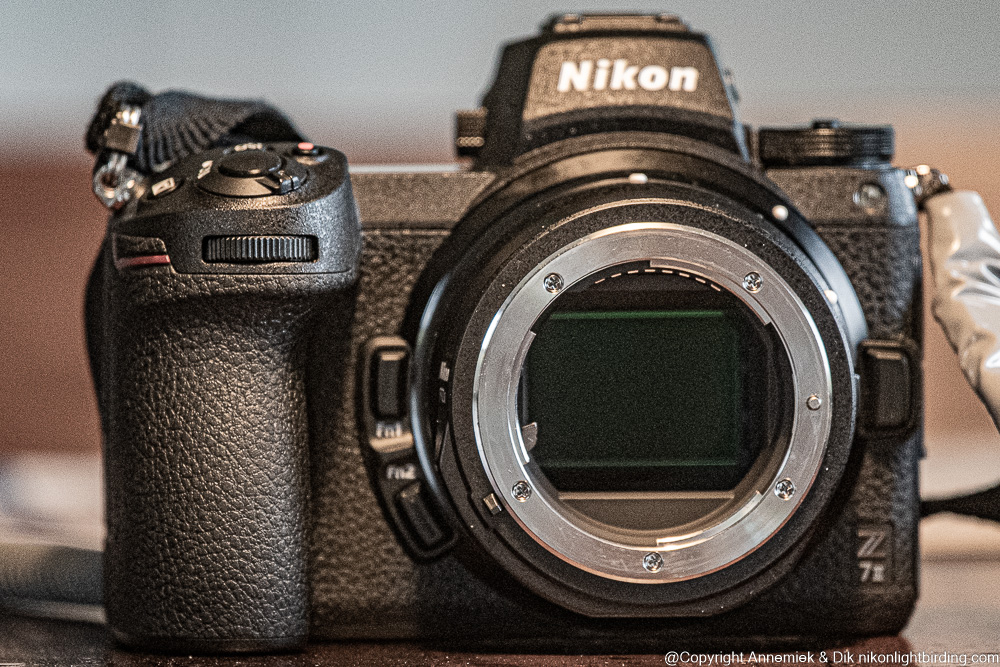
Met nogal wat vallen en opstaan ontwikkelden we onze “APERTURE Mode Birds”. Deze werkwijze maakt gebruik van wat Nikon noemt Easy EXPOSURE time adjustment” and automatiseert verder alle andere instellingen. De manier van werke is uiteindelijk een verrassend effective en eenvoudige kombinatie van APERTURE mode, Auto ISO, Easy EXPOSURE Compensation, Back Button Autofocus, systematisch onderbelichten en enkele andere technieken, die alle verrassend goed bleken te passen in deze speciale modus voor lichtgewicht vogelfotografie, mede dankzij de programmeerbaarheid van Nikon camera’s als D500, Z50 en Z7 II. Tussen haakjes: je kunt hoogstwaarschijnlijk vergelijkbare camera’s van andere merken evenzo programmeren echter Nikons camera’s behouden toch dat wezenlijke voordeel van de grootste opening voor licht transmissie van lens naar image sensor:
Serious lightweight bird photography is a more difficult type of photogtaphy than you may realise. First of all it requires real good knowledge of birds and their behaviour! Also you need plenty of photographing skills, speed of reaction and and one, preferably two or three, sets of high quality semi pro photographic equipment with, during actual bird photography often continuously changing optimal settings thereof because you are in turn dealing with small birds far away, large birds close by and frequently totally unexpected fast bird action of those birds. On top of this wheather and amount or direction of available light may change and consequently your optimal settings of camera or lens.
Rationale behind “APERTURE Mode Birds“
Of course you know all this already and you may find yourself your bird during photography almost continuously checking and resetting values of APERTURE, ISO and EXPOSURE Time. However – and this is key! – in bird photography you are de facto almost all the time (1) working with a constant value of APERTURE – because you need all the light you can get – (2) using low values of EXPOSURE Time – when you wish to photograph fast bird action – and (3) only incidently changing values of ISO sensitivity. Since you keep APERTURE value constant, only values of ISO and EXPOSURE TIME can be reset avoiding noisy respectively unsharp pictures in case of low available light or fast moving birds.
So, can’t we eliminate this continuous “check & reset” and let the camera do the thinking and get mor time for enjoying our birding and photographing instead of continuously checking and resetting our camera?
Definitely! With a bit of trial and error we developed this “APERTURE Mode Birds”. It facilitates “Fast and easy EXPOSURE time adjustment” and automatises all other settings and it really works, years already!
Our “APERTURE Mode Birds” is a surprisingly effective and comfortable combination of APERTURE mode, Auto ISO, Easy EXPOSURE Compensation, Back Button Autofocus, structural underexposure and a few other techniques, which all happened to fit perfectly into this special mode of lightweight bird photography, thanks to the programmability of late Nikon camera’s like D500, Z50 and Z7 II. By the way: one can probably program similar camera’s of other brands this way accordingly, although Nikon MLC camera’s of course anyway remain to have this essential advantage of the largest opening for light transmission of all:
Rationale behind “APERTURE Mode Birds“
Serious lightweight bird photography is a more difficult type of photogtaphy than you may realise. First of all it requires real good knowledge of birds and their behaviour! Also you need plenty of photographing skills, speed of reaction and and one, preferably two or three, sets of high quality semi pro photographic equipment with, during actual bird photography often continuously changing optimal settings thereof because you are in turn dealing with small birds far away, large birds close by and frequently totally unexpected fast bird action of those birds. On top of this wheather and amount or direction of available light may change and consequently your optimal settings of camera or lens.
Of course you know all this already and you may find yourself your bird during photography almost continuously checking and resetting values of APERTURE, ISO and EXPOSURE Time. However – and this is key! – in bird photography you are de facto almost all the time (1) working with a constant value of APERTURE – because you need all the light you can get – (2) using low values of EXPOSURE Time – when you wish to photograph fast bird action – and (3) only incidently changing values of ISO sensitivity. Since you keep APERTURE value constant, only values of ISO and EXPOSURE TIME can be reset avoiding noisy respectively unsharp pictures in case of low available light or fast moving birds.
So, can’t we eliminate this continuous “check & reset” and let the camera do the thinking and get mor time for enjoying our birding and photographing instead of continuously checking and resetting our camera?
Definitely! With a bit of trial and error we developed this “APERTURE Mode Birds”. It facilitates “Fast and easy EXPOSURE time adjustment” and automatises all other settings and it really works, years already!
Our “APERTURE Mode Birds” is a surprisingly effective and comfortable combination of APERTURE mode, Auto ISO, Easy EXPOSURE Compensation, Back Button Autofocus, structural underexposure and a few other techniques, which all happened to fit perfectly into this special mode of lightweight bird photography, thanks to the programmability of late Nikon camera’s like D500, Z50 and Z7 II. By the way: one can probably program similar camera’s of other brands this way accordingly, although Nikon MLC camera’s of course anyway remain to have this essential advantage of the largest opening for light transmission of all:
Rationale behind “APERTURE Mode Birds“
Serious lightweight bird photography is a more difficult type of photogtaphy than you may realise. First of all it requires real good knowledge of birds and their behaviour! Also you need plenty of photographing skills, speed of reaction and and one, preferably two or three, sets of high quality semi pro photographic equipment with, during actual bird photography often continuously changing optimal settings thereof because you are in turn dealing with small birds far away, large birds close by and frequently totally unexpected fast bird action of those birds. On top of this wheather and amount or direction of available light may change and consequently your optimal settings of camera or lens.
Of course you know all this already and you may find yourself your bird during photography almost continuously checking and resetting values of APERTURE, ISO and EXPOSURE Time. However – and this is key! – in bird photography you are de facto almost all the time (1) working with a constant value of APERTURE – because you need all the light you can get – (2) using low values of EXPOSURE Time – when you wish to photograph fast bird action – and (3) only incidently changing values of ISO sensitivity. Since you keep APERTURE value constant, only values of ISO and EXPOSURE TIME can be reset avoiding noisy respectively unsharp pictures in case of low available light or fast moving birds.
So, can’t we eliminate this continuous “check & reset” and let the camera do the thinking and get mor time for enjoying our birding and photographing instead of continuously checking and resetting our camera?
Definitely! With a bit of trial and error we developed this “APERTURE Mode Birds”. It facilitates “Fast and easy EXPOSURE time adjustment” and automatises all other settings and it really works, years already!
Our “APERTURE Mode Birds” is a surprisingly effective and comfortable combination of APERTURE mode, Auto ISO, Easy EXPOSURE Compensation, Back Button Autofocus, structural underexposure and a few other techniques, which all happened to fit perfectly into this special mode of lightweight bird photography, thanks to the programmability of late Nikon camera’s like D500, Z50 and Z7 II. By the way: one can probably program similar camera’s of other brands this way accordingly, although Nikon MLC camera’s of course anyway remain to have this essential advantage of the largest opening for light transmission of all:
When using these settings your Nikon camera will set ISO and EXPOSURE TIME values automatically – within your personal limits of Maximal ISO and Minimal shutterspeed in your bird photography – and you may adjust EXPOSURE TIME infrequently with thumb at subdial. So you always keep one hand free to redirect camera, head or tripod, support telelens, touch manual focus ring, etcetera. It all really works comfortably!
By the way we almost never stop down modern Nikon camera’s and lenses any more in our lightweight bird photography. We prefer to use all available light that the camera needs for autofocus in low light conditions. Only if maximum detail is high priority we use stopping down lens for example when using Sigma Sport 600mm TC 1401 or Tamron G2 600mm TC X14.
Below we list the settings of Nikon DSLR D500, and Nikon mirrorless camera’s Z50 ans Z7 II for APERTURE mode Birds:
For example D500 switches and menu parameters APERTURE Mode Birds:
1 APERTURE Mode
- PASM switch: A (APERTURE Mode)
2 EASY EXPOSURE Compensation +/-
- b4: Easy exposure adjustment (assign to subdial and keep one hand free for directing tripod/camera
3 Back Button Autofocus a8, AF with lock on a3, AF priority a1
- a8: AF activation: AF-ON Only
- a1: prioritity focus (not Release): EITHER if we don’t want any blurred pictures (this setting of a1 may decrease camera speed). OR: we set prioritity Release if we don’t want to miss shots even if they may slightly blurred. This setting of a1 will not decrease camera speed.
- a3 Autofocus with lock on: 1 (camera acquires focus as soon as possible if fast (starting) bird) Subject motion: (if time permits to set this): depends on (expected) species/action, default value medium.
4 ISO Sensitivity Control (menu PHOTO SHOOTING)
- ISO Sensitivity control Automatic: ON
- ISO: set to actual “base” value being 100 at D500 (eg. 64 at D850, etcetera)
- Maximum ISO: 6400 (our personal guideline for maximally acceptable ISO value). (* Sie note below)
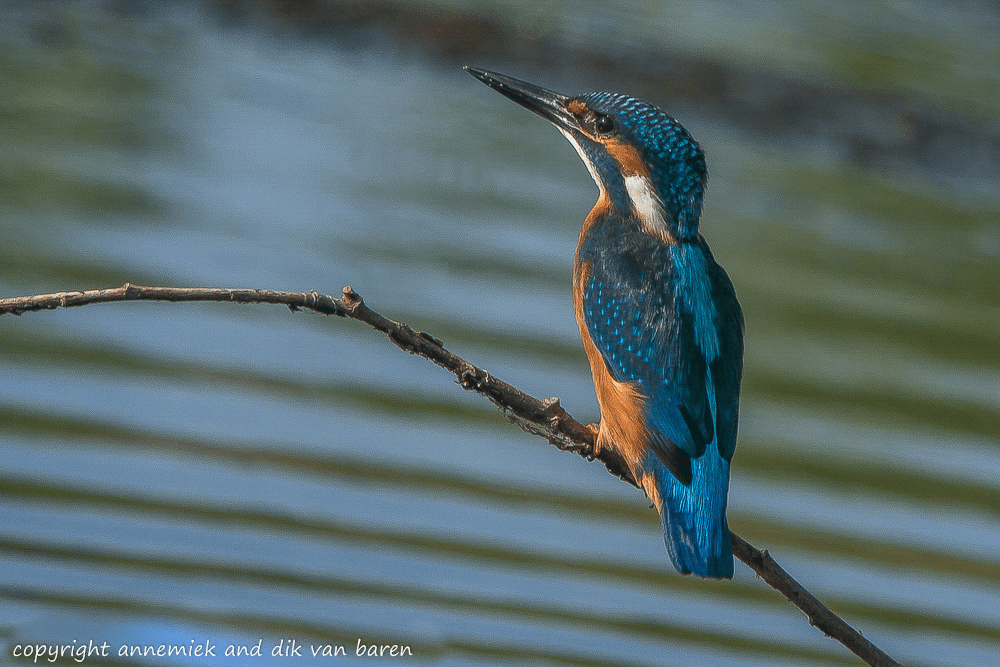
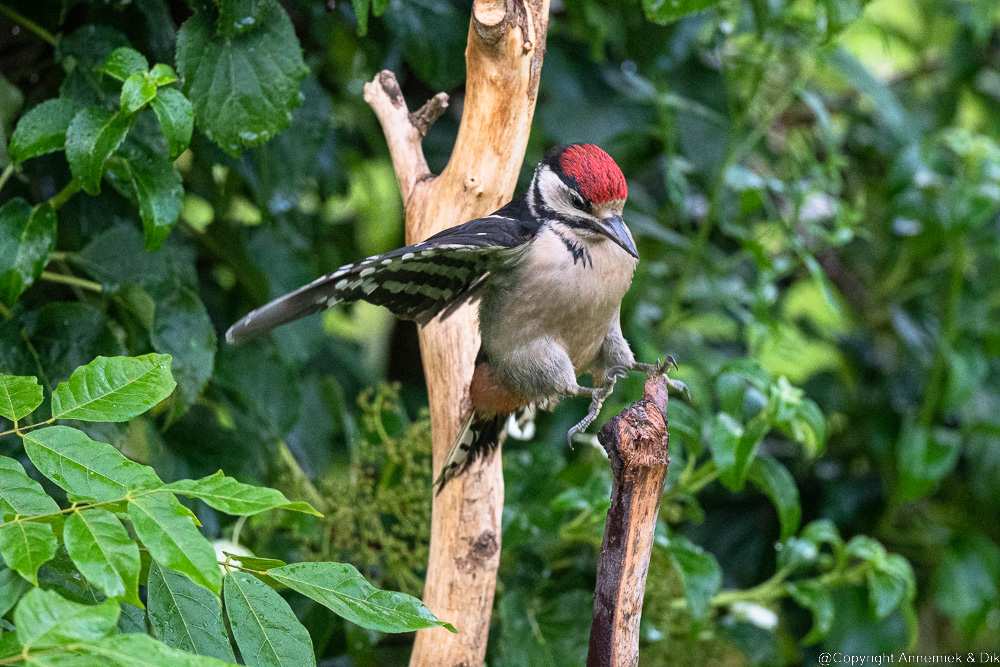
- Minimum Shutterspeed 1/1000 – 1/4000 second depending on bird species and or action expected (hoovering, starting, diving, running, fighting, etcetera). For example Great Spotted Woodpecker (our pretty fast “testbird”) or diving Kingfisher (IJsvogel) 1/2000-1/3000 second.
- Maximum ISO flashlight: equal to no flashlight used (ever use flashlight at birds).
- Auto: we do not use this parameter. It uses classic general reciproke rule photography (example: minimally 1/500 second using 500mm-lens, not relevant in bird photography).
5 Whitebalance: auto (If required WB will be adjusted in post production).
@dik add white etc
6 In case of APERTURE Mode Birds Quality = JPEG Fine.
For example Z50 switches and menu parameters APERTURE Mode Birds:
1 APERTURE Mode
- PASM switch A (APERTURE Mode)
2 Easy EXPOSURE Correction+/-
- b2: Easy EXPOSURE Adjustment (assign this function to subdial Z50: always keep one hand free for directing tripod, head, camera)
3 Back Button Autofocus
- a4: AF activation: AF-ON Only
- a1: prioritity focus (not Release): we don’t want any blurred pictures (this setting may decrease camera speed)
- assign AF-ON function to AF-L/AE-L button enabling back button autofocus.
- reassign AF-L/AE-L function to Fn1 button (controlled by right hand (if you are right handed)).
- Set AF-C AF area = wide (L) at Z50
4 ISO Sensitivity Control (menu item PHOTO SHOOTING)
- Set ISO Sensitivity control Automatic: ON
- ISO: set to actual “base” value being 100 at Z50 (eg. 64 at D850 or Z7 and Z7 II)
- Maximum ISO: 4500 (or your personal guideline for maximally acceptable ISO value). Sie note below.
- Minimum Shutterspeed 1/1000 – 1/2000 second depending on bird species and or action expected (hoovering, starting, diving, running, fighting, etcetera). For example Great Spotted Woodpecker (our fast “testbird”) or diving Kingfisher (IJsvogel) 1/2000 second.
- Maximum ISO flashlight: equal to no flashlight used (we never use flashlight in bird photography).
- Auto: we do not use this parameter. It uses classic reciproke rule photography (like: minimally 1/500 second if using a 500mm-lens, irrelevant in bird photography).
5 Other AF parameters
- a3 AF points used: 1/2 every other point (slightly faster)
6 Whitebalance: auto (if require adjusted for example in Lightroom).
@dik add white etc
7 In case of APERTURE Mode Birds Fast: Quality = JPEG Fine.
@dik chch nc more
Note regarding Maximal ISO value: By default value 6.400 is our personal guideline for maximally acceptable ISO value, preferably even 3.200 (both in bird photography!). However modern Nikon DSLR‘s and Z Series MLC‘s may produce quite acceptable bird pictures at far more high ISO values even up to 12.800. You may judge otherwise but it is definitely worthwhile experimenting at higher ISO values, particularly with fast moving birds. Look at some examples of high ISO values at ISO.
Using APERTURE Mode Birds in the field
Once you have set the afore mentioned switches and menu parameters at your Nikon camera, all you have to do when actually photographing birds is:
Switch camera ON (if it was not in standby mode)
(For “AF-ON” read: “AF-ON” (D500) or “AF -L/AE-L (Z50)”):
- Point your camera at the bird(s).
- Full press and hold AF-ON (using back button focus): camera will perform autofocus according to the way you have set it, for example AF Continuous d72 at D500 or AF-C AF-area Wide at Z50, and will continue focussing when you move the camera, either to follow bird(s) activity or to recompose the picture. Camera will continously feed back remaining space image buffer.
- Occasionally and if you wish: briefly stop pressing AF-ON, and check actual ISO value used. Camera will show this as long as you do not press AF-ON.
- Press Release every time you want to make a (series of) picture(s).
- Otherwise keep/resume pressing AF-ON as long as you want the camera to continue focussing and tracking and full press Release any time you want to shoot picture(s) at actual distance. Do not press Release when the camera is not actually focussed at the bird because then you will loose your last focus distance completely and the camera may even start hunting! Do not touch Release button unless you know that camera is focussed! Practice this. It is important!
- Never switch your camera OFF as long as it is in your neighbourhood or you are in the field. It has been set to enter standby mode after 30 seconds anyway. We then leave it in standby mode all day so if something interesting shows up, the camera is ready right away.
The camera will continue focussing & tracking as long as you press AF-On button until you stop shooting or card is full or battery is empty or you switch camera off.
Only by exception and very occasionally you may have to adjust EXPOSURE TIME via subdial (now your EXPOSURE TIME compensation +/- button), and only if amount or direction of light changes significantly. Een if you have no time to do this you actually still produce acceptable correctable pictures.
In this way you keep control via subdial – easily counting in half stops – over EXPOSURE TIME. Even if you have no time to reset his, you will still get acceptable pictures, anyway never blurred pictures or pictures with unnecessary high ISO values and noise. The camera will be able to handle any situation. The room for EXPOSURE correction in modern digital camera’s is about 5 stops: +/- 2.5 stops. Try it out, you will butoccasionally have to use the backwheel subdial when the situation changes drastically. Some examples:
- (expected) species, activity or speed (flying or moving) of birds change drastically
- bird moves from deep shadow to direct sunlight or vice versa
- sunlight (re-)appears after clouds have drifted away
- you have to redirect camera 180 degrees from backlight to frontlight or vice versa.
Also, anytime something interesting happens, you can pick up the camera, press AF-ON button and Release button and start shooting without checking your settings until you have time to make up for this. Your pictures may not always be perfect but anyway at least acceptable. You have transformed your camera into a “Very smart Point and Shoot”-device.
More about Automatic ISO Sensitivity control
Make sure you do understand this correctly: Your “programmed” D500 or Z50 or Z7 II or other Nikon camera will try to keep shutterspeed “between” the limits you set for Minimal Shutterspeed and Maximum ISO Sensitivity and, if this happens to be impossible, suggest or use shutterspeeds lower than the value set by you. For example requiring a Minimum Shutterspeed 1/1000 in combination with Maximum ISO 6.400 effectively means: set EXPOSURE Time to 1/1000 second or shorter (like 1/1250 second or even shorter) and try to keep ISO Sensitivity below 6.400. If this is impossible for example when you get insufficient available light, the D500 will – in or experience – prioritise high shutterspeed over low ISO values and for example suggest EXPOSURE Time 1/1000 and ISO Sensitivity 9000 or higher. We feel this makes sense: more noise and loss in colour contrast is not as bad as too low shutterspeed causing worthless blurred pictures that is in bird photography.
Try this out for a while and change the ISO and Shutterspeed limits of the camera to your personal guidelines of image quality and or (expected) type and speed of birds. Check the results to gain experience in setting those limits. Our experience – several years by now – is that this method works fine in lightweight bird photography but it may take some time in the field to get the right feel for it.
Basically ISO 3.200 is our standard maximum acceptable ISO value. In some situations we go up to 6.400 ISO and rarely try 12.800 ISO. In our experience Nikon camera’s almost always compute a quite acceptable approach even in extreme and unique birding situations when we use Automatic ISO.
Using APERTURE Birds you may also notice:
At (firmware version 2023) Z50 the picture in the EVF will be blacked out during shooting bursts of pictures. The camera has to write the digital images into its data buffer. Newer models Z camera’s have improved in several areas. This “blacking out” is, for the time being, a disadvantage of Nikon Z MLC’s next to our overall experience that Z camera’s, except probably speedy Z8 and Z9 Superstar, are still somewhat inferior then Nikon DSLR‘s regarding subject tracking.
D500 will keep the optical image in the optical viewer stable, with the advantage that you can better observe, follow and anticipate bird action and redirect your camera accordingly. We tend to use D500 for fast action photography like shooting Woodpeckers and Terns (Spechten en Sterns) and Z50 or Z7 II for other bird photography also because we can use TC-20E III in combination with Nikkor 300mm f/4E PF VR or NIkkor 500mm f/5.6E PF VR and acquire up to 1500mm equivalent with almist no loss in digital image quality.
The frame rate will drop somewhat. In our experience at D500 from 11 FPS to on average of 8 FPS and at Z50 from 10 FPS to average 7 FPS. This is not as bad as it looks: all pictures are in-focus because your a1-setting. In other words: you are missing blurred pictures only.
One step more? Camera in Manual Mode (not advised by us but promoted for example frequently at Youtube)
This way of photographing can also be accomplished using the camera in Manual mode in stead of APERTURE mode and in that case sometimes is called “misomatic mode“.
That way of photographing birds, wildlife or sports will also save you lots of time and enable you to fully concentrate at bird action, etcetera. However: our experience is that shooting birds in that mode frequently produces significantly underexposed or overexposed pictures. We had to take special precautions to avoid this, for example you have to use EXPOSURE TIME compensation frequently in stead of occasionally. So we prefer to zzuse our APERTURE mode Birds.
Pictures using APERTURE Mode Birds including small birds far away and unexpected action:


Pictures APERTURE Mode Birds including some anticipated and some “unexpected happenings“:


So why does this work so well?
Why do you consistently get in-focus pictures and sometimes even suprisingly attractive pictures also when your birds are moving or operating at high speed and your photography feels like you are using a simple “point and shoot camera”? This is why:
- You have streamlined your photography via back button autofocus using AF-ON button to focus camera and independently press Release anytime you wish to shoot (a series of) picture(s) using forefinger & thumb only and comfortably use Easy EXPOSURE TIME Compensation +/- and keep one hand free for redirecting camera, head, tripod or lens.
- Your camera is set to focus and track fast flying birds in APERTURE mode with maximal APERTURE value.
- OR: Your D500 is optimized for accurate focus and track via dynamic anticipating mode using 25 or 72 AF points OR: Your Z camera is optimized for accurate focus and track in AF-C wide AF area (L) and either way you can continuously focus and track bird(s) and recompose at wish.
- You are committed to RAW workflow using professional image editing software for example Lightroom.
- The camera uses Automatic ISO sensitivity control via a lightning fast processor and you have put your personal ideas in bird photography about ISO sensitivity and shutterspeed into the memory of this processor.
So your camera gathers maximum amount of light during optimal EXPOSURE TIME to produce in-focus, detailed pictures according to your experience of required EXPOSURE TIME and ISO limits in bird photography. The camera shoots your pictures of birds and other life. During actual photography you can relax and dedicate all time to enjoy nature, birds and other life, anticipate interesting action and press Release precisely at the right moments, in stead of all the time resetting ISO, EXPOSURE Time, etcetera.
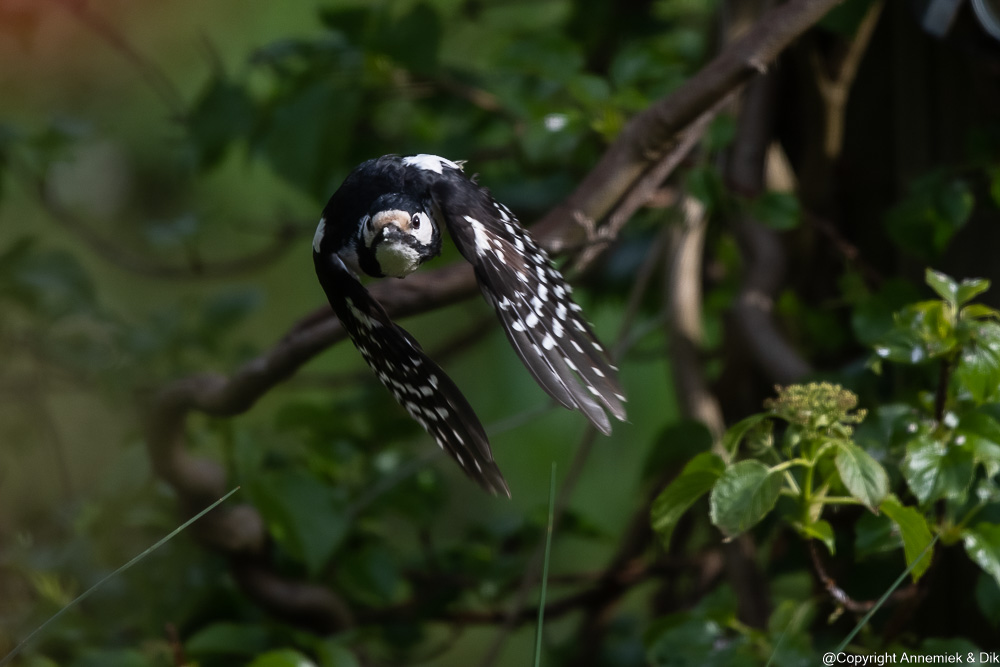
You now shoot pictures like for example this one (notice the optimal trade off EXPOSURE TIME 1/1250 sec and ISO value 4000):
“APERTURE Mode Birds Action
Comfortably using APERTURE Mode Birds” we found a variant which we called “APERTURE Mode Birds Action”: quite efficient and comfortable and also still delivering good pictures. This “spee mode” is basically “APERTURE Mode Birds” but extended with a few settings that optimise your camera for high speed action-bird photography where speed and autofocus are priority and maximum detail maybe a bit less, a compromise. It is built up as follow:
- APERTURE Mode Birds (is the base)
- Quality JPG FINE (in stead of RAW)
- Always AF Mode AF-C (both DSLR and Z camera’s)
- AF area Wide-L (Z camera’s).
In this way you optimise your camera-lens converter combination(s) for shooting (possibly expected) unique action of (fast flying or moving) birds or other animals and or sudden action.
Example pictures APERTURE mode BIRDS


Example pictures APERTURE mode Birds


…